Windows Server 2012 repartition hard drive
This article introduces how to repartition disk drive on Windows Server 2012 R2. Repartitioning Server 2012 disk volume without losing data.
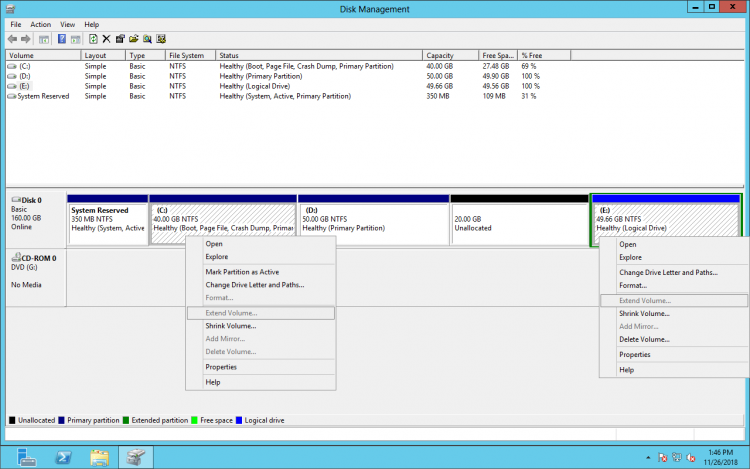
Repartition with Server 2012 Disk Management
As we know, the size of C: drive is allocated while installing Operating System, but it is very likely running out of space after a period of time. Many people ask whether it is possible to repartition Server 2012 hard disk drives without starting over. Yes, of course.
If you just want to shrink a large volume to create new, or expand a volume by deleting another one, Server 2012 built-in Disk Management utility can help you without software. It is very easy to use, fast and able to repartition disk drive on the fly.
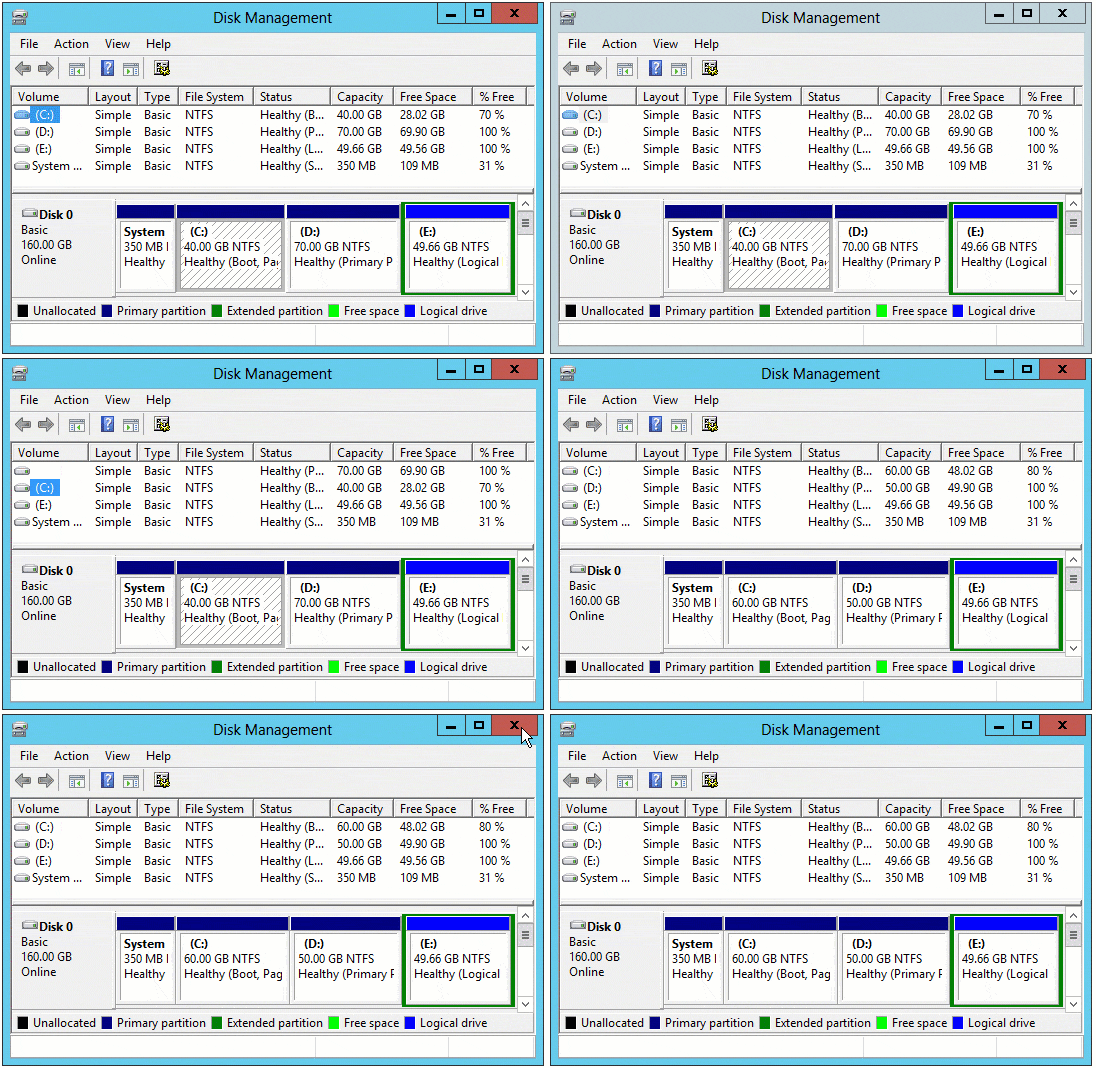
Steps to repartition hard drive with Server 2012 Disk Management:
To shrink hard drive:
- Press
 and
and  on your keyboard, type diskmgmt.msc and press Enter to open Disk Management.
 - Right click a drive and select Shrink Volume.
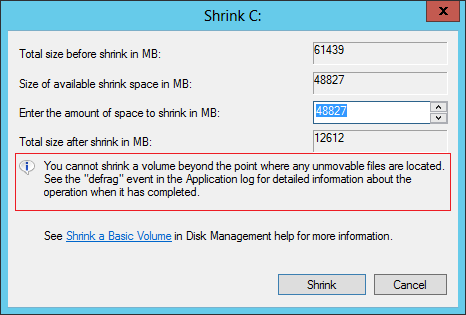
- Enter the amount of space and click Shrink to start.
To extend hard drive:
- Right click the partition with contiguous Unallocated space and select Extend Volume.
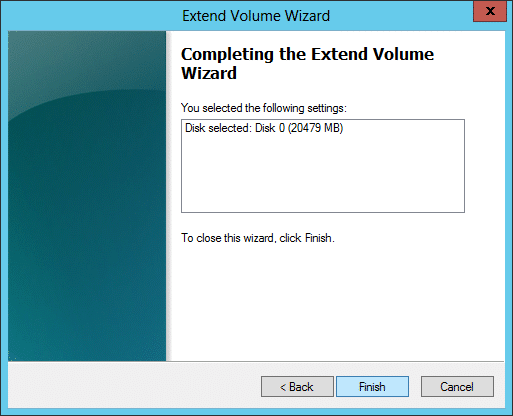
- Simply click Next till Finish in the Extend Volume Wizard window.
Limitation of Server 2012 DM to repartition disk
No matter you use GUI Disk Management or DiskPart command to repartition Server 2012 disk volumes, in some situations you cannot achieve, because both Windows built-in utilities have same limitations:
When shrinking a volume:
- FAT32 partition is not supported.
- Unallocated space can only be generated on the right side.
- Can’t shrink volume in some conditions.
When extending a volume:
- FAT32 partition is not supported.
- Only the drive with adjacent Unallocated space on its right side can be extended.
- Disk space deleted from a Primary partition can’t be extended to any Logical partition, and vice versa.
Repartition Server 2012 hard drive with software
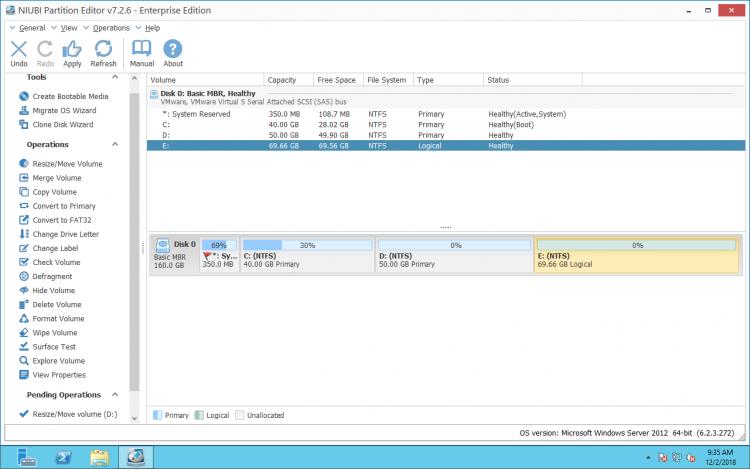
Comparing with Windows Disk Management and Diskpart command prompt, NIUBI Partition Editor is much more powerful.
- Both NTFS and FAT32 partitions are supported.
- Shrink a volume and produce Unallocated space on either side.
- Unallocated space can be combine to any contiguous partition no matter it is Primary or Logical.
- Unallocated space can be moved and combined to any nonadjacent partition.
- If there is is no other volume or not enough free space in all other partitions of the same disk, NIUBI can help clone to another larger disk.
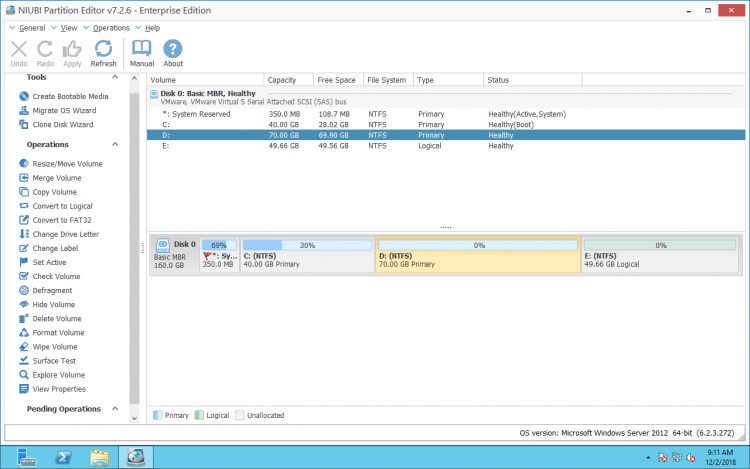
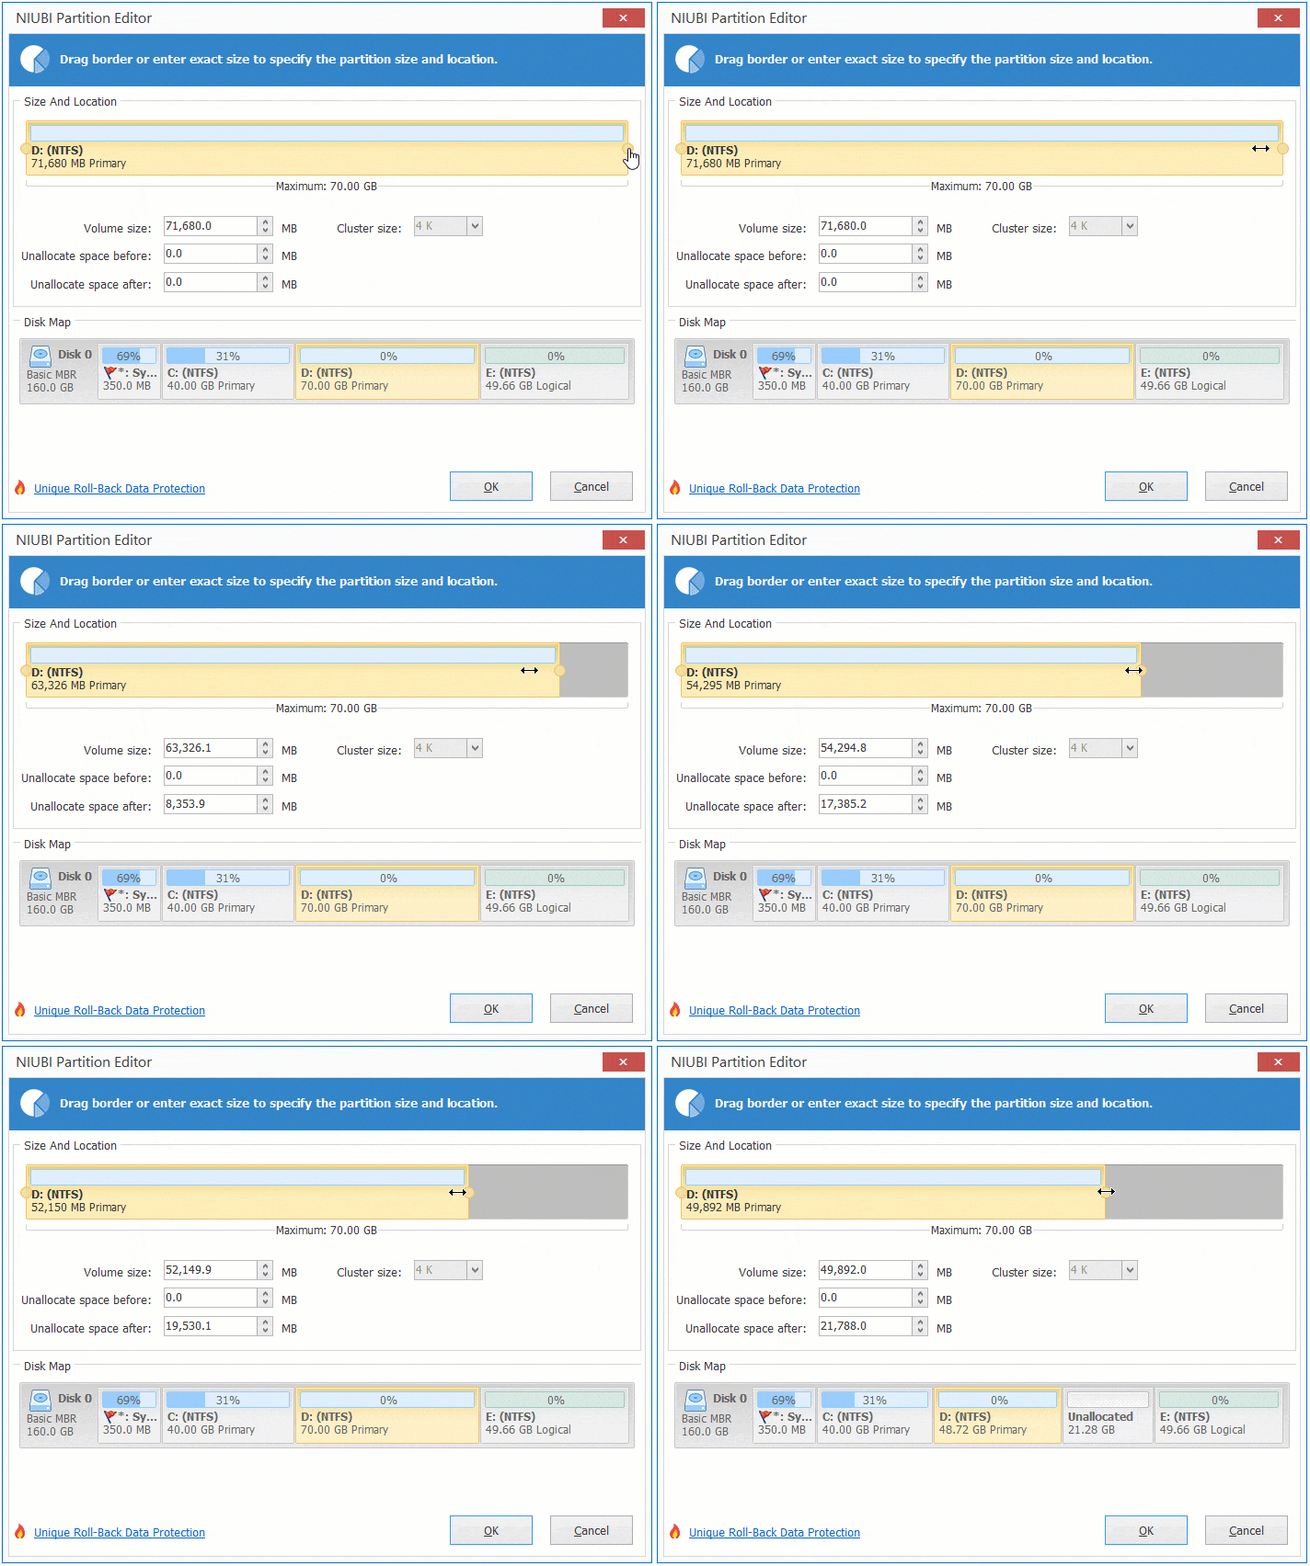
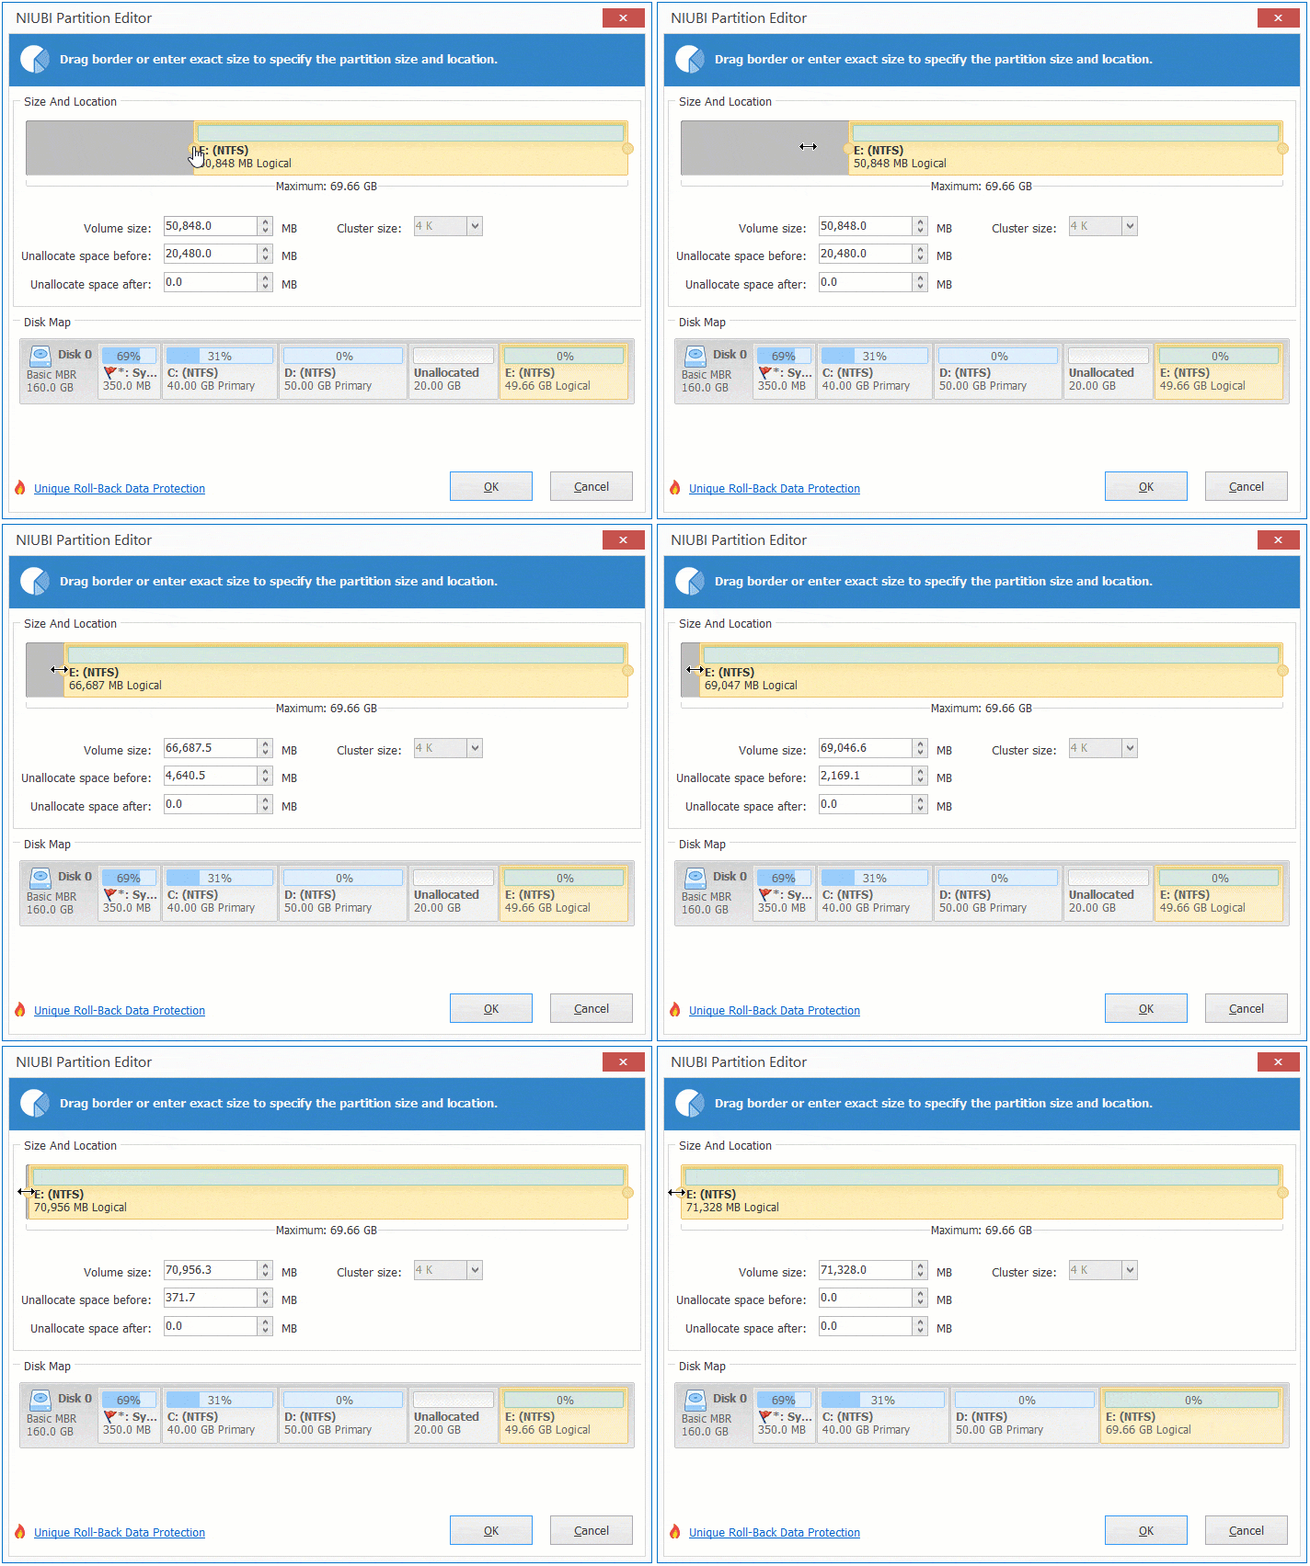
Right click a hard drive (here is D) and select “Resize/Move Volume”.
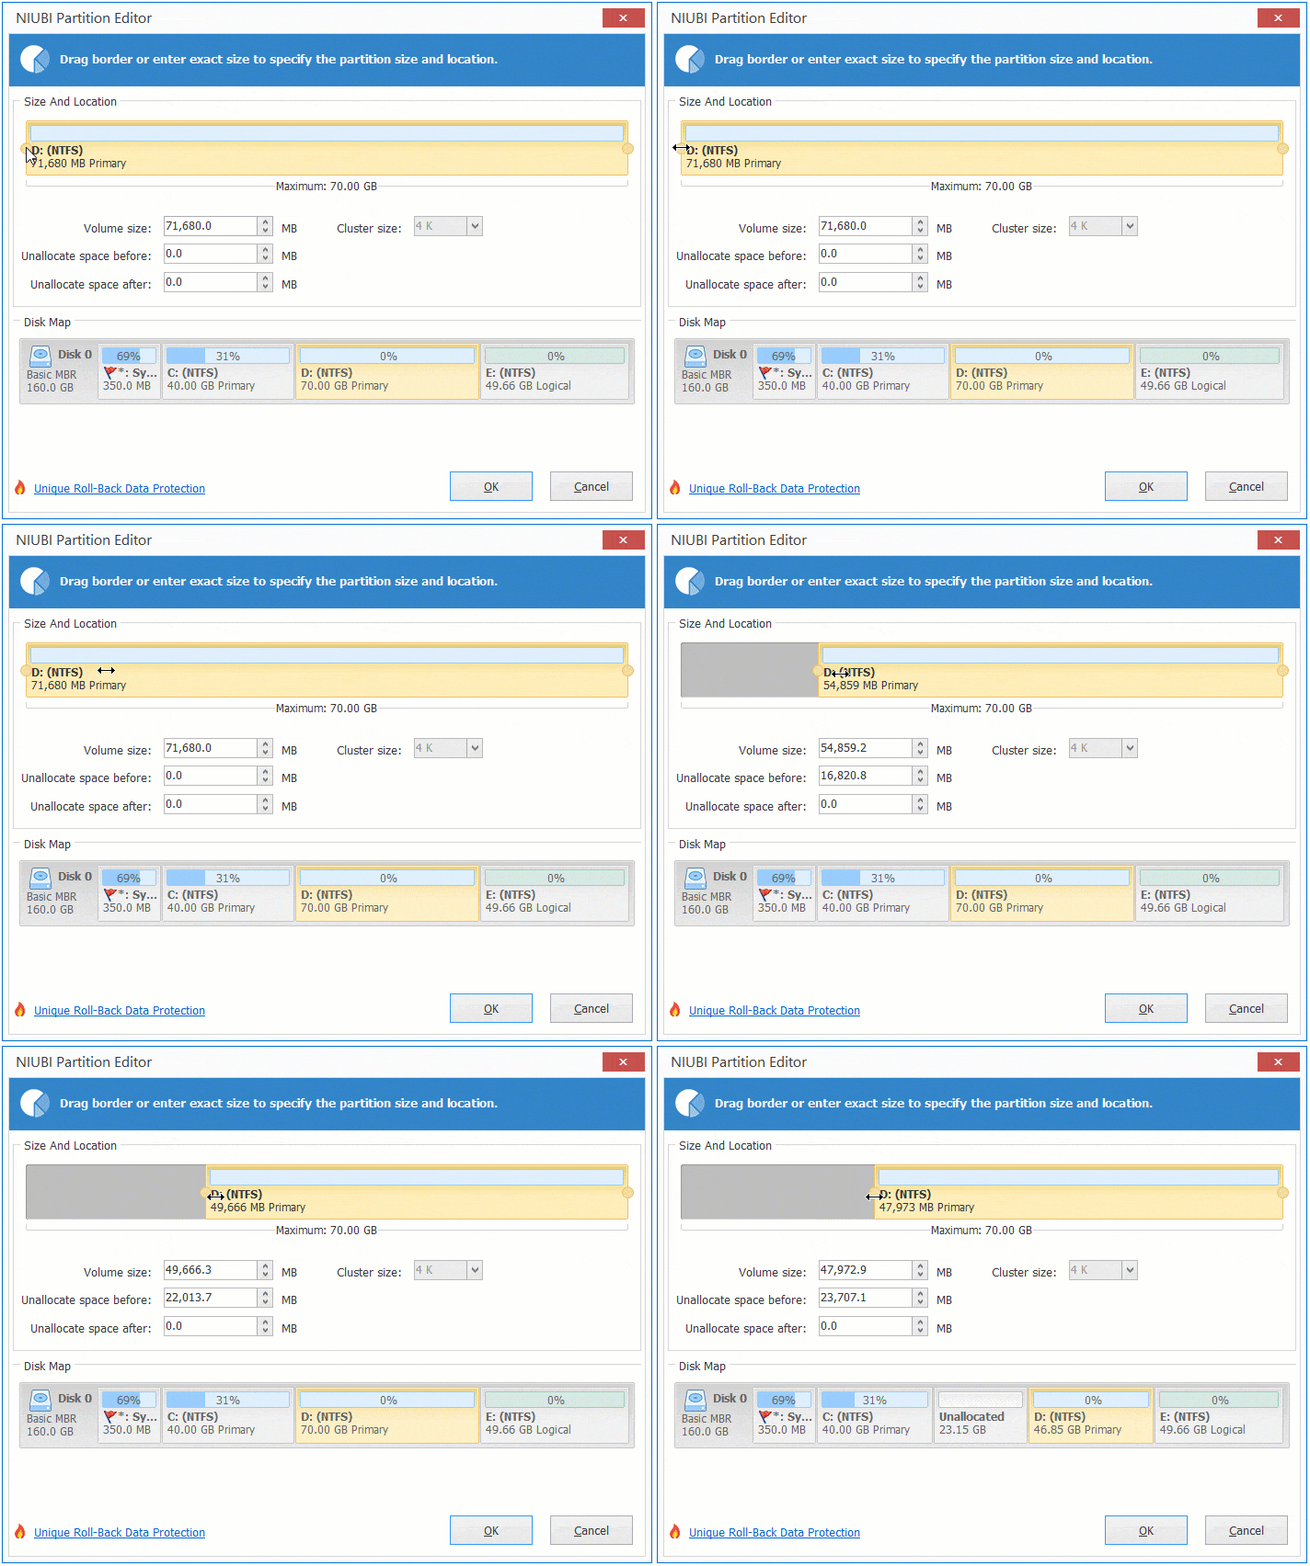
If you drag left border rightwards in the pop-up window:
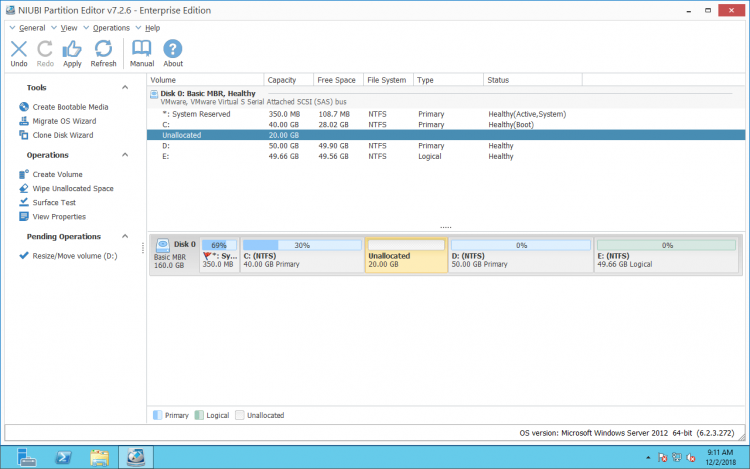
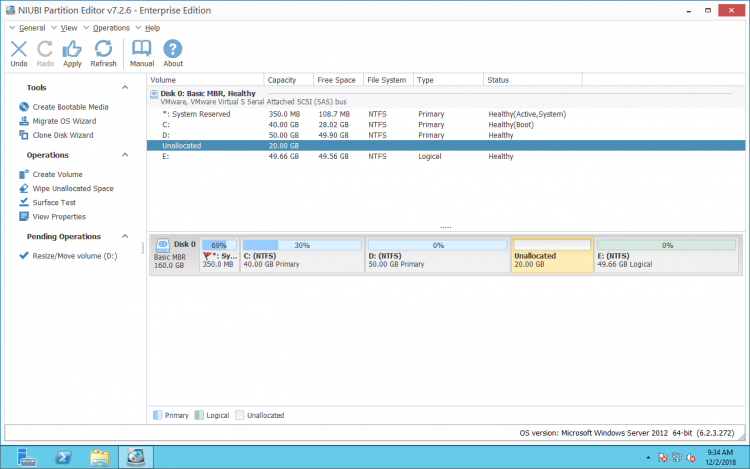
Unallocated space is produced on the left side of drive D.
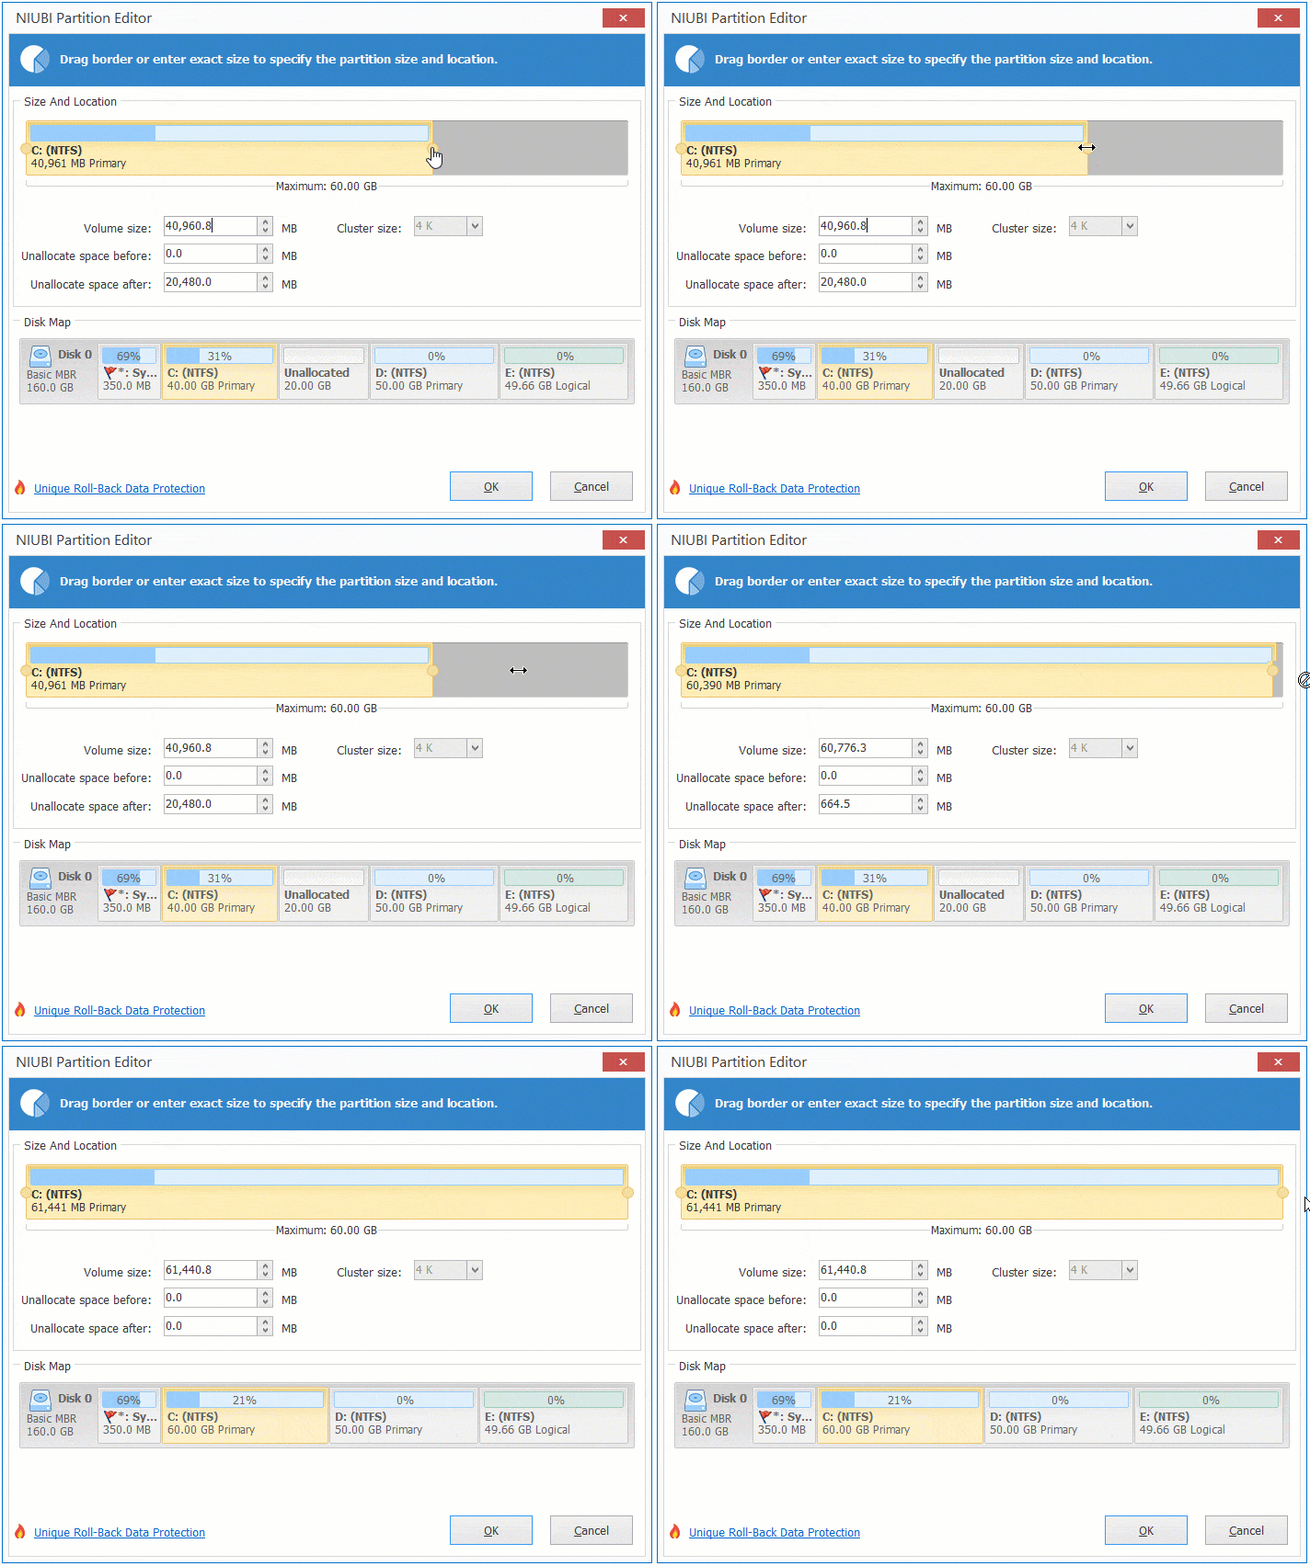
Right click C drive and select “Resize/Move Volume” again, drag right border rightwards in the pop-up window.
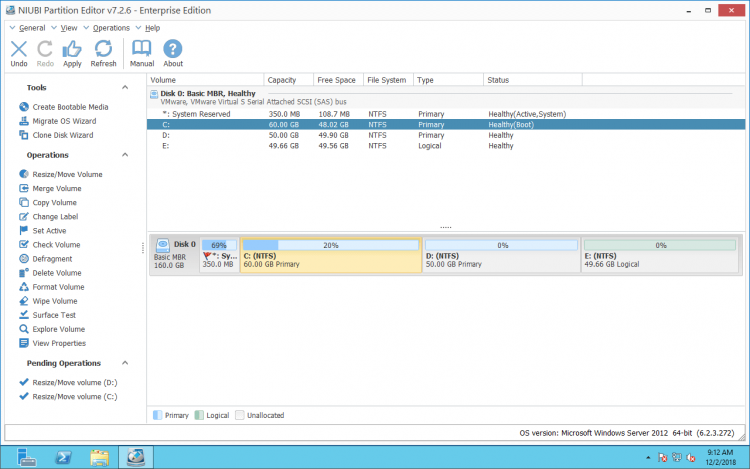
Unallocated space is combined into C drive.
If you want to extend hard drive C but the Unallocated space is on the right side of D, you should move Unallocated space next to C drive first.
Right click drive D and select “Resize/Move Volume”, drag middle position rightwards in the pop-up window.
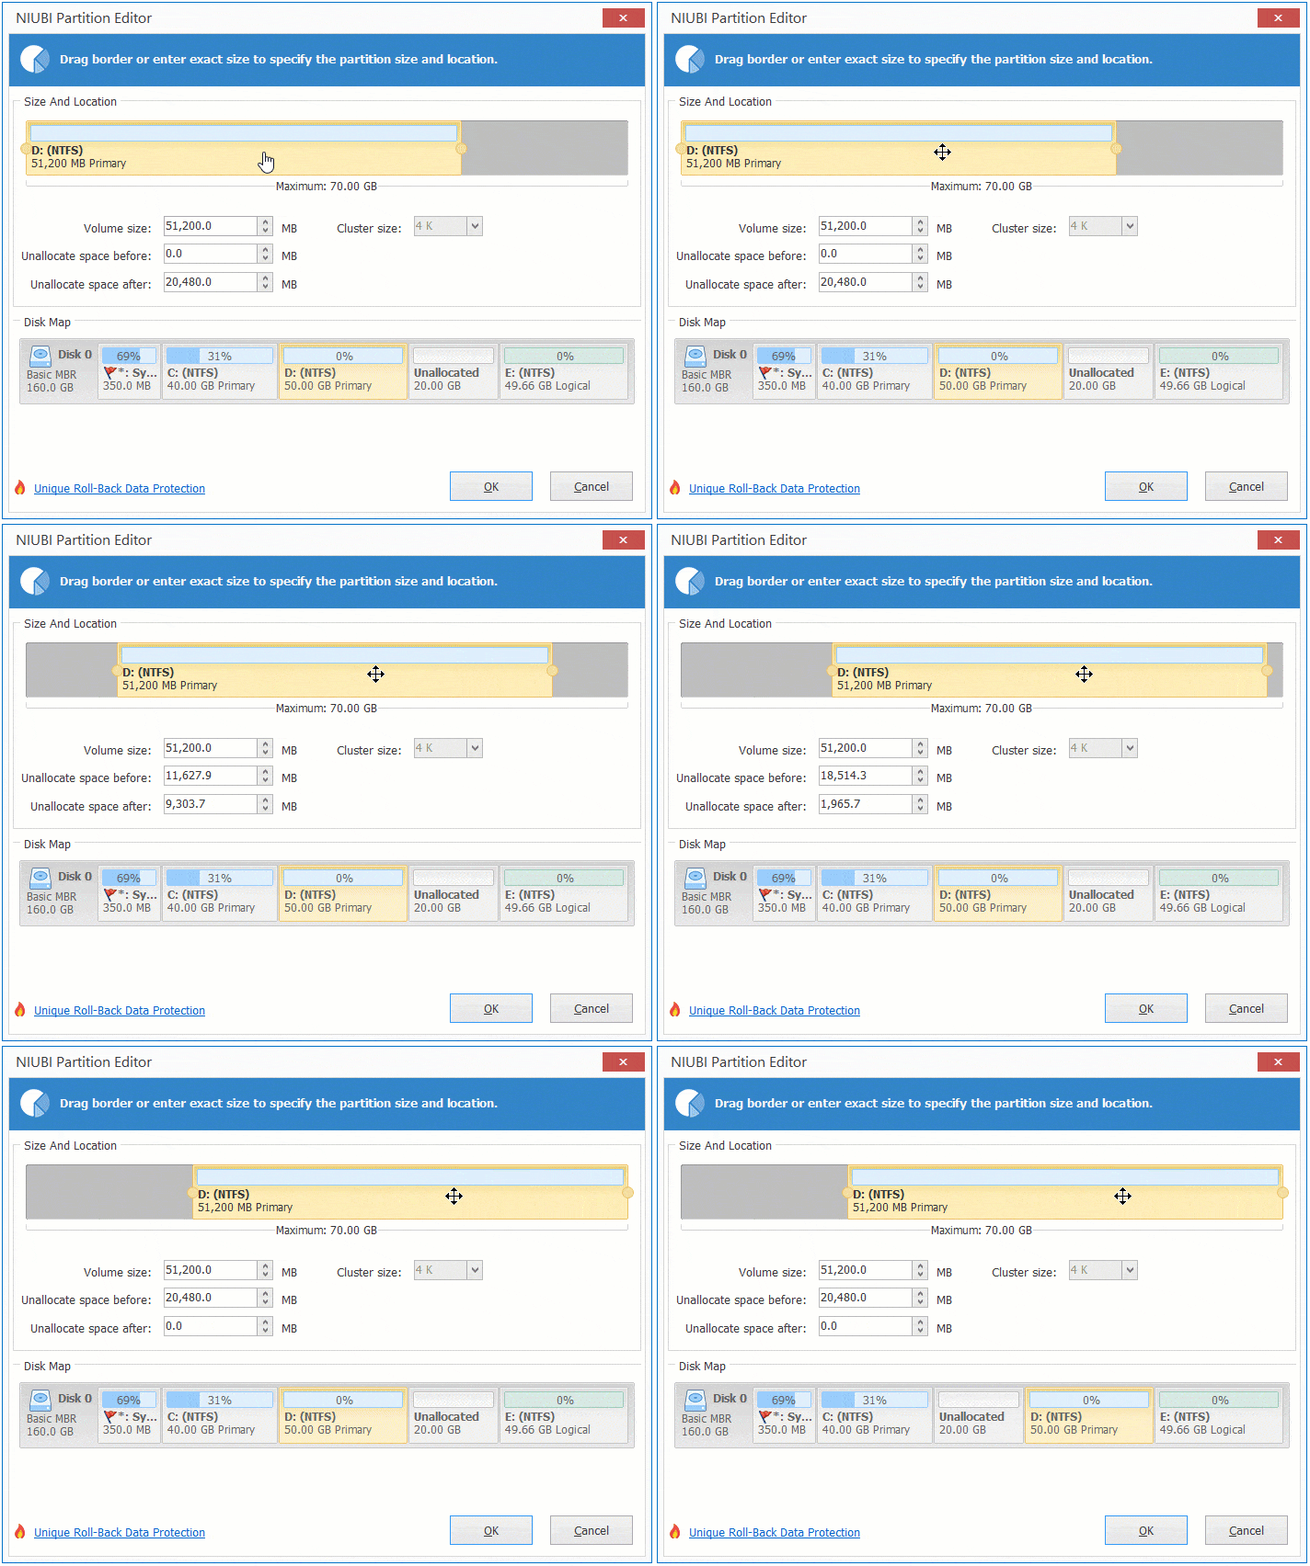
Then, Unallocated space is moved from right of D to the left side.
As the safest Windows disk partition tool, NIUBI Partition Editor provides 1 Second Rollback technology to ensure system and data intact. If any software error or hardware issue occur, it is able to reverts the server to original status in a flash. If it happens, server could back online in a short time and nothing will be changed or damaged.
It also provides Virtual Mode to avoid incorrect operations, Cancel-at-will technology to cancel wrong but ongoing operations, Hot-Resize to extend volume on the fly, unique File-Moving algorithm to help repartition hard drive much faster.
Besides repartitioning Server 2012 disk drives, NIUBI helps you do many other operations.

