When system disk is full in Windows 2019 server, you can clone disk to a larger hard drive to migrate operating system and programs. It's much faster and easier than image backup and recovery. If you installed operating system in a traditional HDD, you'd better clone Windows Server 2019 to SSD, because SSD is much faster than mechanical hard disk. To clone disk in Windows Server 2019/2022, run the program that uses file system level copy method, it's super fast. In this article, I'll introduce how to clone Windows Server 2019/2022 disk partition to SSD, larger HDD or RAID array.
Sector-to-sector clone VS file-to-file copy
There are 2 ways to copy disk in Windows Server 2019/2022: sector-to-sector and file-to-file copy.
It is very very slow to run sector to sector clone, because all sectors in source and target disk must be exactly the same. In this way, you cannot change partition size to fit different disk. If you copy a 250GB disk to a 500GB disk, the first 250GB will be the same with the source disk, the remaining 250GB space will be unallocated.
It is much faster to run file-to-file copy, because it works on file system level. It ensures all files are copied to new disk, but the sectors may be different. However, you won't find any difference in daily usage. Another benefit is that you can change size of the partitions on target disk.
In most cases, there's no need to waste a long time to do sector to sector clone.
How to clone Windows Server 2019/2022 disk to SSD/larger HDD:
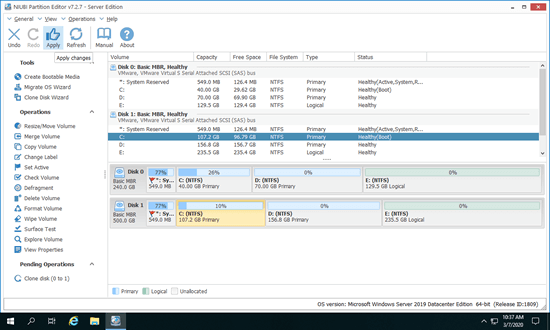
- Download and install NIUBI Partition Editor, then you'll see all disk partitions with structure and other information on the main window.
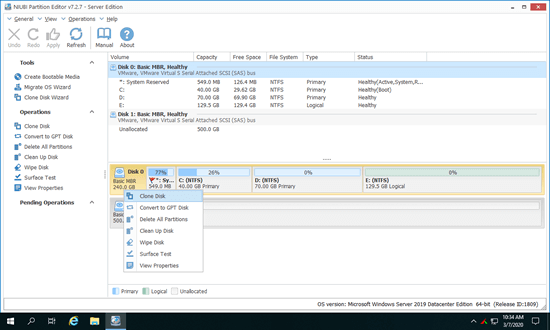
- Right click the front of source disk and select "Clone Disk".
![Clone Disk]()
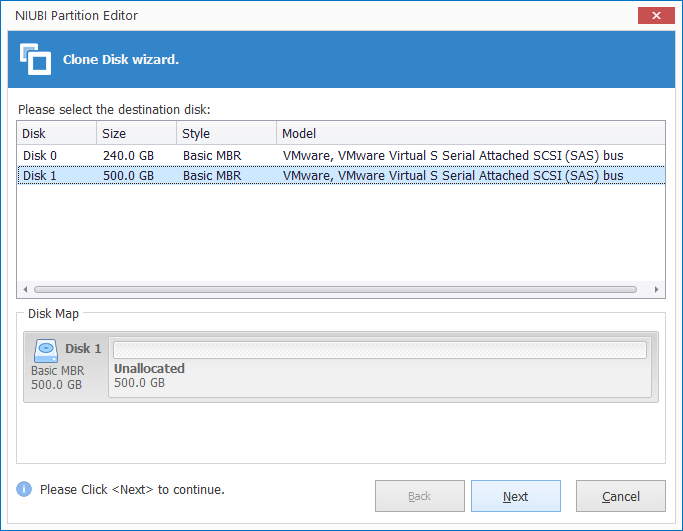
- Select the target disk and click Next. (If there are partitions on the target disk, these partitions must be deleted, so transfer valuable files before next step.)
![Select disk]()
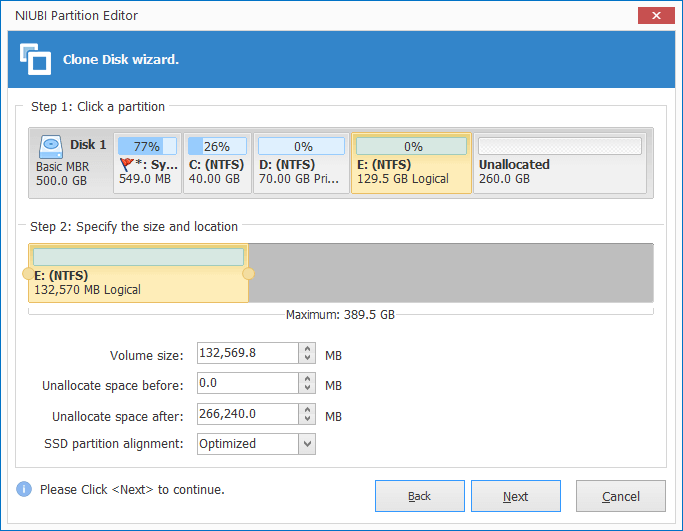
- Edit partition size and location starting from the last one. For example: in the screenshot below, if you drag right border of E: drive towards right, you can extend it with the contiguous unallocated space. If you drag the middle of E drive towards right, you can move it to the right.
![Edit partition]()
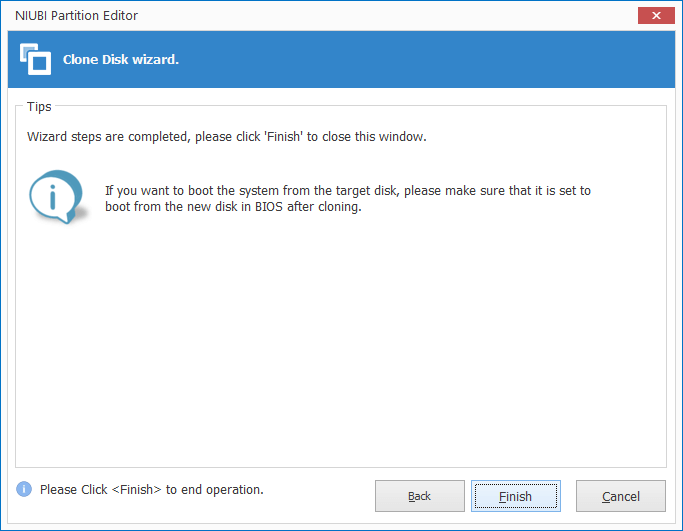
- Click Finish in next window.
![Confirm]()
- Click Apply on top left to confirm and execute.
![Apply]()
Follow the steps in the video to clone Server 2019 disk:
The source and target disk could be HDD, SSD and any types of hardware RAID array.
Main benefits to clone disk in Server 2019/2022 with NIUBI Partition Editor:
- Extremely fast - beside file system level copy, NIUBI has advanced file-moving algorithm to help copy disk partition additional 30% to 300% faster.
- Hot clone - it is able to clone disk partition without rebooting, so your server can keep running without interruption.
- Fast disaster recovery - because it doesn't require rebooting to clone, you can clone system disk regularly as backup. Whenever the system disk is down, you can boot from the clone disk immediately.
- Fit target disk size - you can clone disk to a smaller or larger one. When cloning to a smaller disk, the size of target disk should be larger than used space of all partitions on source disk.
How to copy Server 2019 partition to another disk
When copying partition in Windows Server 2019/2022 to another disk, there must be "Unallocated" space on the target disk. If there's no such space, you can shrink a partition to make. This unallocated space should be equal or larger than the used space of the partition that you want to copy from.
Steps to copy partition in Windows Server 2019/2022 with NIUBI Partition Editor:
- Right click the source partition such as D: and select "Copy Volume".
- Select the unallocated space in target disk and click Next.
- Edition partition size, location and type.
- (Optional) Right click original drive (D:) and select "Change Drive Letter", select any letter in the pop-up window.
- (Optional) Right click the target partition, run "Change Drive letter" again and select D: in the pop-up window.
- Click Apply on top left to execute.
In many servers, drive D is used to install programs, so you should change drive letter of target partition to D. To other data volumes, you may ignore the step to change drive letter.
Besides cloning disk/partition in Windows Server 2019/2022/2025 and previous Server 2016/2012/2008/2003, NIUBI Partition Editor helps you do many other operations such as shrink, extend, move, merge, convert, defrag, wipe, hide, scan bad sectors and much more.

