
If there is only a C drive on the system disk (aside from small system reserved partitions), it is highly recommended to shrink the C drive to create at least one data partition. Saving files and installing applications directly to the C drive will slow down the server and make it difficult to manage. To shrink the C drive in Windows a server, you can use the native Disk Management tool or safe third-party partition software. This article explains how to shrink the C drive in Windows Server 2019/2022 without losing data using both tools.
1. Shrink C Drive in Windows Server 2019/2022 without Software
Windows Server 2019 and 2022 have a built-in "Shrink Volume" function within the Disk Management console. It can shrink NTFS partitions without losing data and without rebooting the server. However, it can only shrink a partition towards the left and generate Unallocated space on the right side. In some cases, it cannot shrink the C drive at all.
Steps to shrink C drive in Server 2019/2022 via Disk Management:
- Press Windows + X on your keyboard and click Disk Management in the list.
- Right-click the C: drive and select "Shrink Volume".
- Enter an amount of space to shrink and click "Shrink". (If you do not input an amount, the maximum available space is used by default.)
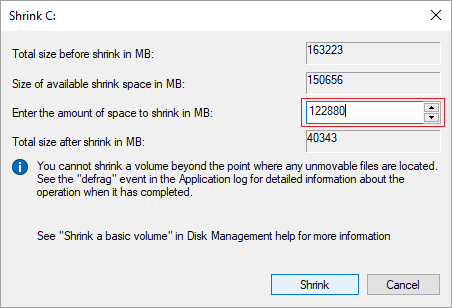
In general, the system partition allocation will be updated and shrunk quickly.
2. Cannot Shrink C Drive Beyond Unmovable Files
Many administrators encounter an issue where Disk Management only allows shrinking a very small amount of space, even if there is plenty of free space in the C drive. Sometimes, the shrink button is disabled, or the available shrink space is 0 MB.
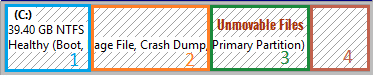
As the notice in the Shrink Volume window states, "You cannot shrink a volume beyond the point where any unmovable files are located." Disk Management cannot move system files such as the Page File or system protection data. Therefore, if these unmovable files are located in the middle of the C drive, Disk Management can only shrink the space behind them.
3. Better Way to Shrink C Drive in Server 2019/2022
To shrink the C drive beyond unmovable files, you need third-party partition software like NIUBI Partition Editor. It can move these "unmovable" files, allowing you to shrink the C drive to its minimum size if needed. Furthermore, it can make Unallocated space on either the left or right side when shrinking a partition.
Because of the potential risk of data loss, you should back up the server and use safe software. Better than other tools, NIUBI Partition Editor has unique technologies to protect your system and data:
- 1-Second Rollback – If any error is detected while modifying partitions, it automatically reverts the server to its original status instantly.
- Hot Clone – Clone the system disk or data partition without interrupting the server. You can boot from the cloned disk immediately if the primary disk fails.
- Virtual Mode – All operations are listed as pending for preview. Real disk partitions won't be modified until you click "Apply" to confirm.
- Advanced file-moving algorithm – 30% to 300% faster when shrinking, moving, or cloning partitions.
- Cancel-at-will – You can cancel ongoing operations safely at any progress without losing data or damaging partitions.
Download NIUBI Partition Editor, right-click the C drive, and select "Resize/Move Volume". You have two options in the pop-up window:
Option 1: Drag the right border towards the left to make Unallocated space on the right.
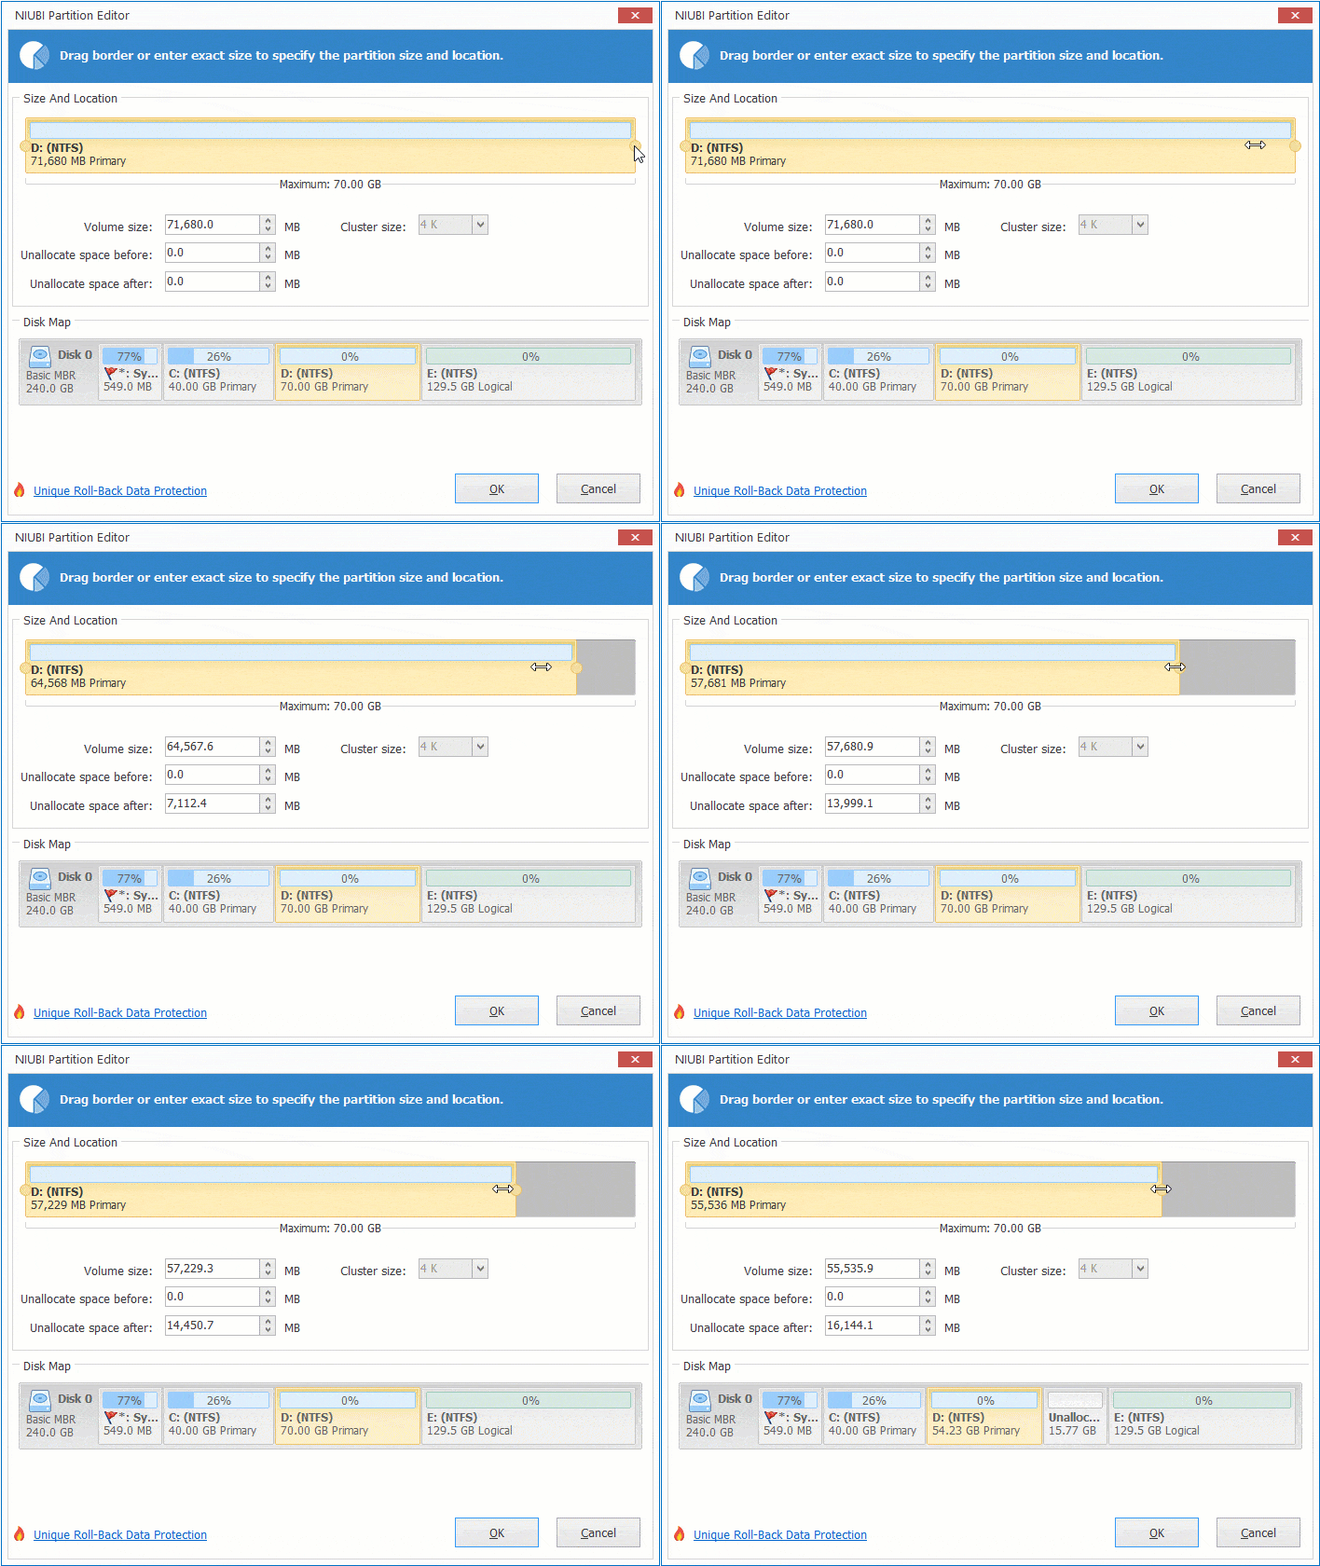
Option 2: Drag the left border towards the right to make Unallocated space on the left.
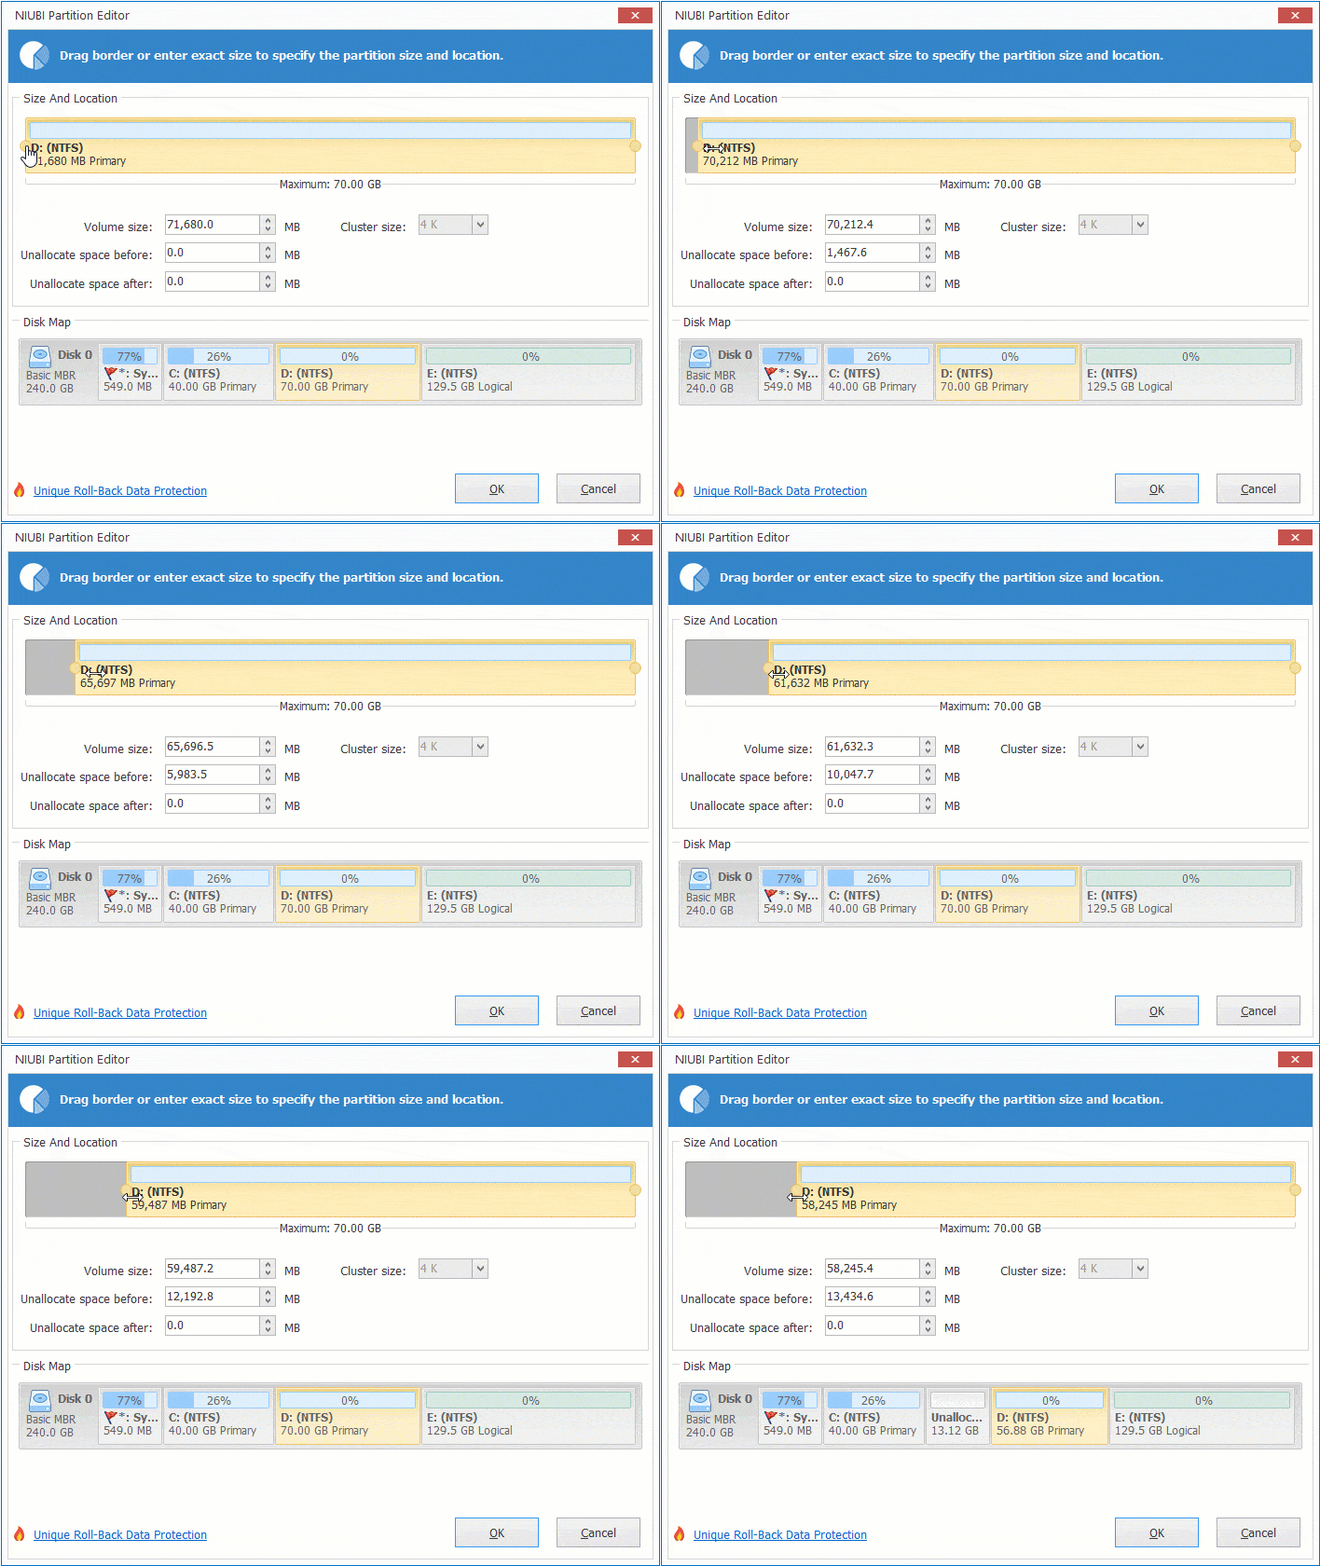
After shrinking the volume to reclaim unallocated space, you can create new partitions or add this space to other volumes on the same disk.
How to shrink C drive and extend other partitions in Windows Server 2019:
Beyond shrinking and extending partitions in Windows Server 2019/2022/2025 and previous versions, this software helps you perform many other disk partition management operations.
 © 2009 - NIUBI Technology All Rights Reserved. |