Better than previous version, Windows Server 2008 has new Shrink Volume and Extend Volume functions in Disk Management tool. "Shrink Volume" can reduce an existing partition to release unallocated space. It is able to shrink both system partition and data volumes without losing data. In most cases, you can shrink partition without any software. But because of some restrictions, Disk Management cannot shrink partition in Server 2008 R2 under specific condition.
Why can't shrink volume in Server 2008 Disk Management
There are several reasons why Disk Management cannot shrink volume in Windows Server 2008 R2. I'll introduce one by one.
1. Partition is not supported
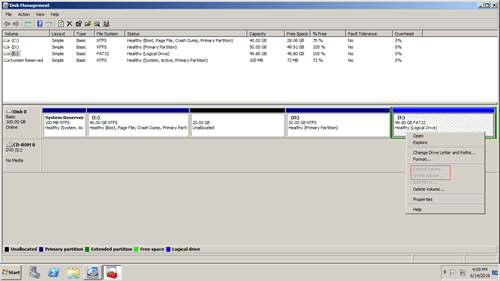
As you see in my server, both Extend and Shrink Volume greyed out for drive E, because it is formatted with FAT32.
From Microsoft explanation, Shrink Volume can only shrink the partitions that are formatted with NTFS or without any file system (RAW). So, another common FAT32 and other types of partitions are not supported.
2. Caused by unmovable files
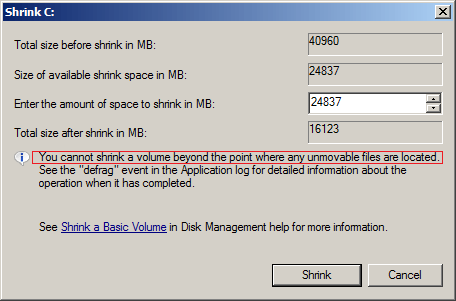
There's a tip on middle of the Shrinking window - You cannot shrink a volume beyond the point where any unmovable files are located.
For example: there's 40GB free unused space in C drive, if there are "unmovable" files are located in block 3, Disk Management cannot shrink volume C beyond this block to 1 or 2. Therefore, Disk Management only allow you shrinking C drive with free space in block 4.

In few servers, Disk Management cannot shrink volume with even 1MB.
3. Conflicting available space
It is uncommon and few people encounter this issue.
When you shrinking a volume, Disk Management will calculate the available free space and give you the maximum amount by default.
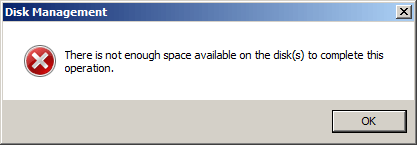
If there are many or large files save to this volume before you clicking Shrink, you may receive error - There is not enough space available on the disk(s) to complete this operation.
Because the available free space is less than Disk Management calculated.
Why cannot shrink partition to expand other one
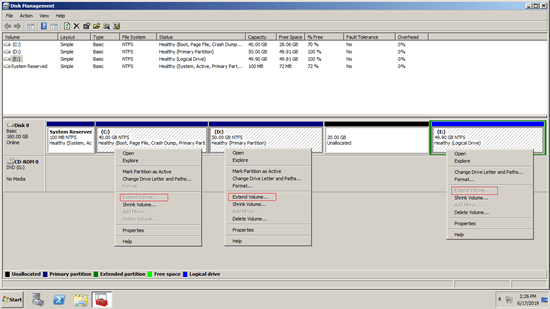
As you see in the screenshot, Extend Volume is disabled for C: and E: drive after shrinking D. This is because:
- When shrinking partition with Disk Management, unallocated space can only be made on the right.
- Extend Volume can only extend unallocated space to the left contiguous partition.
System partition C is non adjacent and drive E: is on the right of the unallocated space, therefore, Extend Volume is grayed out.
If Disk Management can make unallocated space on the left and move unallocated space to the other side, there is no such issue.
What to do if unable to shrink disk partition
To solve these problem, you just need to run NIUBI Partition Editor, it is able to:
- Shrink and extend both NTFS and FAT32 partitions.
- Shrink volume and produce unallocated space on either side.
- Shrink a partition to minium size (if you want) by moving the unmovable files.
- Combine unallocated space to either contiguous partition with 1 step.
- Move unallocated space and combine to any nonadjacent partition on the same disk.
Download NIUBI Partition Editor and follow the steps in the video when you cannot shrink volume in Windows Server 2008 R2:
Explanation: right click a partition and select "Resize/Move Volume".
- Drag either border towards the other one, then you can shrink this partition and make unallocated space on either side.
- Drag the border opposite to other one, then you can extend this partition by merging adjacent unallocated space.
- Drag the middle, then you can move the position of this partition and unallocated space.
Besides shrinking and extending disk partition, NIUBI Partition Editor helps copy, merge, convert, defrag, hide, wipe, scan partition and much more.

