
The C drive becoming full is a common issue in Windows Server 2019 and 2022. When this happens, the first step is to clean up C drive to reclaim disk space. To help administrators free up space, Windows provides a native Disk Cleanup utility that safely removes unnecessary files. If cleaning up the disk cannot reclaim enough space, you need to expand the C drive with free space from other partitions. This guide shows how to run Disk Cleanup in Windows Server 2019/2022 using the graphical wizard and how to automate the process with the cleanmgr command.
1. Run Disk Cleanup in Server 2019/2022 via Wizard
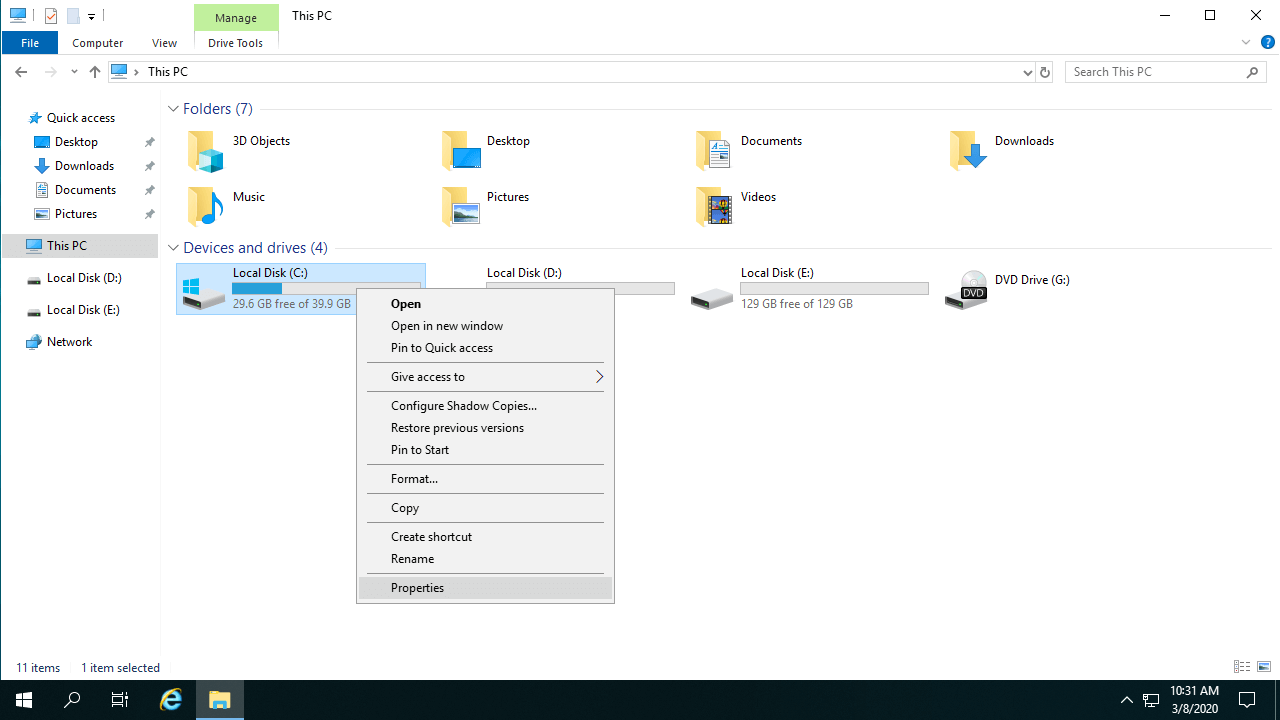
Step 1: Press Windows + E to open File Explorer, right-click the C drive, and select "Properties".
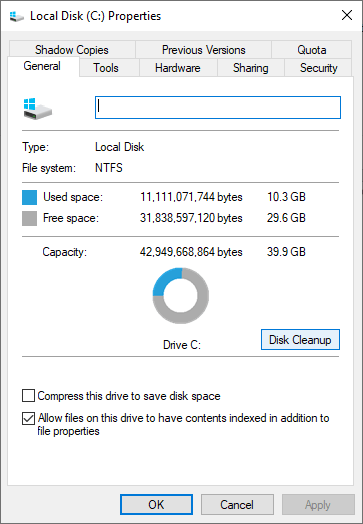
Step 2: Click "Disk Cleanup" in the pop-up window.
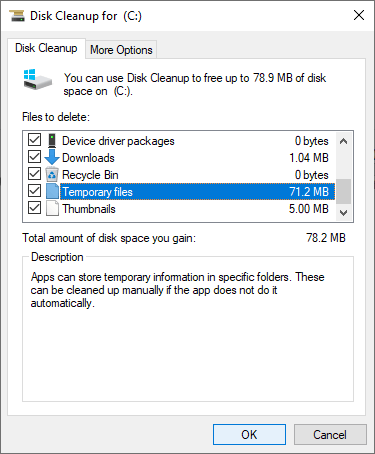
Step 3: Select the checkboxes in front of the files you want to delete, click "OK", and confirm.
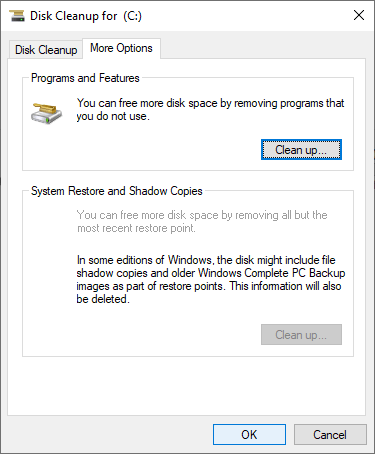
Step 4: Switch to the "More Options" tab to delete system restore points and Shadow Copies.
If you prefer command-line tools, you can clean up the C drive in Windows Server 2019/2022 using the cleanmgr command.
2. Clean Up C Drive in Server 2019/2022 with Cleanmgr Command
There are several ways to run Disk Cleanup via the command line. Select the method that fits your needs.
Way 1: Select Files and Confirm Manually
- Press Windows + R to open the Run box.
- Type cleanmgr and press Enter.
- Select the C: drive in the drop-down box and click "OK".
- When the Disk Cleanup dialog appears, select the checkboxes next to the files you want to delete, click "OK", and confirm.
Way 2: Select All Files Automatically but Confirm Manually
- Press Windows + R to open the Run dialog.
- Type cleanmgr /LOWDISK and press Enter.
- The Disk Cleanup dialog will open with all file types selected by default. You just need to click "OK" to confirm.
Way 3: Clean Up All Junk Files Automatically
- Press Windows + R on your keyboard.
- Type cleanmgr /VERYLOWDISK and press Enter.
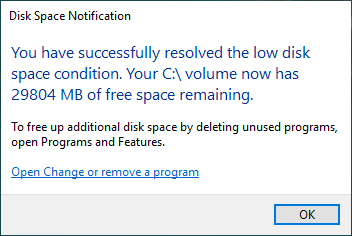
Disk Cleanup will automatically delete all junk files and show a summary dialog with the result.
Way 4: Clean Up Specified Junk Files Automatically
- Press Windows + R to open Run.
- Type cleanmgr /sageset:1 and press Enter (you can specify any index value from 0 to 65535).
- When the Disk Cleanup dialog appears, select the files you want to delete and click "OK".
- Press Windows + R, type cleanmgr /sagerun:1 and press Enter. The preselected files will be deleted automatically without a results window.
In the future, you just need to run cleanmgr /sagerun:1. If you want to delete other types of files, type cleanmgr /sageset:2 in step 2 and run cleanmgr /sagerun:2 in step 4.
3. Additional Step After Cleaning up Disk
Disk Cleanup is useful, but it usually only frees up a few gigabytes of space. If you cannot reclaim at least 20GB of free space, the C drive will likely fill up again quickly. The best permanent solution is to add more free space to the C drive from other partitions.
Download NIUBI Partition Editor and follow the steps in the video tutorial:
With NIUBI Partition Editor, you can safely shrink other data partitions to get Unallocated space, and then add it to the C drive. The operating system, programs, and data remain entirely intact. Beyond safely extending the C drive and reallocating free space in Windows Server 2019 and other versions, NIUBI Partition Editor provides a comprehensive toolkit to clone, convert, merge, hide, and wipe partitions, as well as scan for bad sectors and optimize file systems.
Tip: It is recommended to run Disk Cleanup monthly to remove new junk files. Additionally, change the default download and output paths of your programs to a data partition instead of the C drive.
 © 2009 - NIUBI Technology All Rights Reserved. |