
When the C: drive runs out of space on a server, no one wants to start from scratch or restore from a backup. Instead, you can increase the C: drive space using another partition or disk. However, changing partition sizes can be a challenging task for many server administrators. This article introduces four options to extend the C: drive in Windows Server 2012/2016/2019/2022. Choose the appropriate method based on your disk partition configuration.
Option 1: Extend the C Drive by Deleting the D Drive
This method is only used when there is an adjacent partition on the right of the C: drive and it can be deleted.
Windows includes a built-in Disk Management tool to help resize server partitions without losing data. The "Shrink Volume" function can reduce the size of an NTFS partition, converting a portion of its unused space into unallocated space without data loss. The "Extend Volume" function can expand an NTFS partition, but only when there is adjacent unallocated space on the right. However, since "Shrink Volume" can only generate unallocated space on the right side of a partition, "Extend Volume" cannot use this unallocated space to extend any other partitions.
For example, after shrinking the D partition using the "Shrink Volume" function, unallocated space is generated on the right side of the D drive. This space is non-adjacent to the C: drive and is located to the left of the E: drive. As a result, the "Extend Volume" option is disabled for both the C: and E: drives.
If you do not want to use third-party software, the only option to extend the C: drive in Server 2012/2016/2019/2022 is to delete the D: drive to obtain adjacent unallocated space on the right. However, there is an additional significant restriction in Disk Management: the partitions to be deleted and extended must both be either primary or logical partitions.
If the D drive is a primary partition on your server and it can be deleted, follow the steps below.
How to extend the C drive in Windows Server 2012/2016/2019/2022 without software:
- Press Windows and X on the keyboard, and click Disk Management in the list.
- Right-click the D: drive and select "Delete Volume".
- Right-click the C: drive and select "Extend Volume".
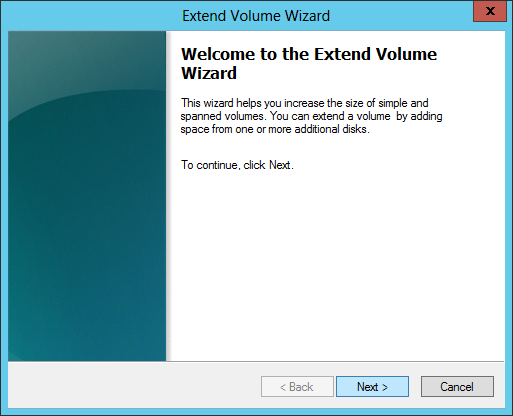
- Click Next until you reach Finish in the pop-up "Extend Volume Wizard" window.
Option 2: Extend the C Drive by Shrinking the Adjacent D Partition
This method is used when there is an adjacent partition (D:) on the right with plenty of free space.
With disk partition software, you can generate unallocated space on the left when shrinking the D: drive. This allows the C: drive to be easily extended by merging the adjacent unallocated space. In this way, no partition needs to be deleted. Additionally, the operating system, programs, settings, and everything else remain unchanged.
Download NIUBI Partition Editor, and you will see all disks along with their partition layout and other information in the main window.
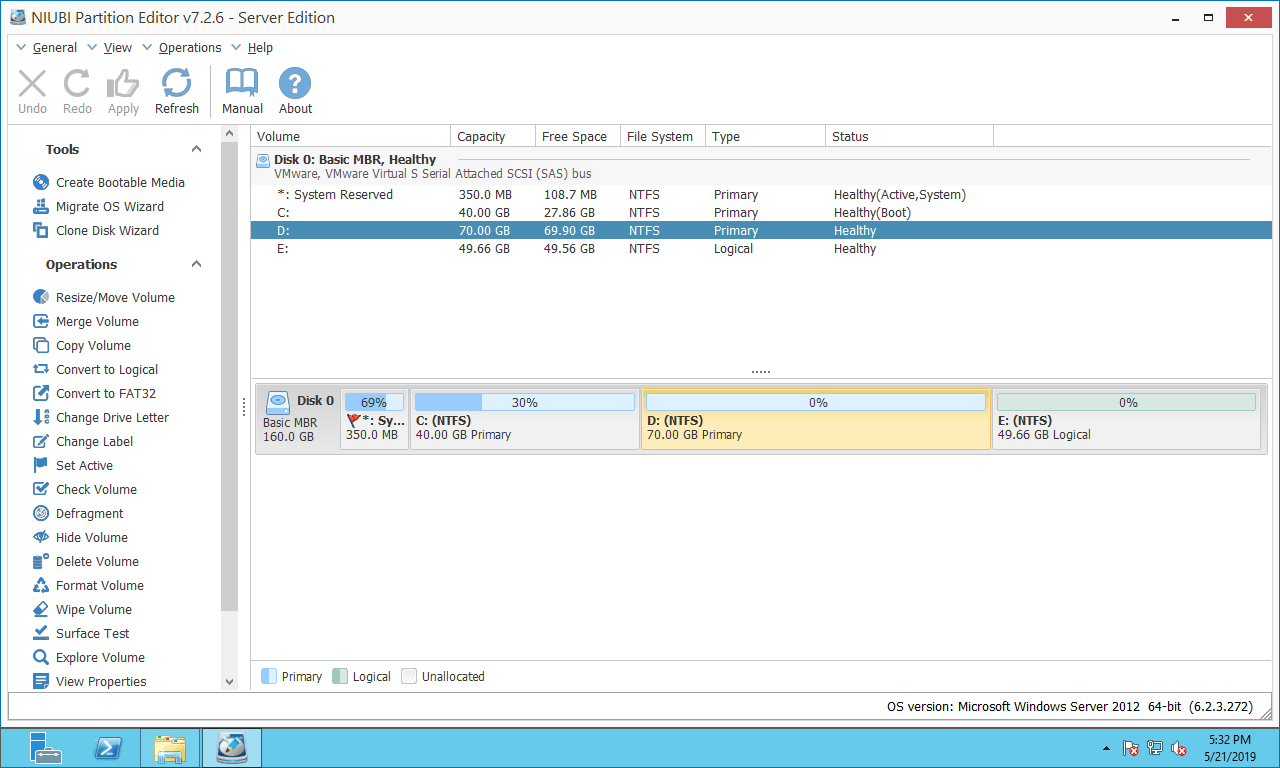
Steps to extend the C drive in Server 2012 R2/2016/2019/2022 with NIUBI:
Step 1: Right-click the D: drive and select "Resize/Move Volume", then drag the left border to the right in the pop-up window.
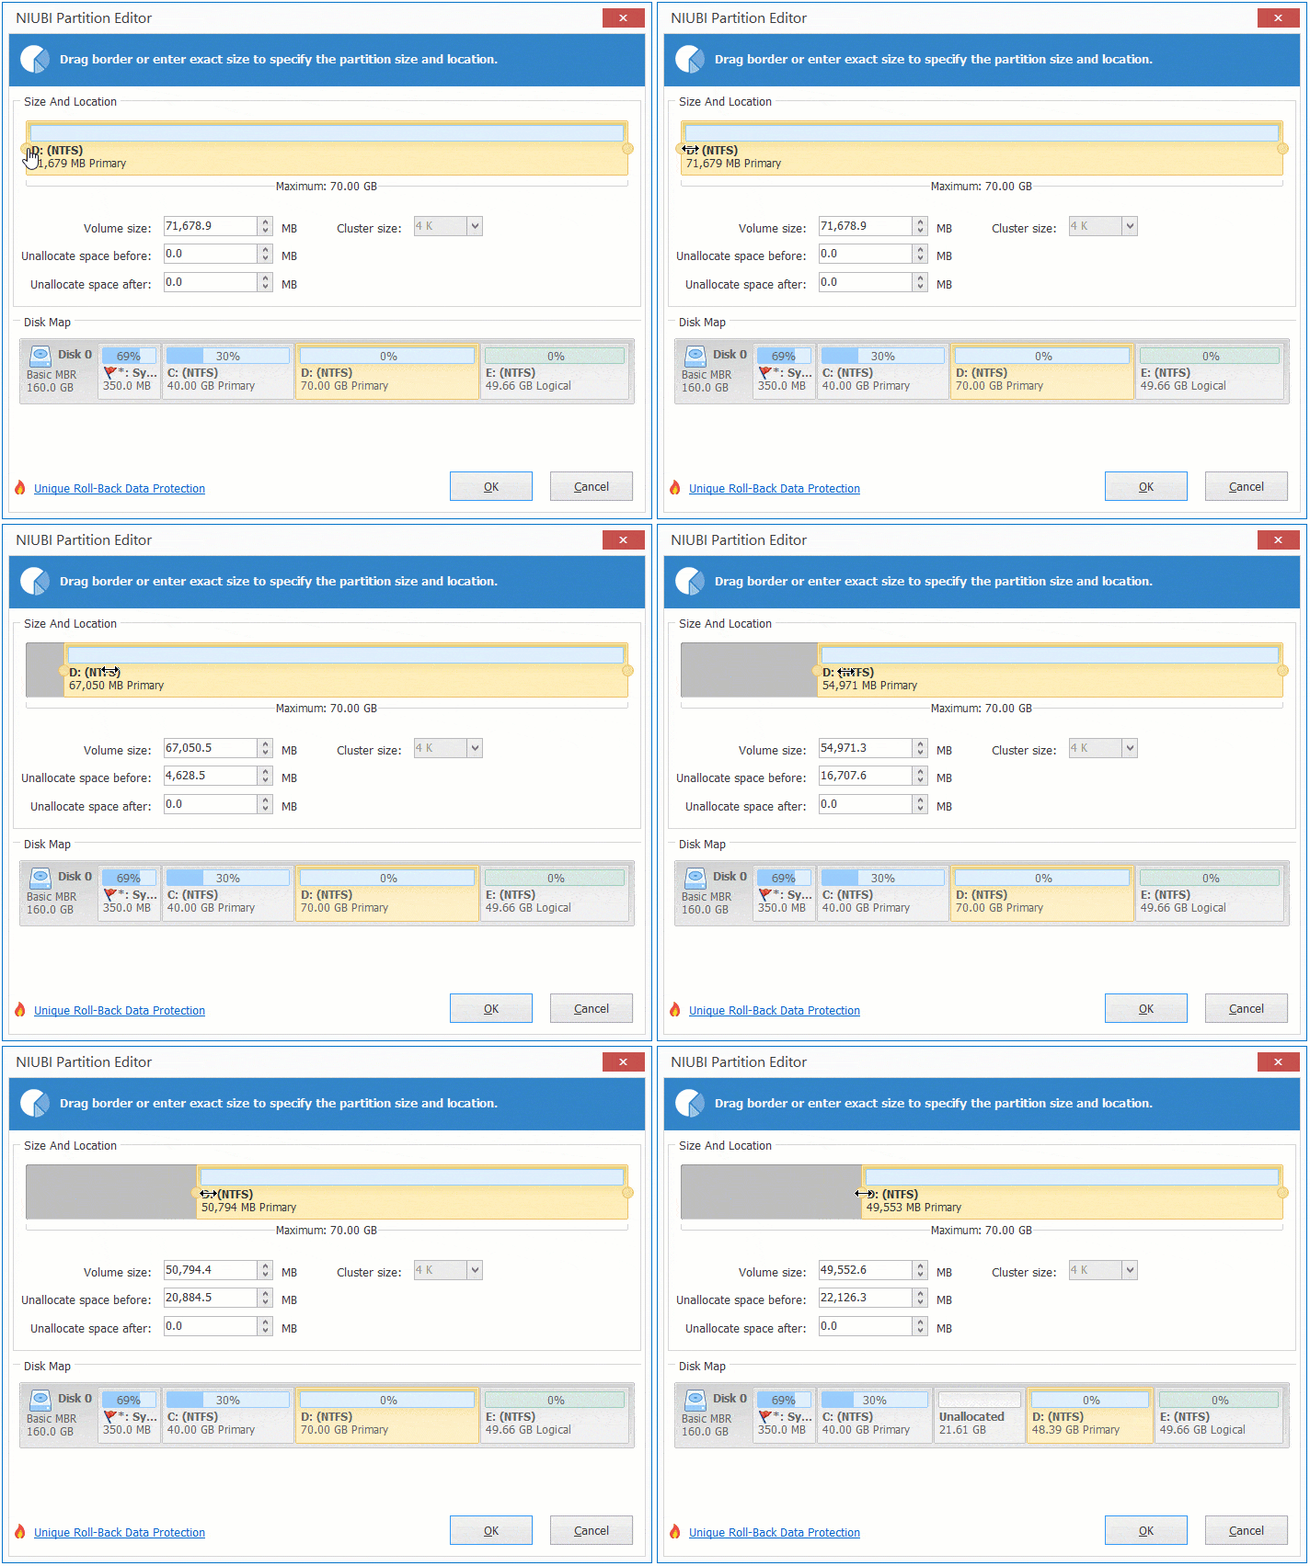
The D: drive will then be shrunk, and a portion of its unused space will be converted into unallocated space on the left.
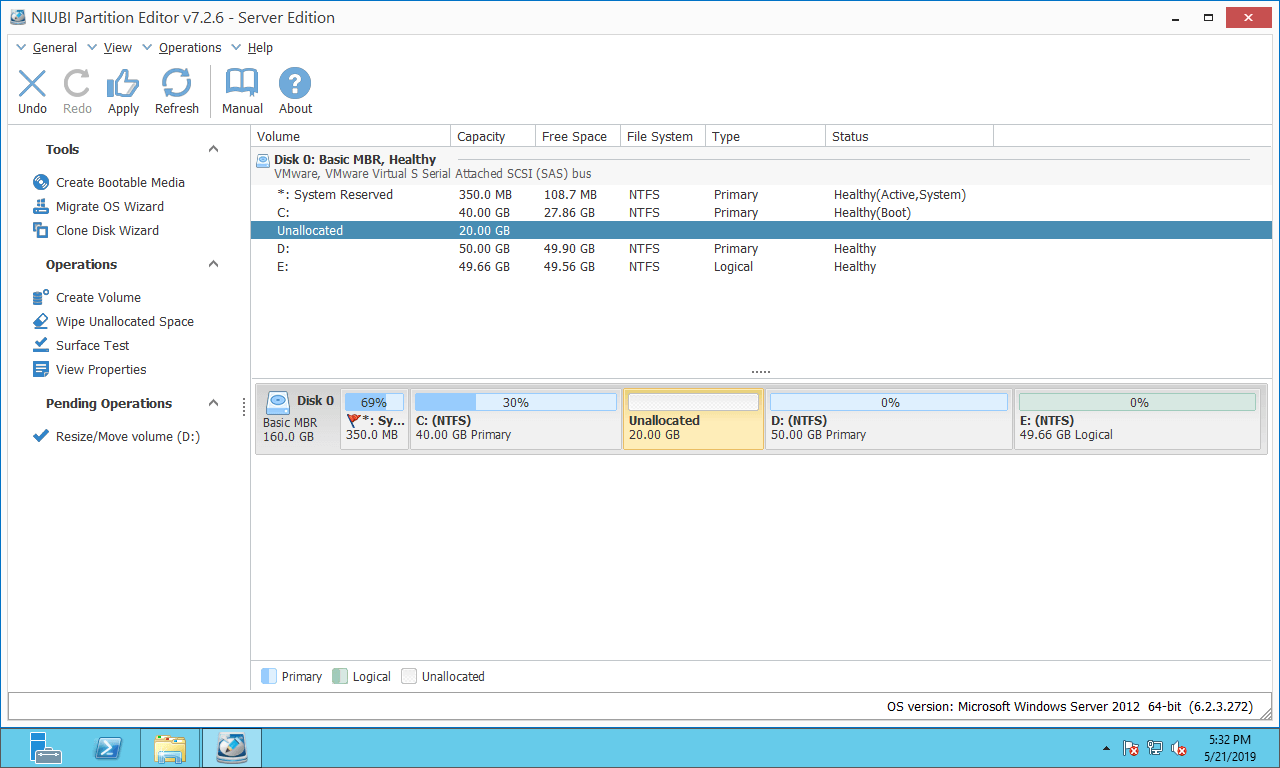
Step 2: Right-click the C: drive and select "Resize/Move Volume" again, then drag the right border to the right in the pop-up window.
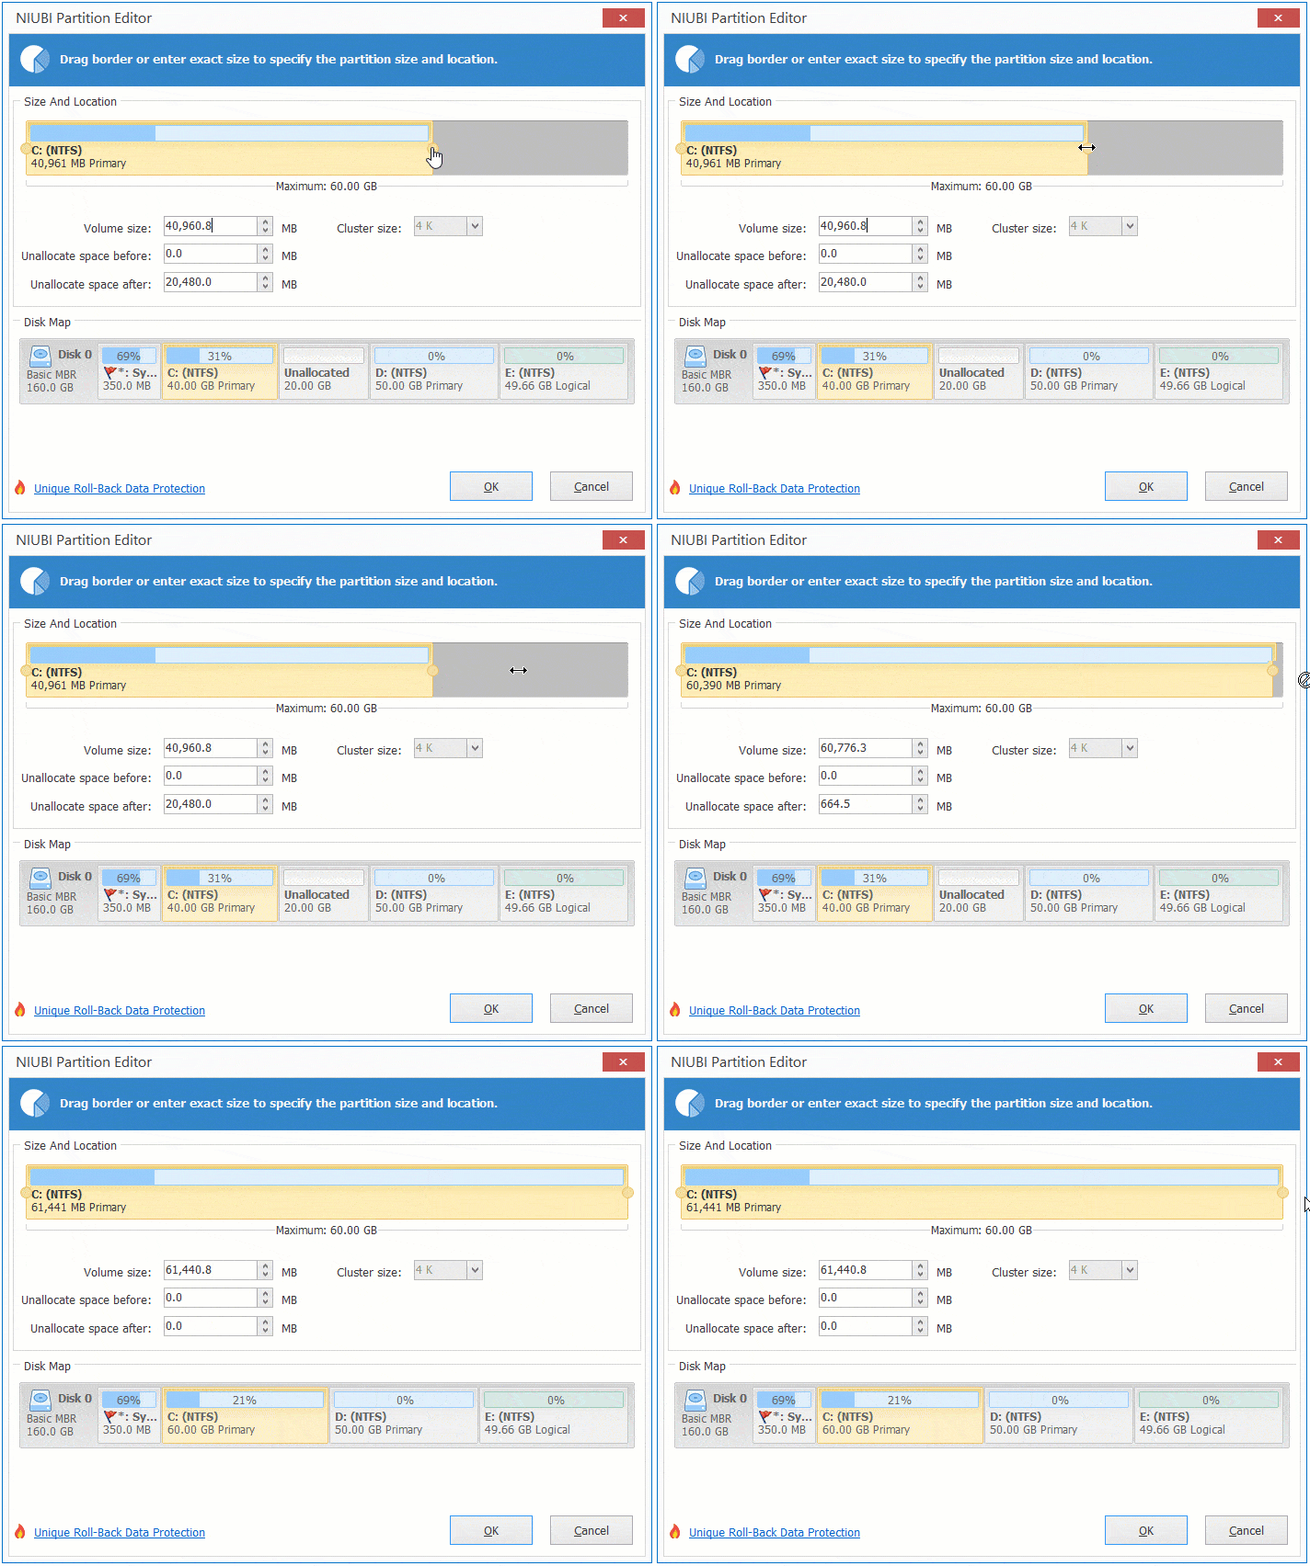
The C: drive will then be extended by merging the adjacent unallocated space.
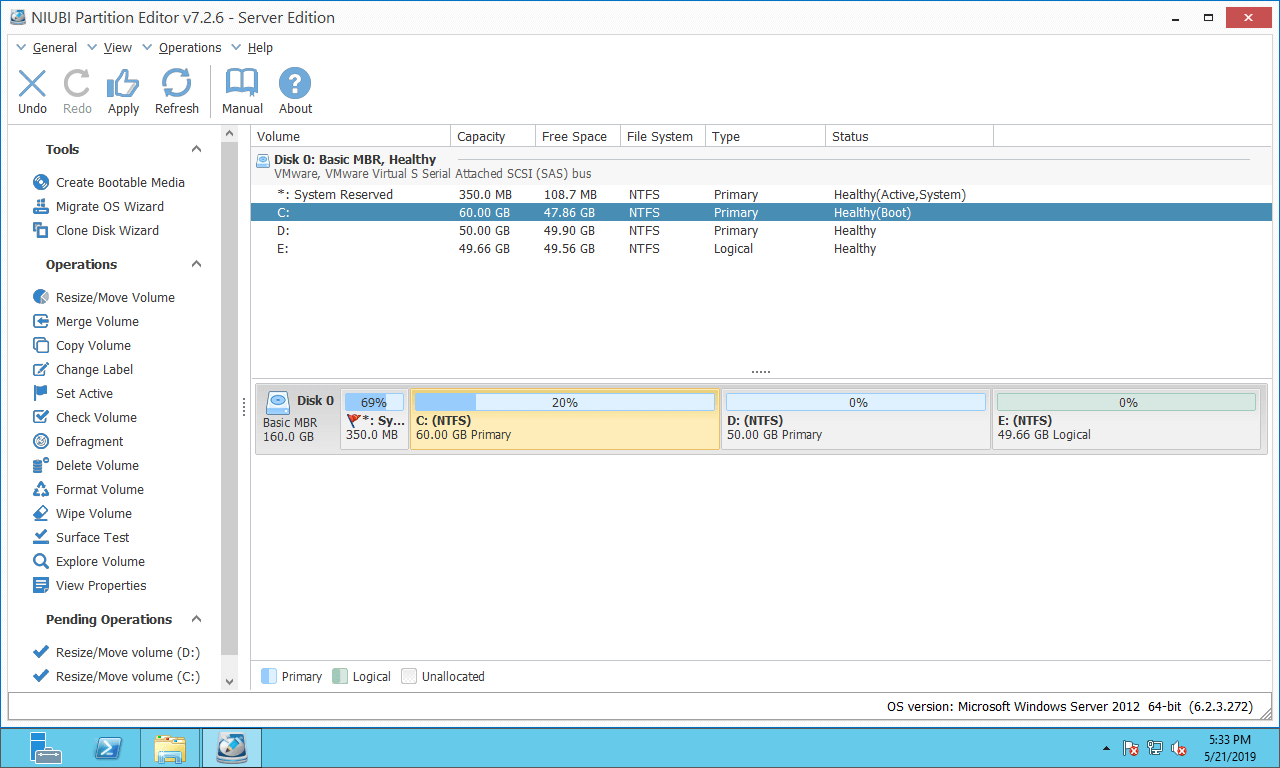
Step 3: Click "Apply" on the top left to execute.
If there is a recovery or another type of small partition between C and D, follow the method in the next section to move this small partition to the right before extending the C drive.
Option 3: Extend the C Volume by Shrinking the Non-Adjacent E Drive
This method is used when there is insufficient free space in the adjacent partition.
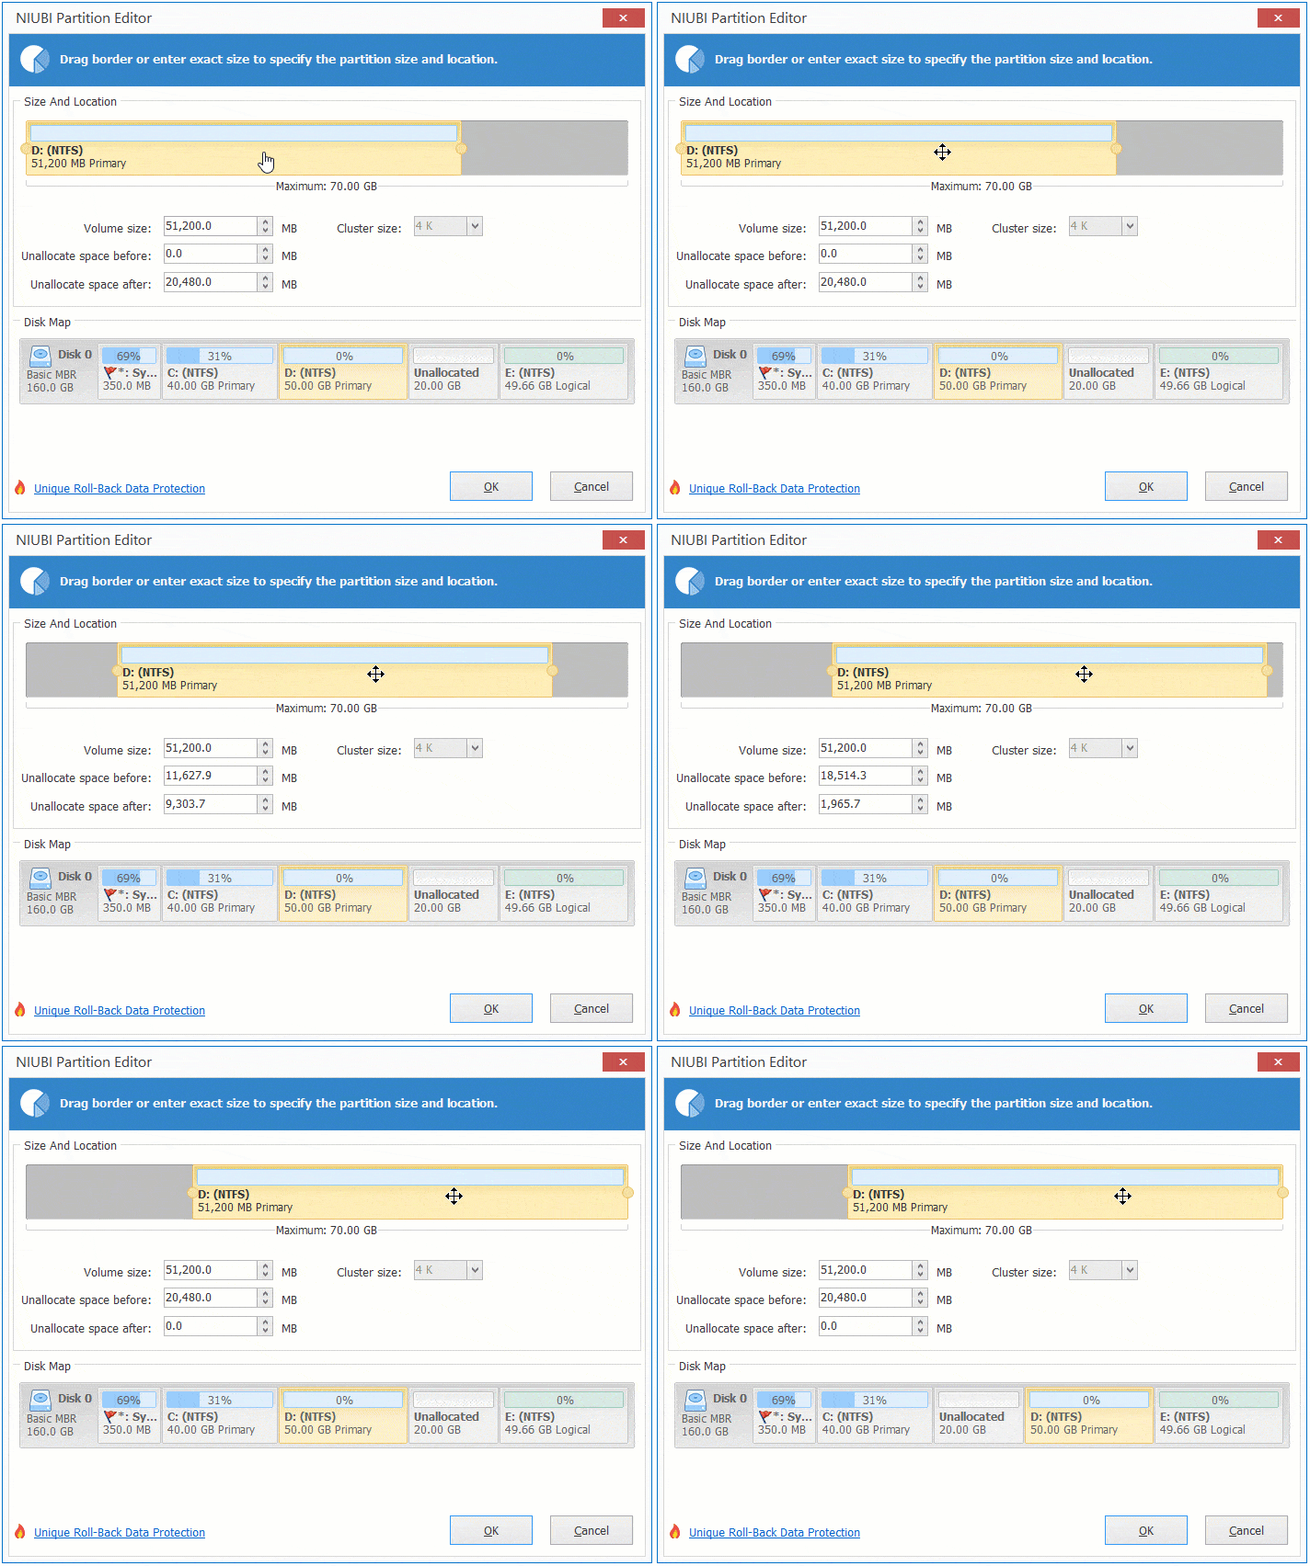
In this case, you can move free space from a non-adjacent partition on the same disk. Similarly, shrink the E drive to generate unallocated space on its left. Unlike the option above, there is an additional step required to move the unallocated space from the right of the D: drive to the left.
To do this, right-click partition D: and select "Resize/Move Volume", then drag the middle of the D partition to the right in the pop-up window.
How to enlarge the C drive in Server 2012/2016/2019/2022:
Option 4: Enlarge the C Drive with Another Disk
This method is used when there is insufficient free space on the system disk.
The size of a physical disk is fixed. In this case, no software can expand the C: drive by adding space from another separate disk. Alternatively, you can clone the disk to a larger one and extend the partitions using the additional disk space. Watch the video to learn how to extend the C: drive in Server 2012/2016/2019/2022 with a larger disk:
No matter how your disk partitions are configured, NIUBI Partition Editor provides a way to extend the C: drive in Windows Server 2012/2016/2019/2022. Compared to other tools, NIUBI is much safer and faster due to its powerful technologies.
- Hot Clone - Clone disk partitions in Windows for backup, migration, and fast disk swapping.
- Virtual Mode - All operations are listed as pending for preview, and real disk partitions won't be modified until you click "Apply" to confirm.
- Cancel-at-Will - If you applied incorrect operations, you can safely cancel the ongoing operations at any stage before completion.
- 1 Second Rollback - If any error is detected while resizing partitions, it can immediately and automatically revert the disk partitions to their previous state.
- Advanced file-moving algorithm: Resize and move partitions 30% to 300% faster, saving significant time, especially when handling a large number of files.
 © 2009 - NIUBI Technology All Rights Reserved. |