
Disk partitions are usually allocated while installing the operating system, but sometimes you need to repartition hard drives. For example: you forgot to edit the disk while installing Windows, so the system partition C occupies all the disk space. Another typical example is when the D drive runs out of space, but there is plenty of free space in the C drive. In these situations, you can shrink the system partition C to create a new volume or expand other partitions without starting over. To shrink the C: drive on Windows Server 2012 R2, there are two choices: the inbuilt Disk Management and 3rd-party disk partition software. This article introduces detailed steps with both tools.
Shrink the System Partition Without Software
Windows Server 2012 has the Shrink Volume feature in the built-in Disk Management utility, which is able to shrink the system partition and any data volumes without losing data. It is easy, fast, and able to decrease partition size without rebooting the server; however, it has some restrictions.
How to shrink the C drive in Server 2012 R2 via Disk Management:
- Press Windows and X on your keyboard, and then click Disk Management from the list.
- Right-click the C drive and select "Shrink Volume".
- Enter the amount of space and click "Shrink" to proceed.
In a short time, the system C drive will be shrunk.
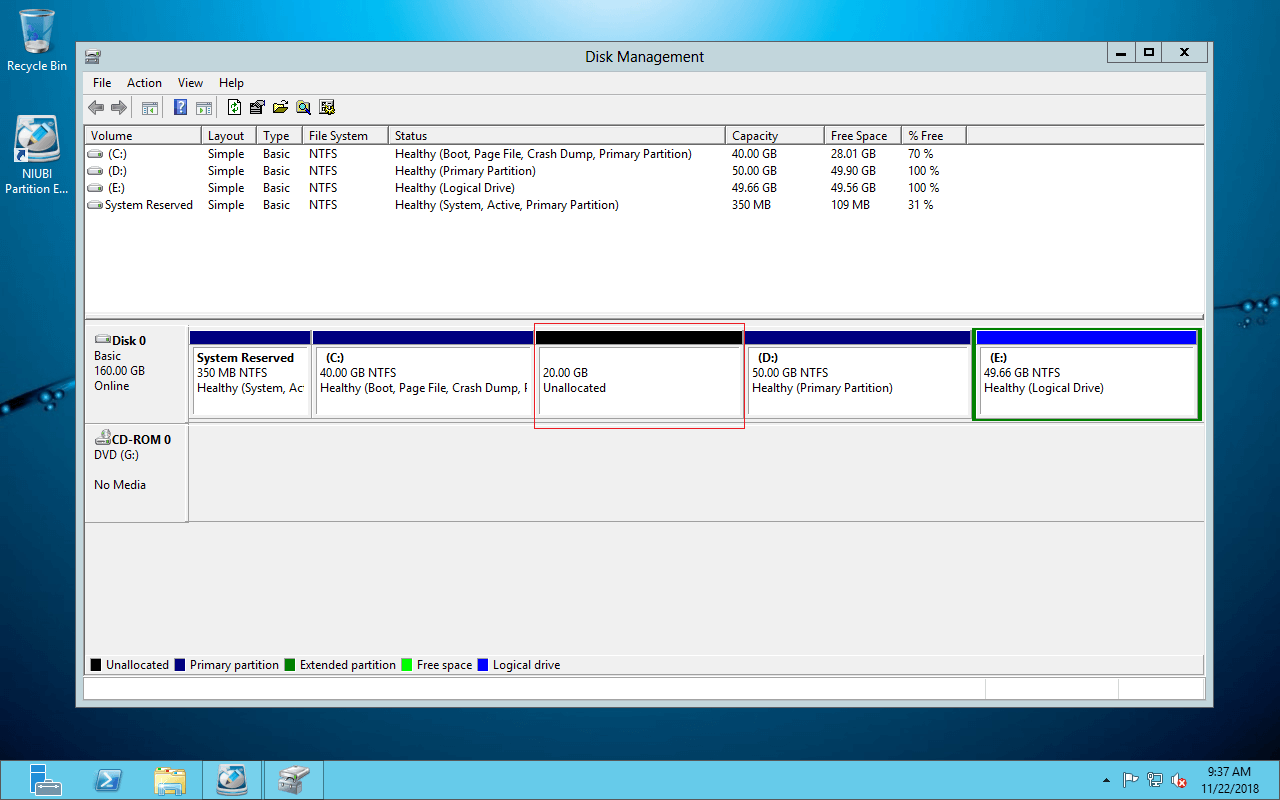
If you just want to shrink the system partition to create new volumes, you can achieve this without any software in most cases. But Disk Management is not the best tool because of some limitations.
Limitations of Decreasing the C Drive with Disk Management
1. Cannot Shrink the C Drive Beyond Unmovable Files
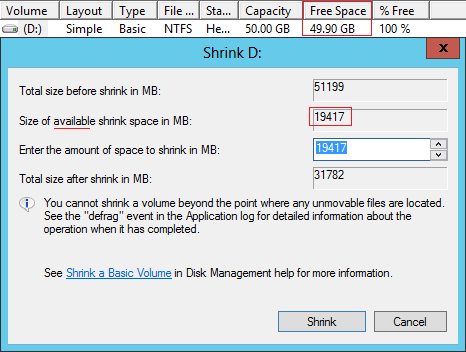
In the shrinking window, there is a tip - You cannot shrink a volume beyond the point where any unmovable files are located.
In the test server, the D drive is blank with 50GB of space, but in the shrinking window, Disk Management gives only 19417MB (18.96GB) of available space.
The "unmovable" files include the paging file, hibernation files, and other large system files. Most of such files are located in the system C drive by default. Therefore, you may encounter such an issue while shrinking the C: drive.
2. Cannot Extend Another Volume After Shrinking Partition C
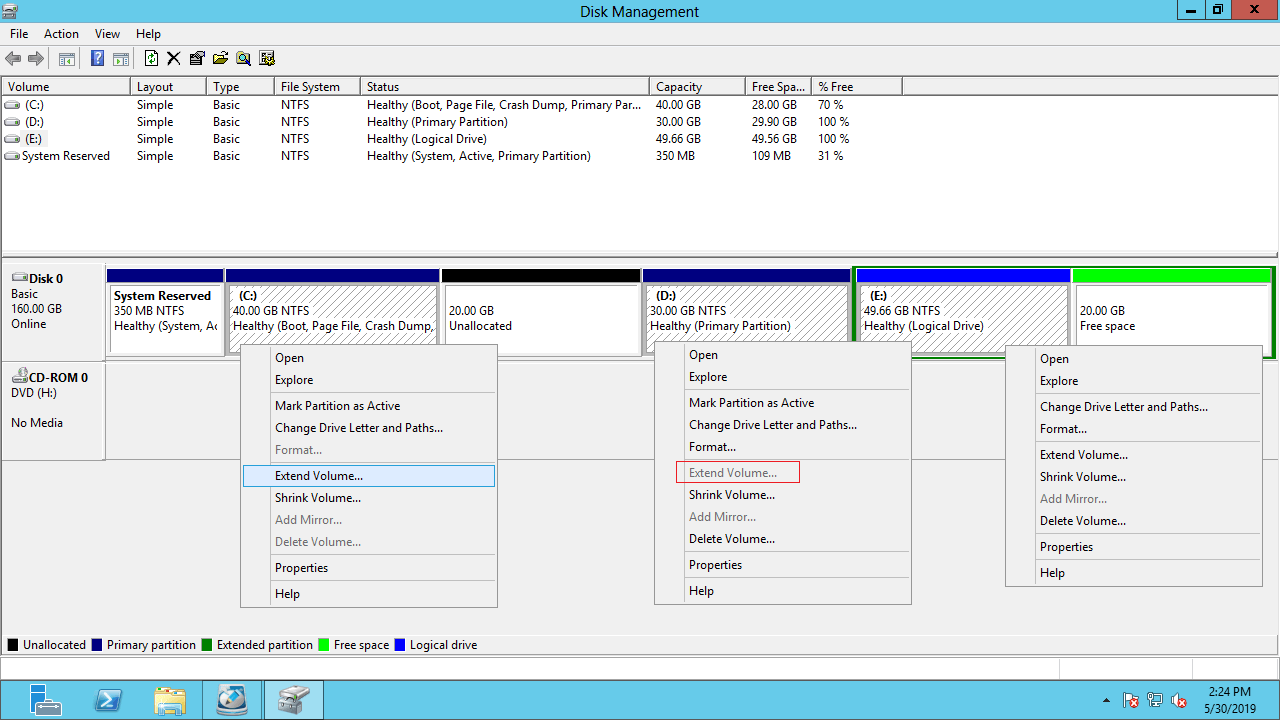
As shown in the test server, Extend Volume is disabled for the D: drive after shrinking both the C: and E: drives. This is because:
- Unallocated space can only be generated on the right side after shrinking a drive with Disk Management.
- Unallocated space can only be merged into the left contiguous drive with the Extend Volume function.
Therefore, whether you want to extend the D: drive or the System Reserved partition, you cannot achieve this by shrinking the C partition via Disk Management.
Another native tool - the Diskpart command has the same restrictions.
How to Shrink the C Drive and Expand the D Volume
To shrink the C volume in Windows Server 2012 R2, NIUBI Partition Editor is a better choice because it offers more advantages.
- You just need to click, drag, and drop on the disk map to resize partitions.
- Both NTFS and FAT32 partitions can be shrunk and extended.
- It is able to move these "unmovable" files and shrink the partition to a much smaller size.
- Unallocated space can be generated on either the left or right side when shrinking a partition.
- Unallocated space can be merged into either adjacent or any non-adjacent partitions on the same disk.
Download NIUBI Partition Editor and follow the steps in the video:
How to shrink the C drive in Windows Server 2012 to expand the D volume:
How to shrink the C drive to expand the System Reserved partition:
 © 2009 - NIUBI Technology All Rights Reserved. |