Hard drive partitions are allocated by computer seller or after installing Operating System. Many people ask whether it's possible to repartition hard drive without losing data, because C: drive or a data volume is getting full. Nobody likes to start from scratch. The answer is yes. To repartition a drive in Windows PC and server, you may use either native Disk Management or third party software. Comparing with Disk Management, 3rd-party software is much more powerful, but you'd better make a backup in advance and run the safest software. In this article, I'll introduce detailed steps to repartition hard drive in Windows PC/server with both kinds of tools.
Applies to: Windows 11, Windows 10, Windows 8, Windows 7, Windows Vista, Windows XP, Windows Server 2022, Windows Server 2019, Windows Server 2016, Windows Server 2012 (R2), Small Business Server 2011, Windows Server 2008 (R2) and Windows Server 2003 (R2).
How to repartition a drive with Windows Disk Management
In Windows XP/Server 2003 Disk Management, you can only create, delete and format partition. From Windows 7/Server 2008, new Shrink Volume and Extend Volume functions are added in Disk Management. They can help you repartition hard drive without losing data (in most cases). However, both functions have shortages. First of all, they only support NTFS partition, other types of partitions including FAT32 can't be shrunk and extended. Other shortages of Disk Management include:
- It cannot shrink a partition beyond the point where unmovable files are located.
- It can only shrink a partition towards left and make Unallocated space on the right.
- It can only extend a NTFS partition when there's contiguous Unallocated space on the right.
How to repartition a drive smaller in Windows 11/10/8/7 and Server 2008 to 2022:
- Press Windows + R together on your keyboard, type diskmgmt.msc and press Enter to open Disk Management.
- Right click this NTFS partition and select Shrink Volume.
- If you want to shrink partition with maximum available free space, simply click Shrink. Otherwise, enter an smaller amount by yourself.
If you want to extend a NTFS partition, Disk Management is not a good choice. It can only help you extend partition by deleting the contiguous partition on the right. If you want to extend partition by shrinking another one, Disk Management cannot help you.
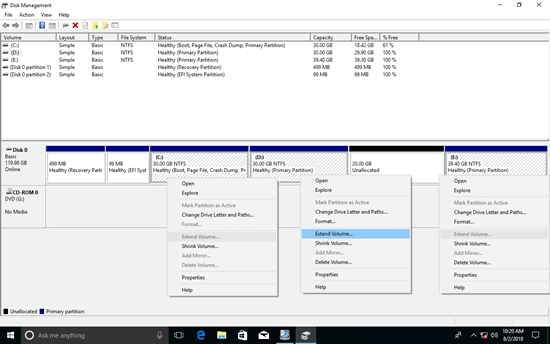
As you see in the screenshot, Extend Volume is disabled for C and E drive after shrinking D. Because Unallocated space can only be generated on the right when shrinking D: drive. This space is non adjacent to C drive and is on the left of E drive, therefore, Extend Volume is grayed out.
How to repartition hard drive larger in Windows 11/10/8/7 and Server 2022/2019/2016/2012/2008:
- Right click the adjacent partition D: (or E) and select "Delete Volume".
- Right click system C: drive and select "Extend Volume", then Extend Volume Wizard will be opened.
- Simply click Next till Finish in next windows.
The partitions to delete and extend must be the same Primary or Logical drive. Otherwise, Extend Volume still greyed out after deleting.
Repartition hard drive in Windows 11/10/8/7 with free software
Obviously, Disk Management is not the best tool to help you repartition hard disk drive. Better than this native tool, NIUBI Partition Editor has more advantages while repartitioning hard drive:
- It can shrink and extend both NTFS and FAT32 partitions.
- It can make Unallocated space on either left or right when shrinking partition. Because it can move files, partitions can be shrunk to minimum size.
- It can merge Unallocated space to either contiguous partition by 1 step.
- It can move Unallocated space and combine to non adjacent volume on the same disk.
Better than other partition software, NIUBI has Virtual Mode, Cancel-at-will and 1-Second Rollback technology to protect system and data. To repartition hard drive in Windows 11/10/8/7/Vista/XP home computer, NIUBI has free edition to help you. To adjust partition size, you just need to drag and drop on the disk map.
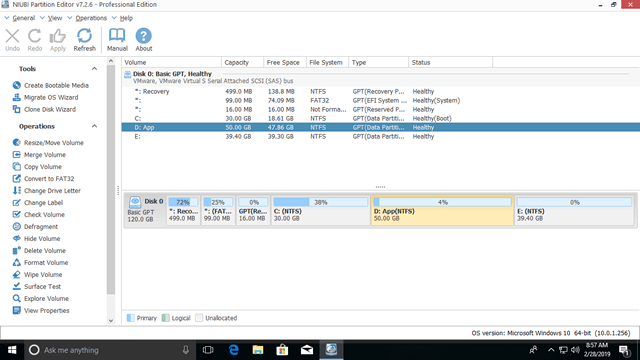
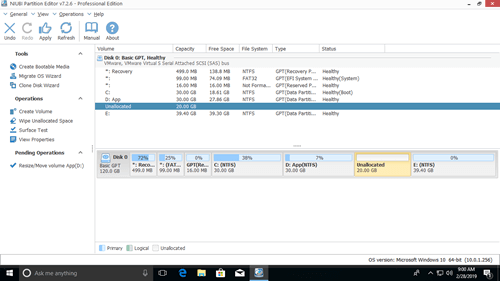
Download NIUBI Partition Editor and you'll see the main window with disk partition structure and other information.
How to repartition hard drive in Windows 11/10/8/7/Vista/XP without losing data:
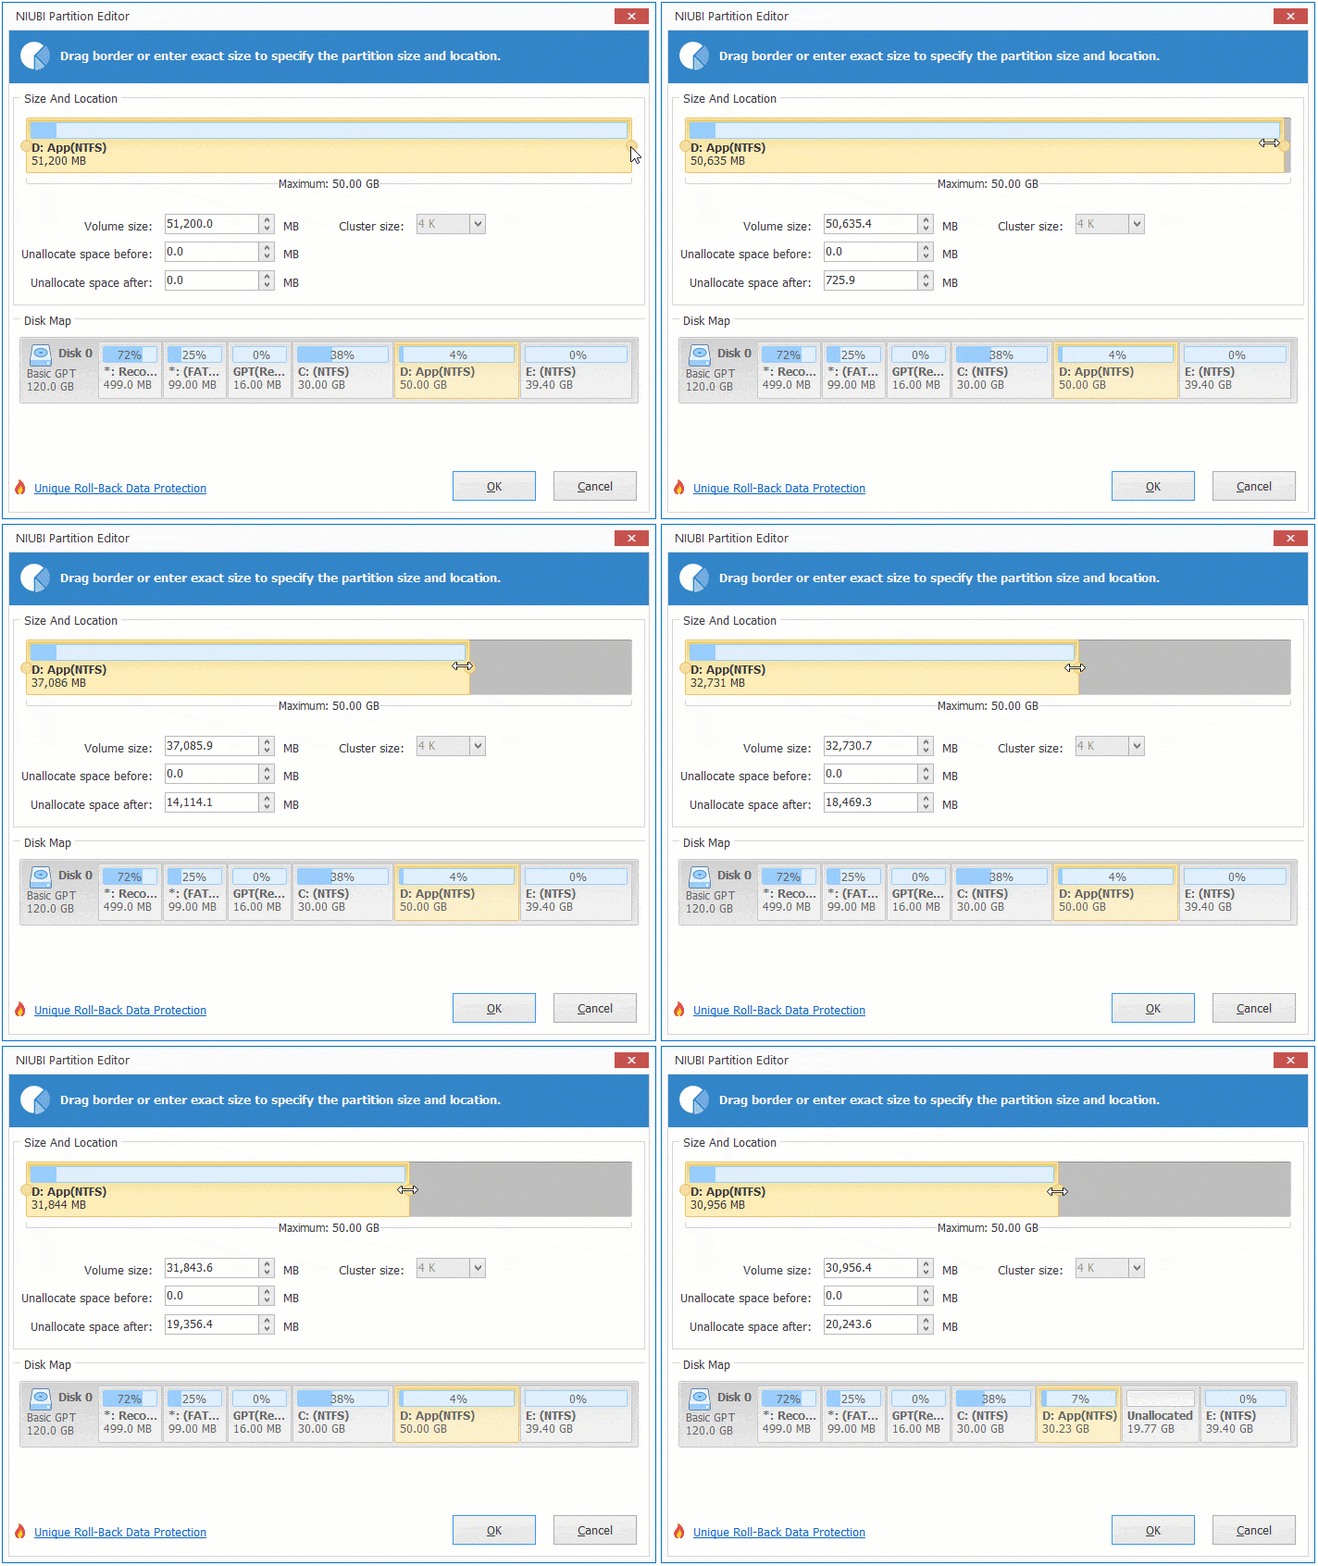
Right click a partition such D: and select "Resize/Move Volume", you have two choices to shrink it in the pop-up window.
① If you drag left border towards right in the pop-up window,

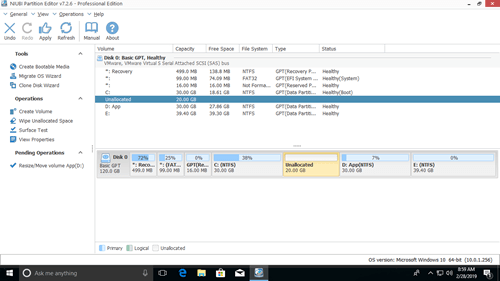
Then Unallocated space is made on the left.
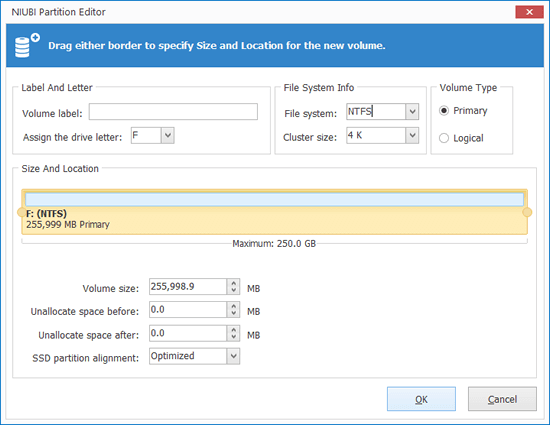
If you want to create more volumes, right click the Unallocated space and select "Create Volume". You can select partition type, file system, cluster size, add/modify partition label, change drive letter and edit partition size/location in the pop-up window.
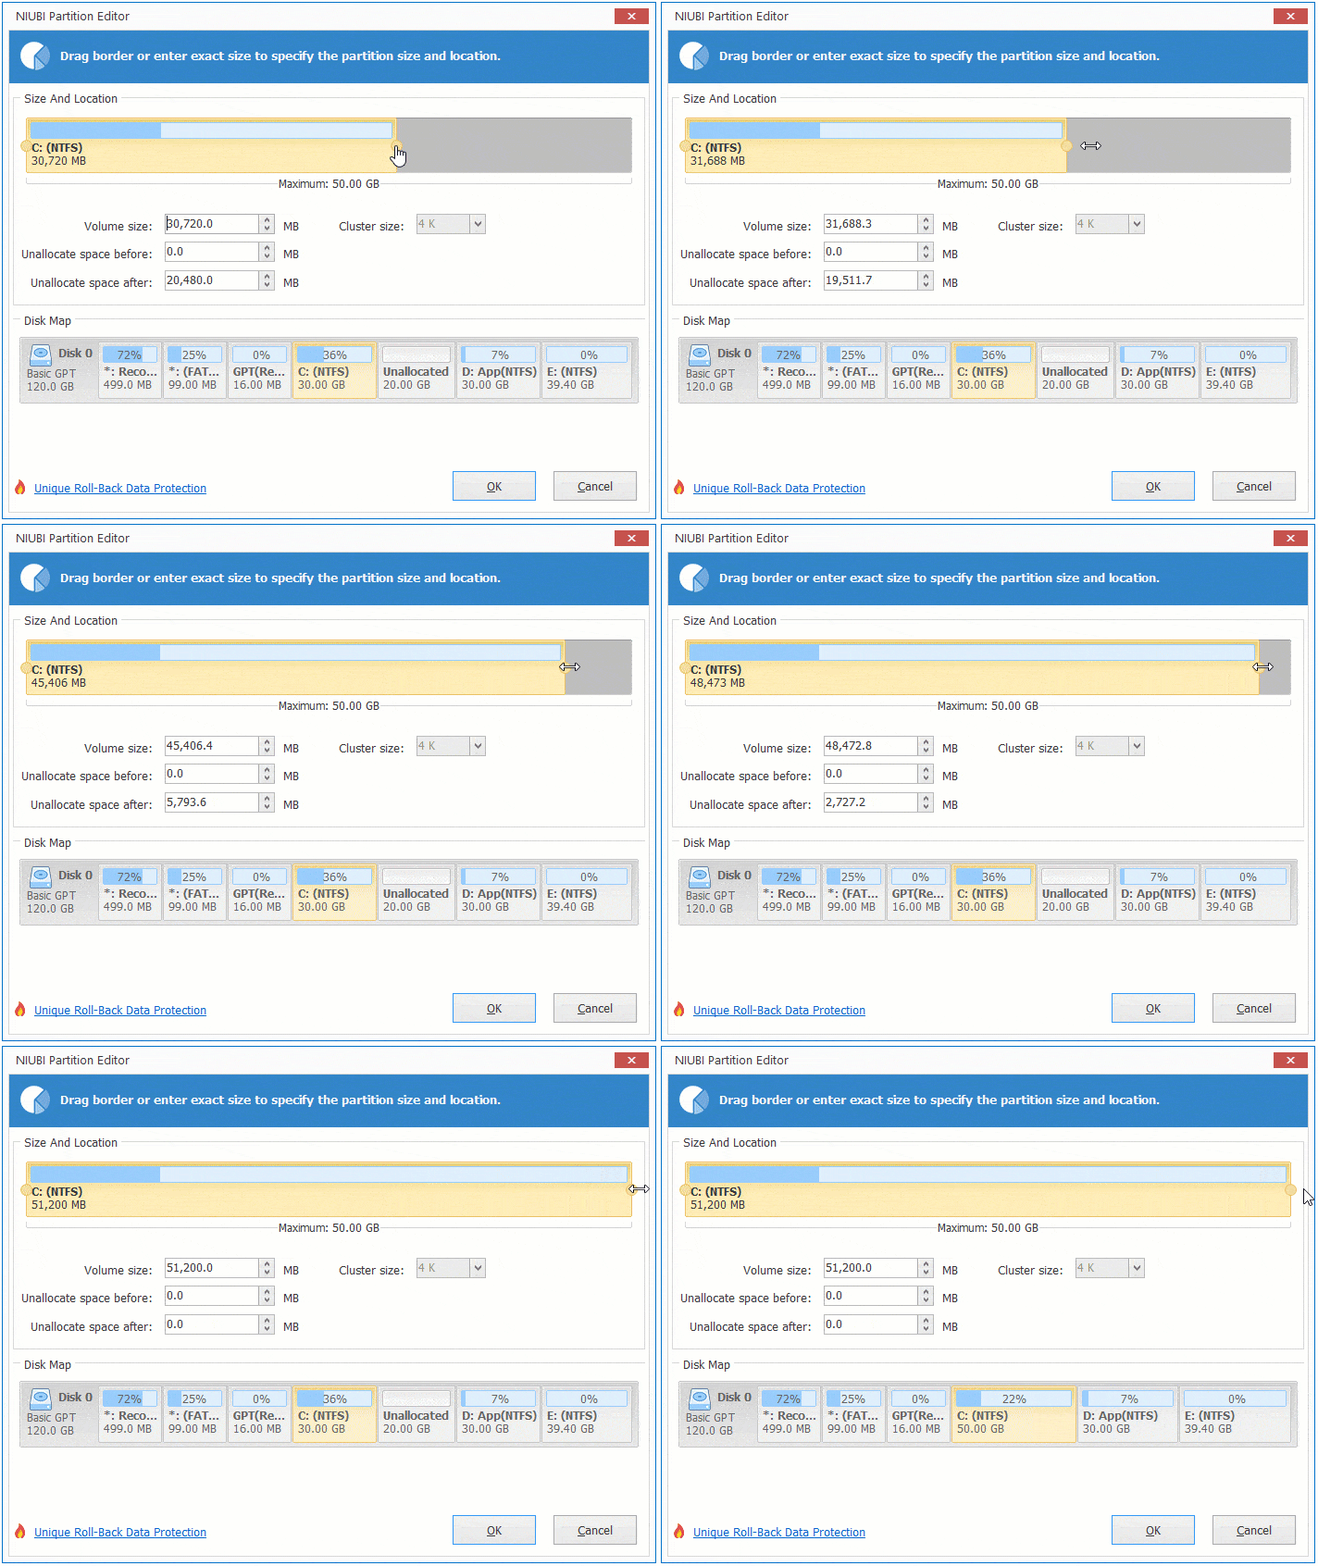
If you want to extend C drive after shrinking D, right click C: and select "Resize/Move Volume" again, drag right border towards right in the pop-up window.
If you want to extend E drive after shrinking D, right click E: and select "Resize/Move Volume" again, drag left border towards left in the pop-up window.
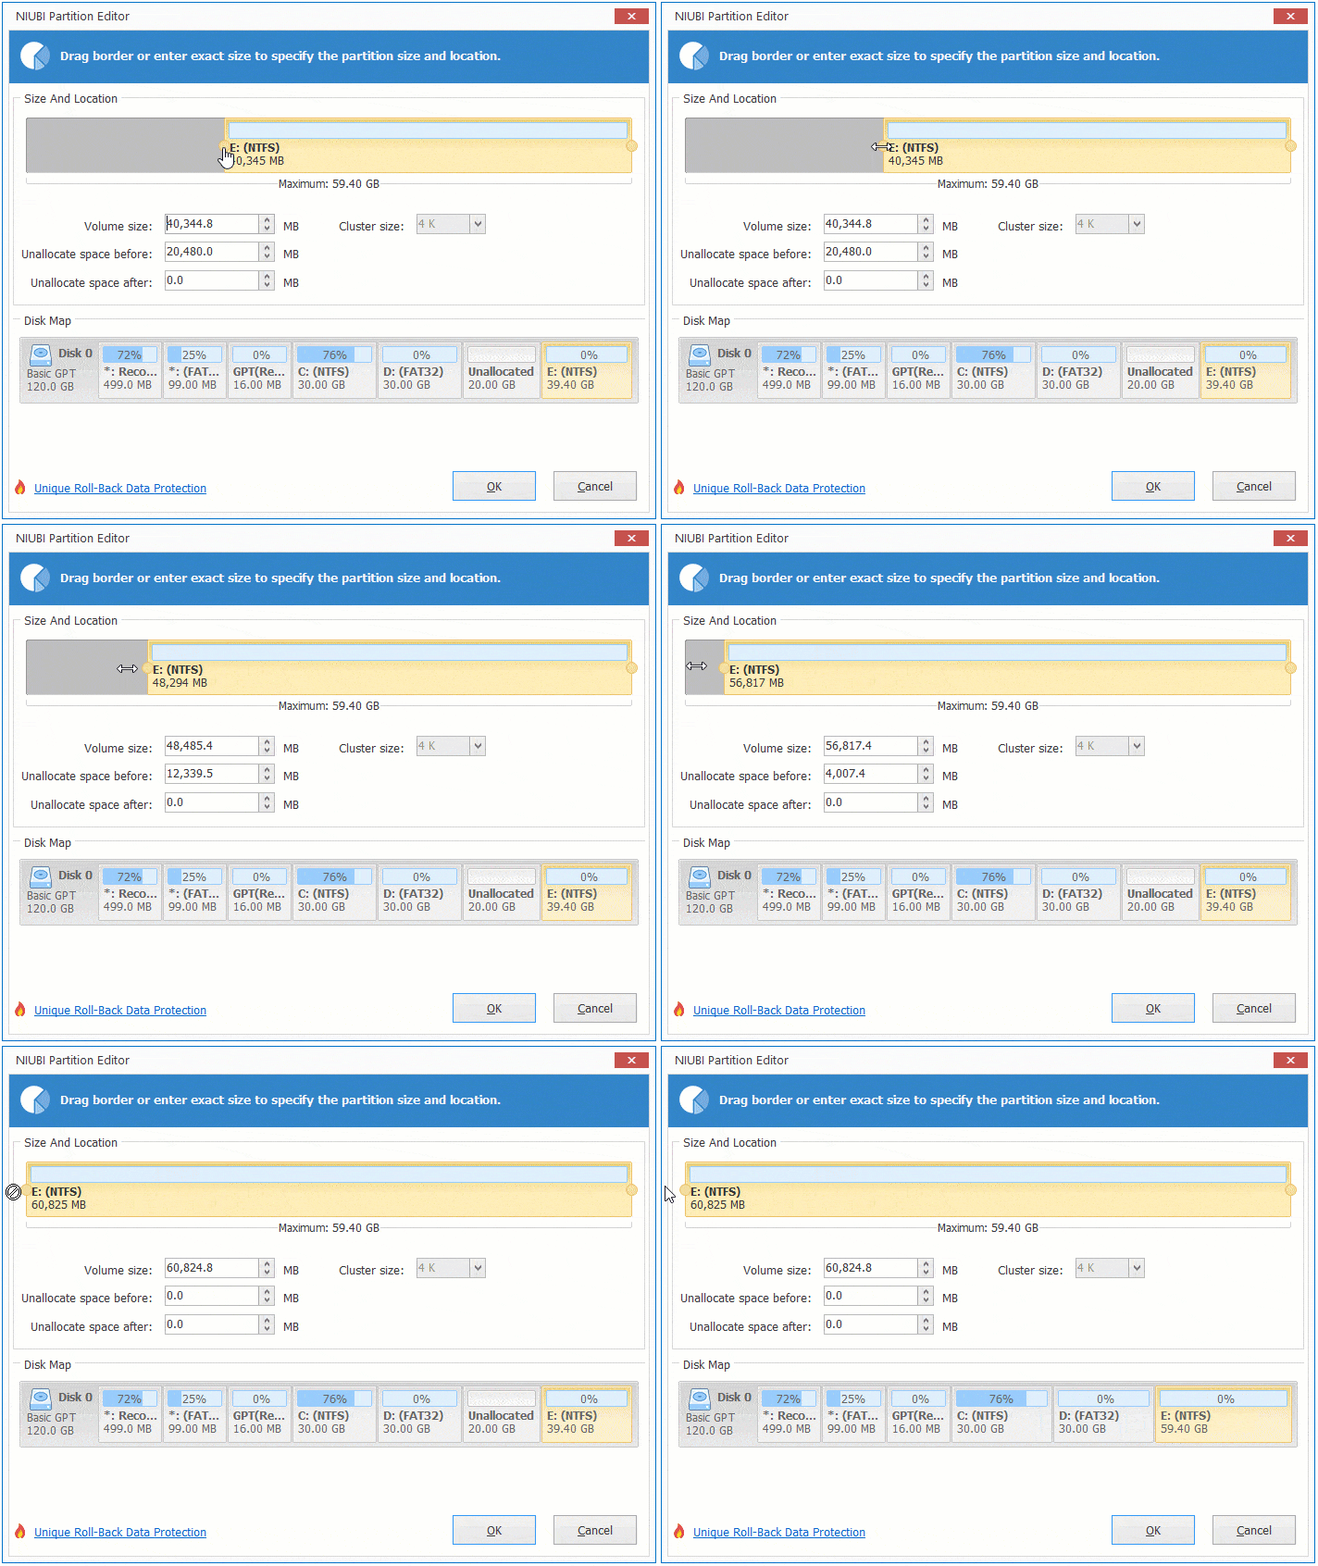
If you want to shrink E and extend non adjacent partition C, shrink E and make Unallocated space on the left. Before adding Unallocated space to C drive, you need to move partition D to the right. Watch the video how to resize partition without losing data:
The steps to repartition hard drive in Windows Server 2008/2012/2016/2019/2022 are the same, but you need server or higher edition. If you use any types of hardware RAID arrays, do not break RAID array, follow the same steps above.
How to repartition hard drive with another larger disk
In some computers, there's no other partition or not enough free space on the same disk. In that case, no software can repartition hard disk, because the size of a physical disk is fixed, no software can decrease a 256GB hard disk to 200GB or increase it to 300GB.
In this situation, you can copy disk/partition to a larger one and repartition with extra disk space.
Besides help repartition hard drive without losing data, NIUBI Partition Editor helps you do many other disk and partition management operations.

