
C drive low disk space is a common issue in Windows Server 2012 and R2. To solve this problem, you had better free up disk space first. To accomplish this task, Windows Server 2012 has a native Disk Cleanup tool. But different from other versions, this tool is not enabled by default. This is the reason why many people report that Disk Cleanup is missing in Windows Server 2012 (R2). This article introduces how to add, install, and enable Disk Cleanup in Windows Server 2012 R2, and how to run Disk Cleanup via the cleanmgr command in Server 2012 to free up disk space.
About the Windows Server 2012 Disk Cleanup Utility
As in other versions, the Windows Server 2012 system C: drive gets full after running the server for a period of time. One of the solutions is cleaning up the C drive and deleting unnecessary and junk files to reclaim disk space. To do this, Microsoft provides the native Disk Cleanup utility, which can be run via the cleanmgr command or with a GUI wizard.
To clean up the C drive in Server 2012 (R2), the native Disk Cleanup utility is the first choice because it is easy, fast, and able to delete the most common types of junk files safely. There are third-party optimization programs, but the native cleanup utility is safe and powerful enough. There is no need to fight for 1GB more free space but put the server in danger.
As stated at the beginning, Disk Cleanup in Server 2012 (R2) is not activated by default. This is the reason why some people report that Disk Cleanup is missing in Server 2012 (R2), or receive the error: Windows cannot find 'cleanmgr'. Make sure you typed the name correctly, and then try again.
Before cleaning up a disk in a Windows 2012 server, you must install or enable this utility in advance.
How to Install/Enable Disk Cleanup in Windows Server 2012 R2
There are two options to enable Disk Cleanup in Server 2012 (R2): copy files from WinSxS or install it with the Desktop Experience feature.
It is easy and fast to copy files to a specific folder, but in some environments, Disk Cleanup does not work this way. By installing the Desktop Experience feature, Disk Cleanup is fully functional, but it requires a reboot to complete the installation. Furthermore, many other unnecessary components will be installed on the server together with Desktop Experience, such as:
- Windows Media Player
- Desktop themes
- AVI support for Windows
- Windows SideShow
- Windows Defender
- Sync Center
- Audio recording
- Character Map
- Snipping Tool
Both methods to enable Disk Cleanup in Windows Server 2012 (R2) are introduced below; select the one that fits your needs.
1. Add/Enable Disk Cleanup in Server 2012 Without a Reboot
You just need to copy two files, Cleanmgr.exe and Cleanmgr.exe.mui, from WinSxS to the system directory.
For Server 2012 R2, this copy method is invalid, and you need to install Desktop Experience. If you are not sure about your version, simply press the Windows + R keys together on your keyboard to start Run, type winver, and press Enter to check.
How to enable Disk Cleanup in Windows Server 2012 without rebooting:
Step 1: Press the Windows + X keys together on the keyboard and select Command Prompt (Admin).
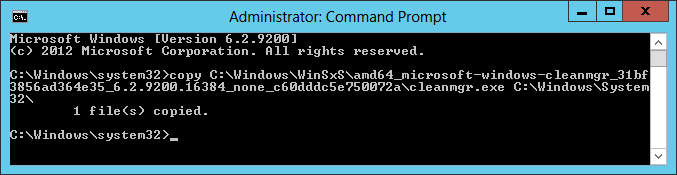
Step 2: Copy the command below, paste it into the command prompt window, and press Enter to execute.
copy C:\Windows\WinSxS\amd64_microsoft-windows-cleanmgr_31bf3856ad364e35_6.2.9200.16384_none_c60dddc5e750072a\cleanmgr.exe C:\Windows\System32\
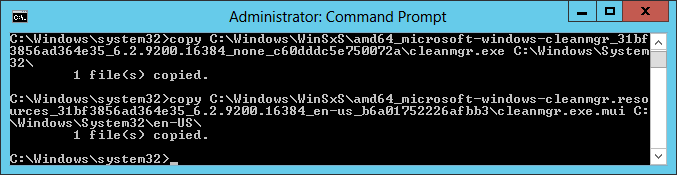
Step 3: Copy, paste, and execute the second command:
copy C:\Windows\WinSxS\amd64_microsoft-windows-cleanmgr.resources_31bf3856ad364e35_6.2.9200.16384_en-us_b6a01752226afbb3\cleanmgr.exe.mui C:\Windows\System32\en-US\
2. Install Disk Cleanup in Server 2012 (R2) with Desktop Experience
As stated above, you cannot enable Disk Cleanup in Windows Server 2012 R2 by simply copying files; you have to follow the steps below to install the Disk Cleanup utility with Desktop Experience.
How to install Disk Cleanup in Windows Server 2012 R2:
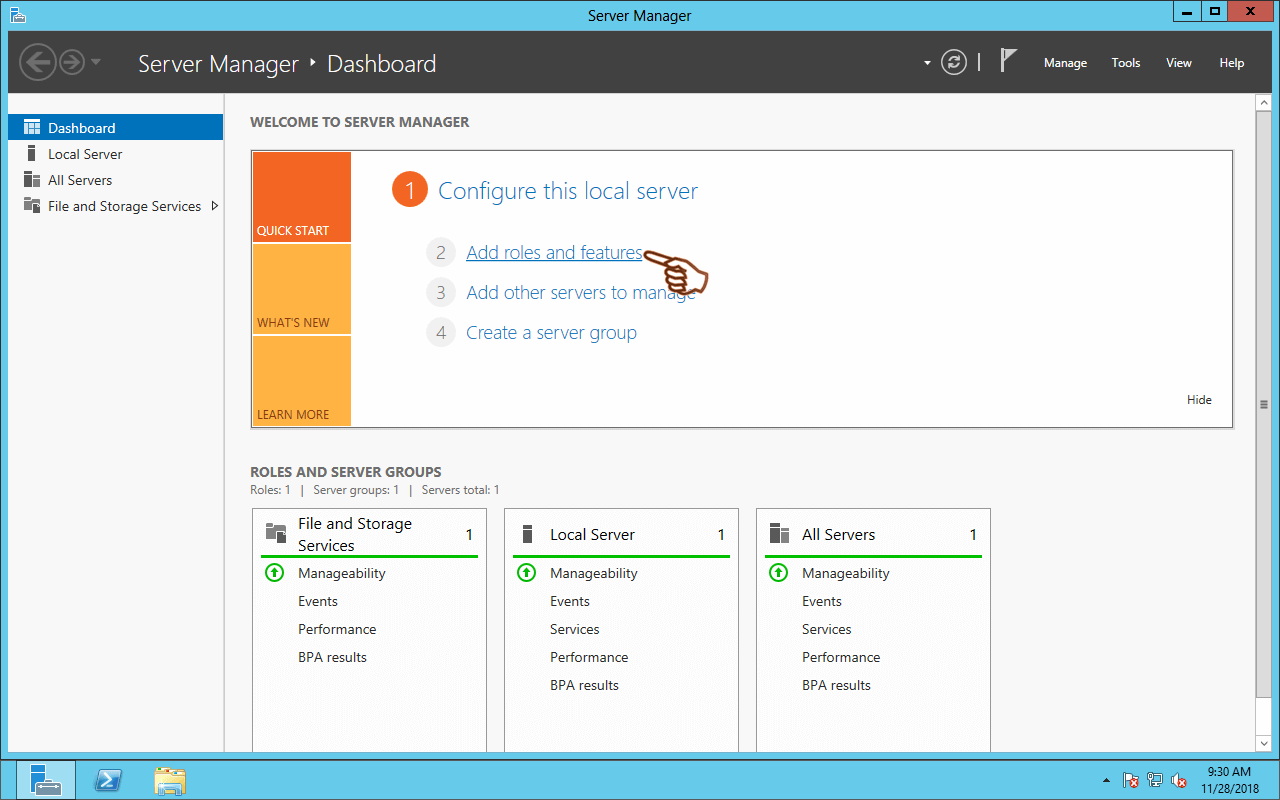
Step 1: Click Server Manager on the bottom left, and then click the second option, "Add roles and features".
Step 2: Simply click Next in the following 4 windows.
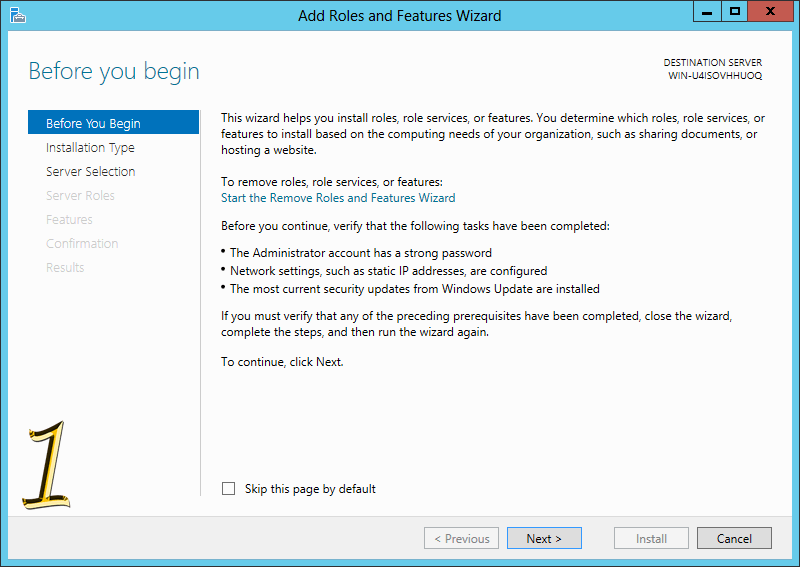
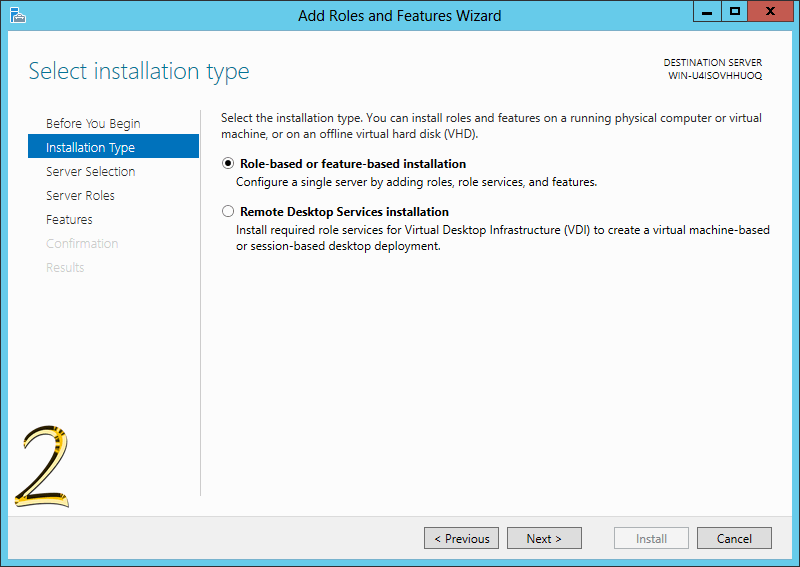
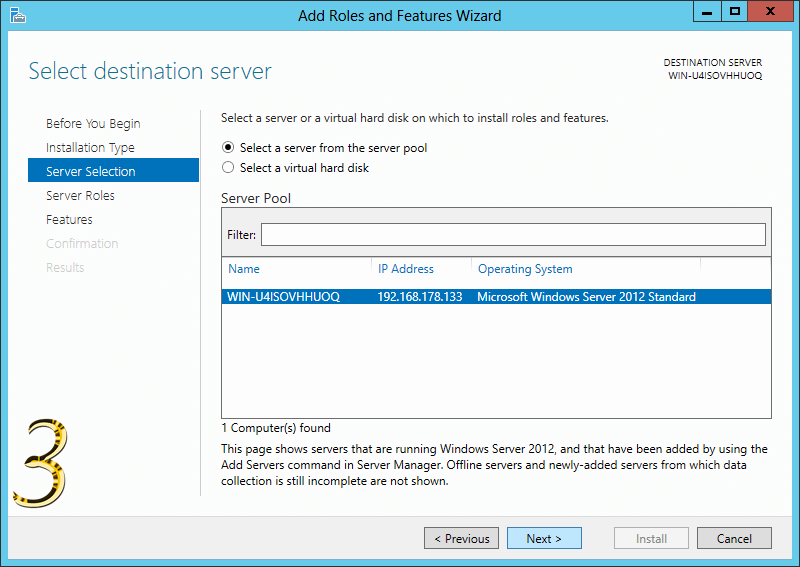
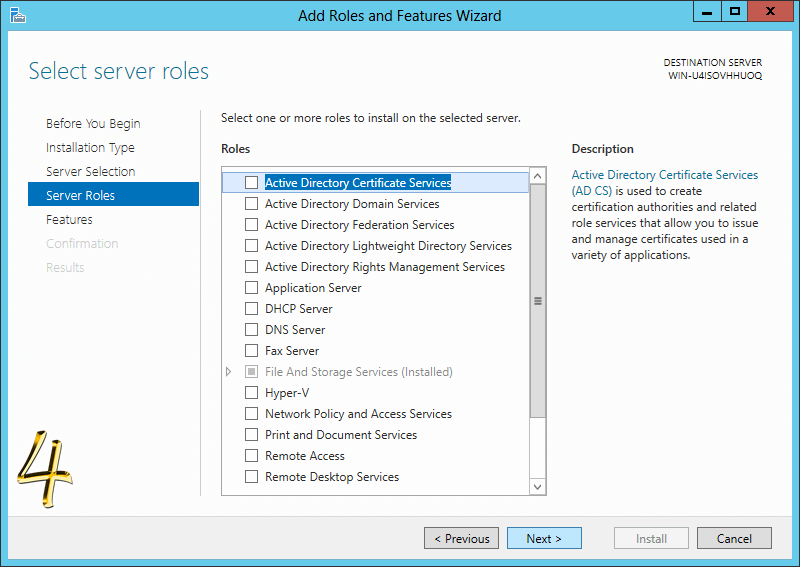
Step 3: Click the triangle to unfold User Interfaces and Infrastructure, and then click the check-box in front of "Desktop Experience".
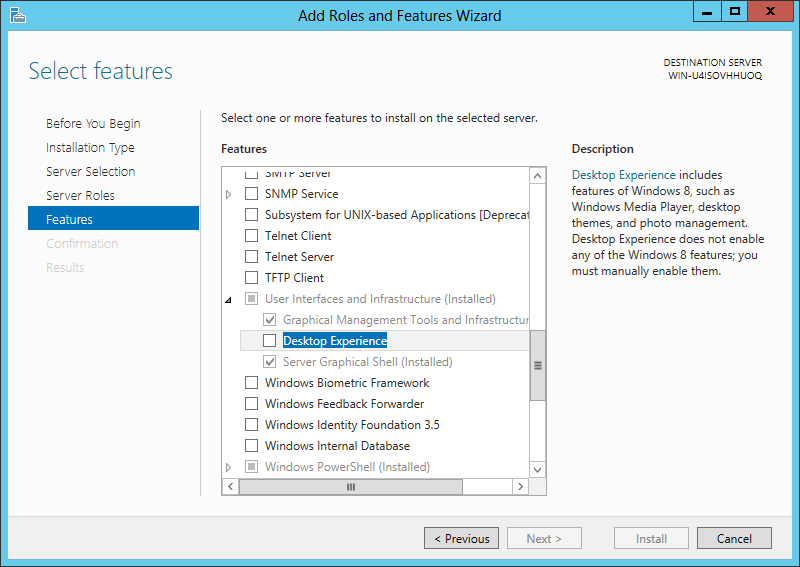
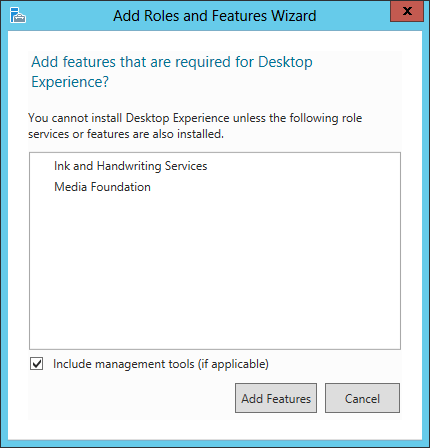
A window will pop up asking you to add additional features; click Add Features at the bottom.
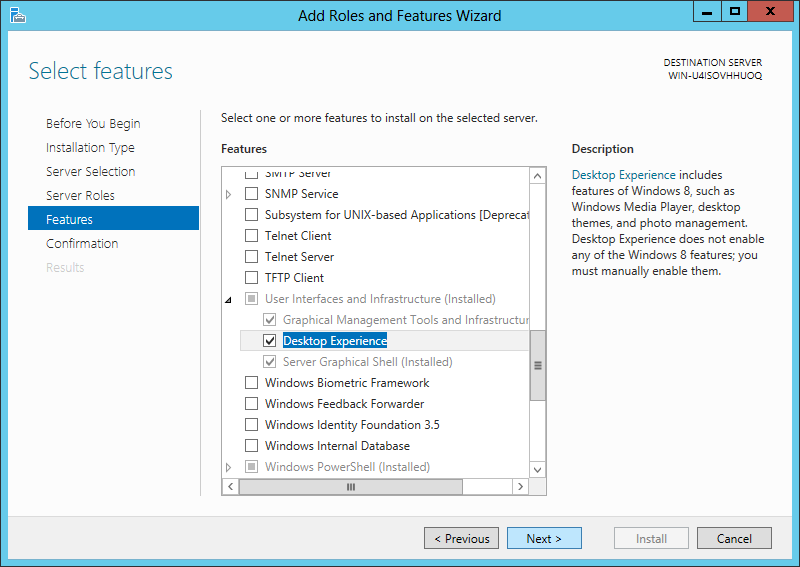
Step 4: Click the check-box in front of "Desktop Experience" again, and then click Next. Then click Install in the next window.
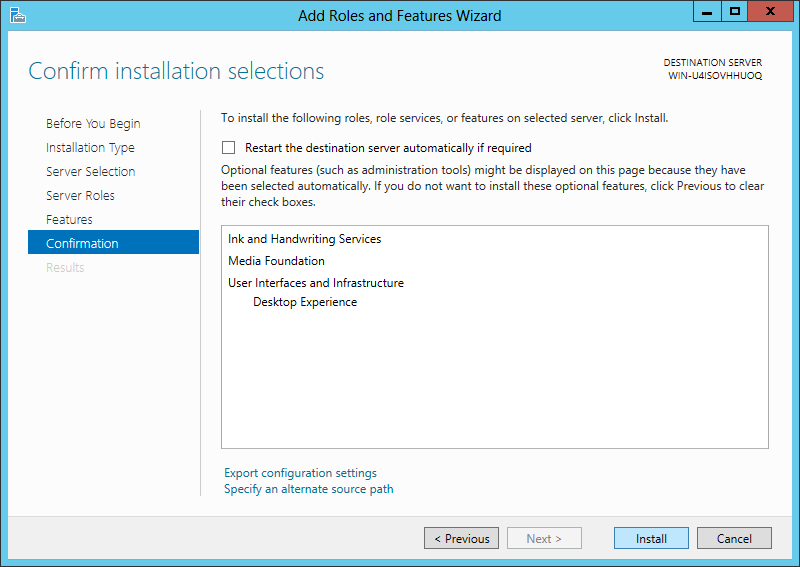
Step 5: Click Close when it finishes. It requires a reboot to complete the installation and take effect.

How to Run Disk Cleanup in Windows Server 2012 and R2
There are two ways to open Disk Cleanup in Windows Server 2012 (R2).
Option 1: Run cleanmgr (Valid after copying files or installing)
- Press Windows + R on your keyboard, type cleanmgr, and press Enter.
- Select the C: (or another) drive in the drop-down list and click OK.
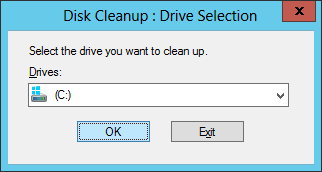
Option 2: Via File Explorer (Only valid after installing)
- Open File Explorer, right-click the C drive, and select Properties.
- Click the Disk Cleanup button in the middle.
No matter which way you choose, it is very easy to free up disk space with Disk Cleanup in Windows Server 2012 (R2). Simply click the check-box in front of the files that you want to delete and then click OK to execute.
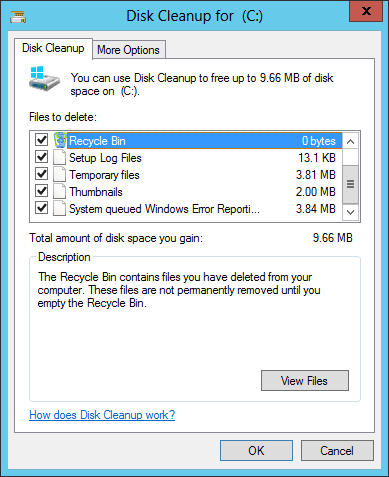
This test server is newly installed, so it can only reclaim a little space. For servers that have never had disk space freed up or have not done so for a long time, the Server 2012 Disk Cleanup utility may help you regain several gigabytes of disk space.
How to Clean Up a Disk in Windows Server 2012 (R2) with the Cleanmgr Command
There are 3 ways to run the cleanmgr command in Server 2012 (R2); select the one that fits your needs.
① All junk files are selected and confirmed manually
- Press the Windows and R keys together on the keyboard.
- Input cleanmgr /LOWDISK and press Enter.
- The Disk Cleanup dialog box will pop up with all types of files selected by default, so you just need to click OK to confirm.
② Clean up all junk files automatically
- Press the Windows and R keys together on the keyboard.
- Input cleanmgr /VERYLOWDISK and press Enter.
Then, Disk Cleanup will delete all junk files automatically and show you a dialog box with the result.
③ Clean up specified junk files automatically
- Press the Windows and R keys together on the keyboard to open Run.
- Input cleanmgr /sageset:1 and press Enter. (You can specify a value from 0 to 65535).
- The Disk Cleanup dialog box will pop up; select the files to delete and click OK.
- In the future, you just need to run cleanmgr /sageset:1 and press Enter, and the preselected junk files will be deleted automatically. If you want to delete different types of files, input cleanmgr /sageset:2 in step 2 and run cleanmgr /sagerun:2 in step 4.
If you gain only a little space with Disk Cleanup in a Windows 2012 server, or if the system C drive was created small, you had better expand the C drive to a larger size. Otherwise, the C drive will become full again shortly. In fact, even if you gain 10GB of free space, it will be eaten up quickly by newly generated junk files.
With server partition software, you can shrink any data volume on the same disk to get Unallocated space and then add it to the C drive. In this way, there will be more free space in the C drive. The Operating System, programs, and everything else keep the same as before. This step is the most effective way to help solve this problem.
Download NIUBI Partition Editor and follow the steps in the video to add more free space to the C drive.
Besides shrinking and extending partitions without losing data, NIUBI Partition Editor helps perform many other disk and partition management operations.
 © 2009 - NIUBI Technology All Rights Reserved. |