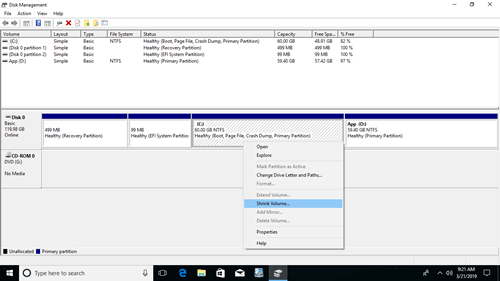
Besides basic ability to delete, create and format partition, Windows 10/8/7 native Disk Management utility has advanced "Shrink Volume" and "Extend Volume" functions to help resize partition without losing data. However, it can only shrink a partition towards left and make Unallocated space on the right side. In addition, in some cases it even cannot shrink volume in Windows 10/8/7. In this article, I'll explain the reasons why you can't shrink Windows 10 partition with Disk Management and what to do when you are unable to shrink volume in Windows 10/8/7 laptop/desktop/tablet computer.
Why Disk Management can't shrink partition in Windows 10/8/7
There are 4 common reasons why you cannot shrink volume in Windows 10/8/7 with native Disk Management tool.
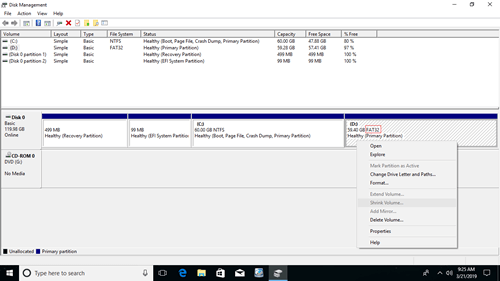
Reason 1: File system is not supported
Disk Management can only shrink and extend the partition that are formatted with NTFS file system, FAT32 and any other types of partitions cannot be shrunk or extended.
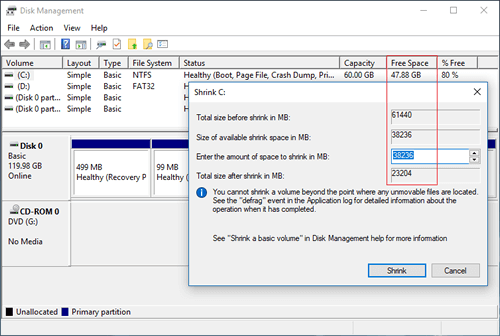
Reason 2: Not enough free space
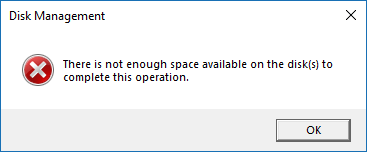
After running Shrink Volume, Disk Management calculates disk space usage and gives you the maximum available space by default. If you do not enter a smaller amount, you may receive the error that "there is not enough space available".
Reason 3: File system error
If there is file system error or other system issue, Disk Management can't shrink partition with even 1MB.
Reason 4: There are unmovable files
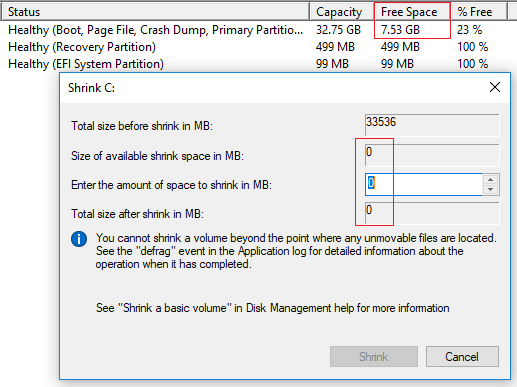
If there are some unmovable files such as Paging file and hibernation files are located in this partition, Disk Management can only shrink little space.
What to do when you are unable to shrink volume in Windows 10/8/7
When you cannot shrink volume in Windows 10/8/7 with Disk Management, find out the reason above and follow the corresponding solutions below.
Solution 1: Shrink with partition software
If you want to shrink a FAT32 partition, Shrink Volume is grayed out in Windows 10/8/7 Disk Management. In that case, you need to run third party software such as NIUBI Partition Editor.
Solution 2: Shrink with less space
As I said above, Disk Management will calculate disk space of the partition that you want to shrink, and then gives you the maximum available space. If you entered a larger space or many files saved to this partition before you clicking Shrink button. The real available space and the calculated amount of space is conflicting. In that case, you just need to run "Shrink Volume" again or enter a smaller amount by yourself.
Solution 3: Fix file system error
Many computers have file system error in one or more partitions. In general, you won't find any difference in daily usage, but you may encounter issue while shrinking and extending partitions. If there's plenty of free space in a partition, but Disk Management gives you 0MB available space or the "Shrink" button is grayed out, try to repair file system.
How to repair file system when cannot shrink volume in Windows 10/8/7:
- Click Windows icon or Start menu, type cmd, then you'll see a result, right click it and select Run as Administrator.
- In the command window, type chkdsk X:/v/f and press Enter. (X is the drive letter of the partition that you want to shrink.)
- To system C: drive, the command window will report that this partition can't be locked and ask you if schedule this task, type Y and press Enter.
- Restart your computer and shrink C drive again.
Solution 4: Shrink partition with NIUBI
If there is plenty of free space in a partition but Disk Management give little available space when shrinking, it means that there are "unmovable" files in this partition. In that case, shrink with NIUBI Partition Editor. Better than Disk Management, NIUBI can move these unmovable files, therefore, you can shrink this volume to minimum size if you want.
What to do when cannot shrink D to extend C drive
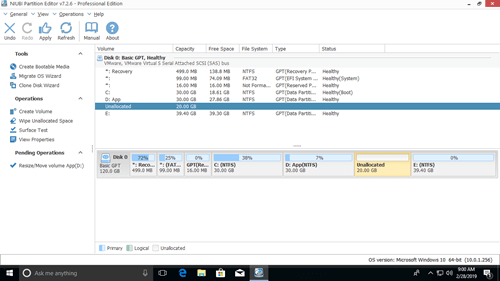
Windows Disk Management tool cannot change the start position of a partition, so it cannot shrink a partition towards right in Windows 10/8/7. It only gives you option to enter an amount, and then it shrink a volume towards left and make Unallocated space on the right automatically.
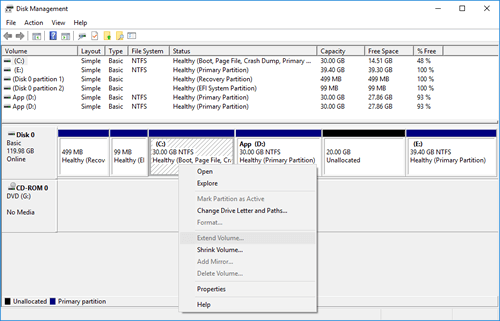
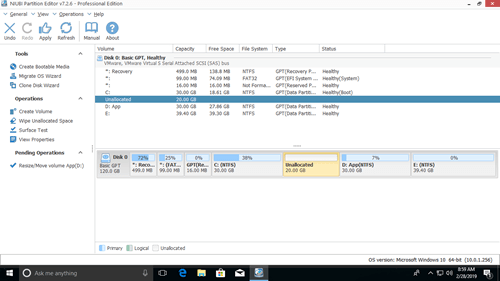
If you just want to shrink a partition to create new volume, it doesn't matter. But it's big issue if you want to shrink D to expand C drive, because the Unallocated space that shrunk from D can't be added to C drive with Disk Management.
As you see in the screenshot, after shrinking D drive, E is on the right side of the Unallocated space, C drive is nonadjacent, therefore, Extend Volumes is disabled for both partitions.
Better than Disk Management, NIUBI Partition Editor has more advantages while repartitioning hard drive:
- It can shrink and extend both NTFS and FAT32 partition.
- It can move unmovable files and shrink a partition to minimum size.
- It can make Unallocated space on either left or right when shrinking partition.
- It can merge Unallocated space to either contiguous or any nonadjacent partition on the same disk.
NIUBI Partition Editor has free edition for Windows 10/8/7/Vista/XP home computer users. It is the same with commercial edition except lacking of 1 Second Rollback technology and bootable media builder. To shrink partition in Windows 10 laptop/desktop/tablet, you just need to drag and drop on the disk map.
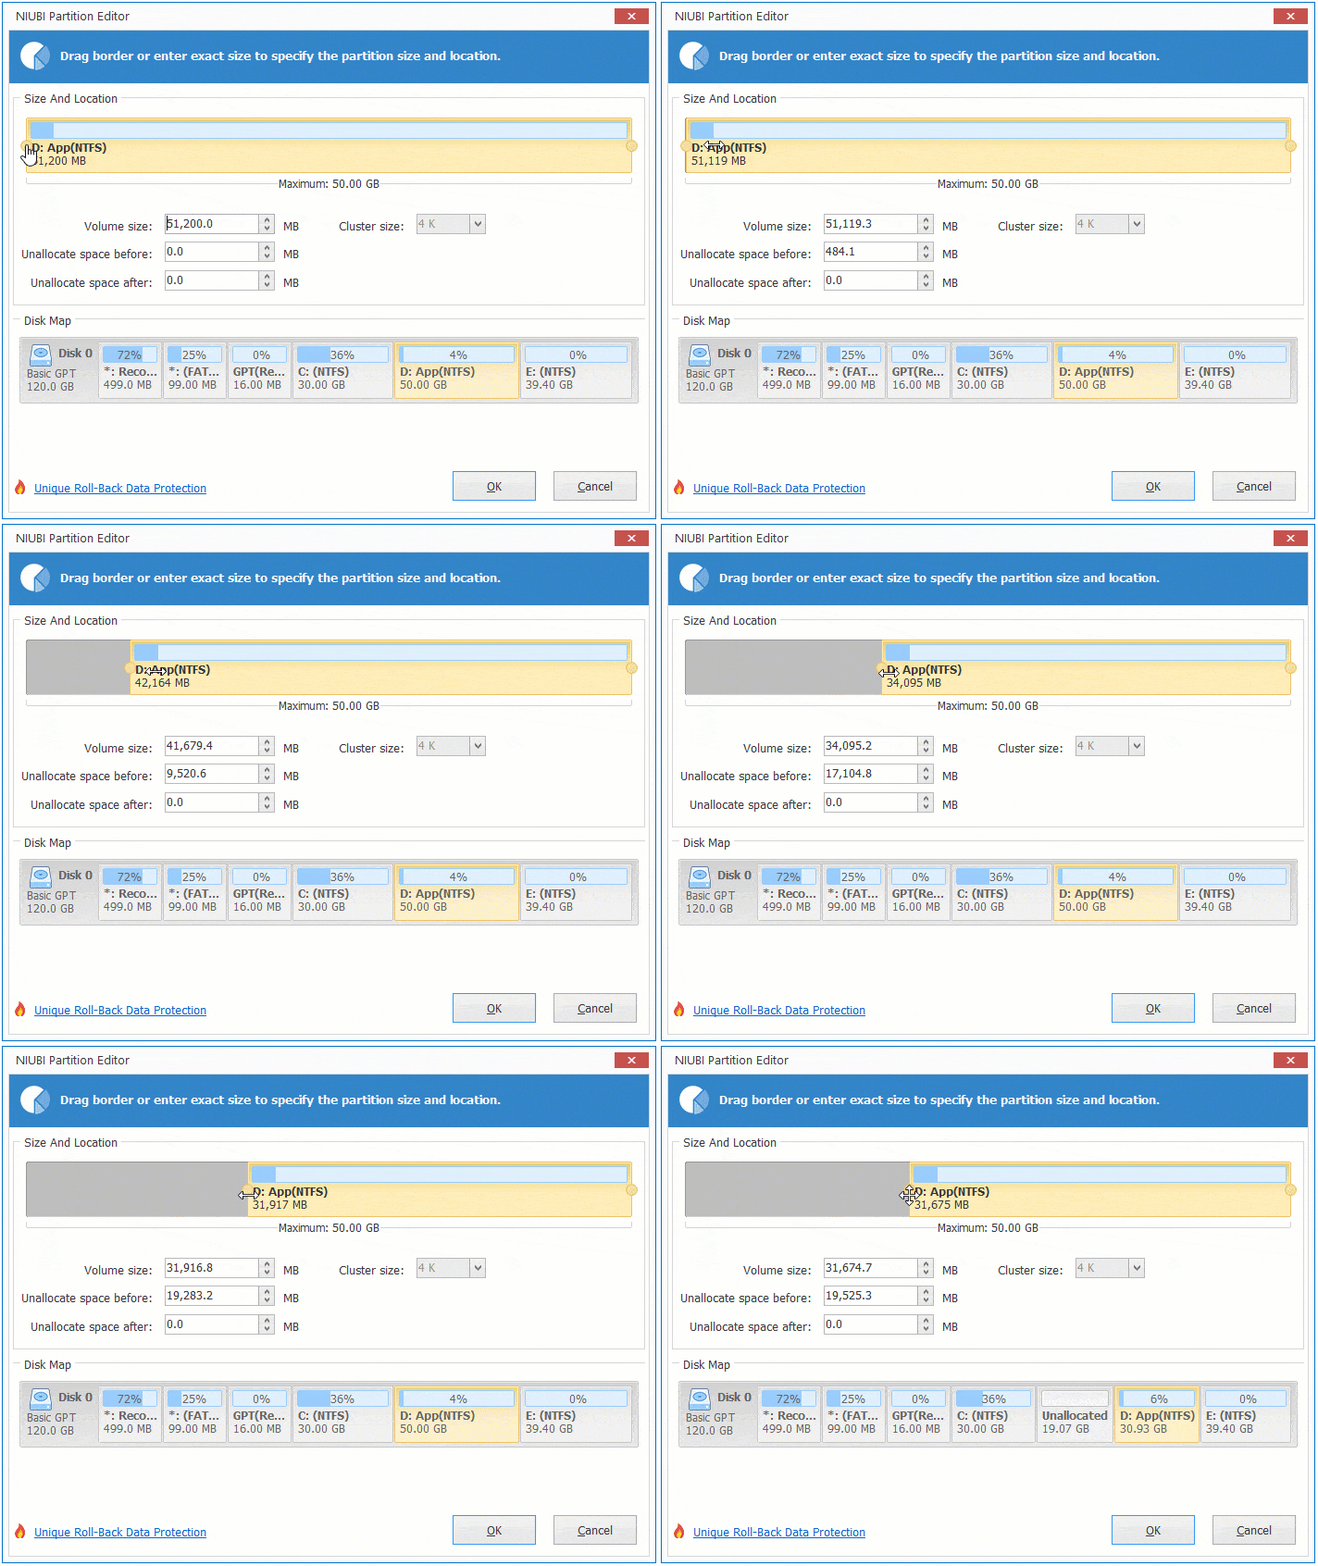
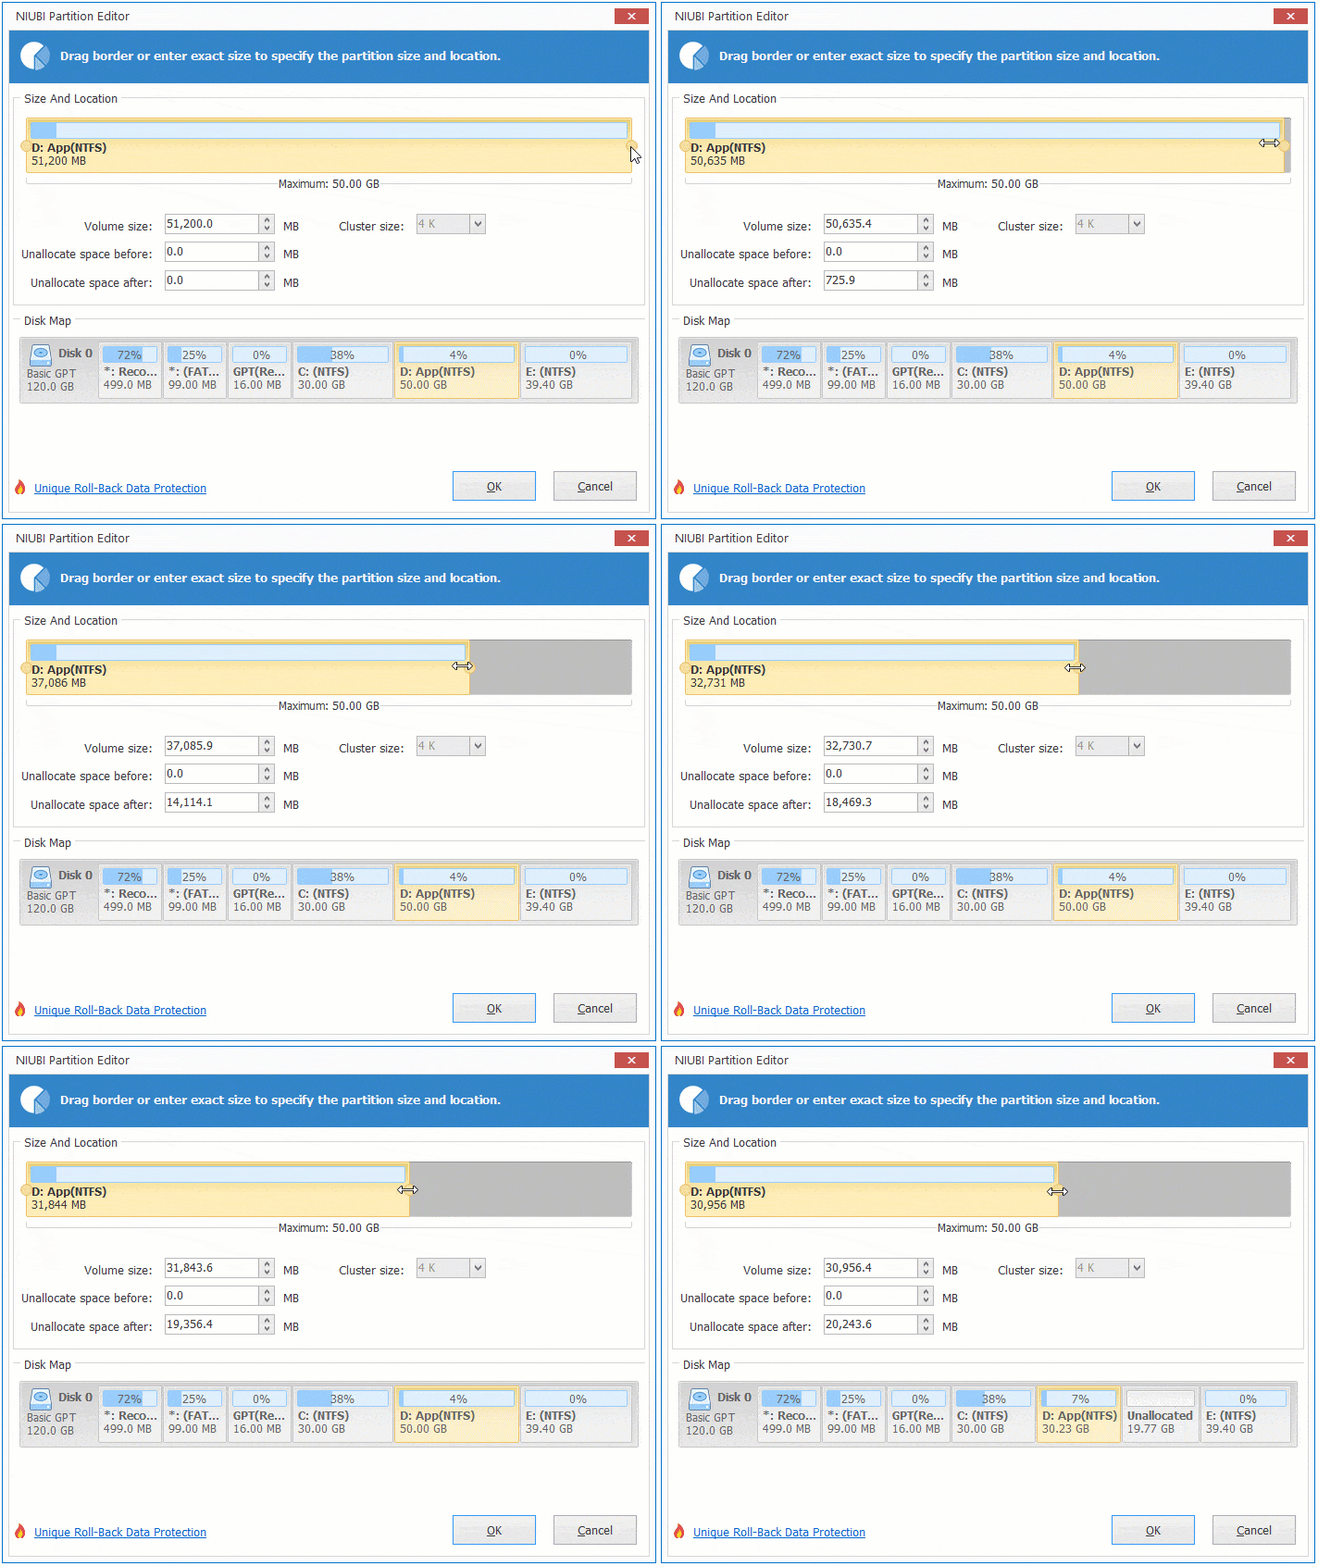
Download the free edition, right click drive D (or other one) and select "Resize/Move Volume". You have 2 options in the pop-up window.
Option 1: If you drag left border towards right
Option 2: If you drag right border towards left
Follow the steps if you want to expand C drive, extend system reserved partition or increase D drive by shrinking other partition on a disk. Besides shrinking and extending volume, NIUBI Partition Editor helps you do many other operations such as move, merge, convert, wipe, defrag, hide, copy partition. Better than other tools, it has unique 1 Second Rollback, Virtual Mode and Cancel-at-will technologies to protect system and data.

