
When the system C: drive is getting full, you can extend it with free space from other volumes. This allows you to solve this problem without wasting a long time recreating partitions and restoring from a backup. There are "Shrink Volume" and "Extend Volume" functions in the Disk Management console to help resize partitions. However, this built-in tool cannot shrink the D drive to extend the C drive. To accomplish this task, disk partition software is required. This article introduces how to shrink the D drive and extend the C drive in Windows Server 2012/2016/2019/2022 without losing data.
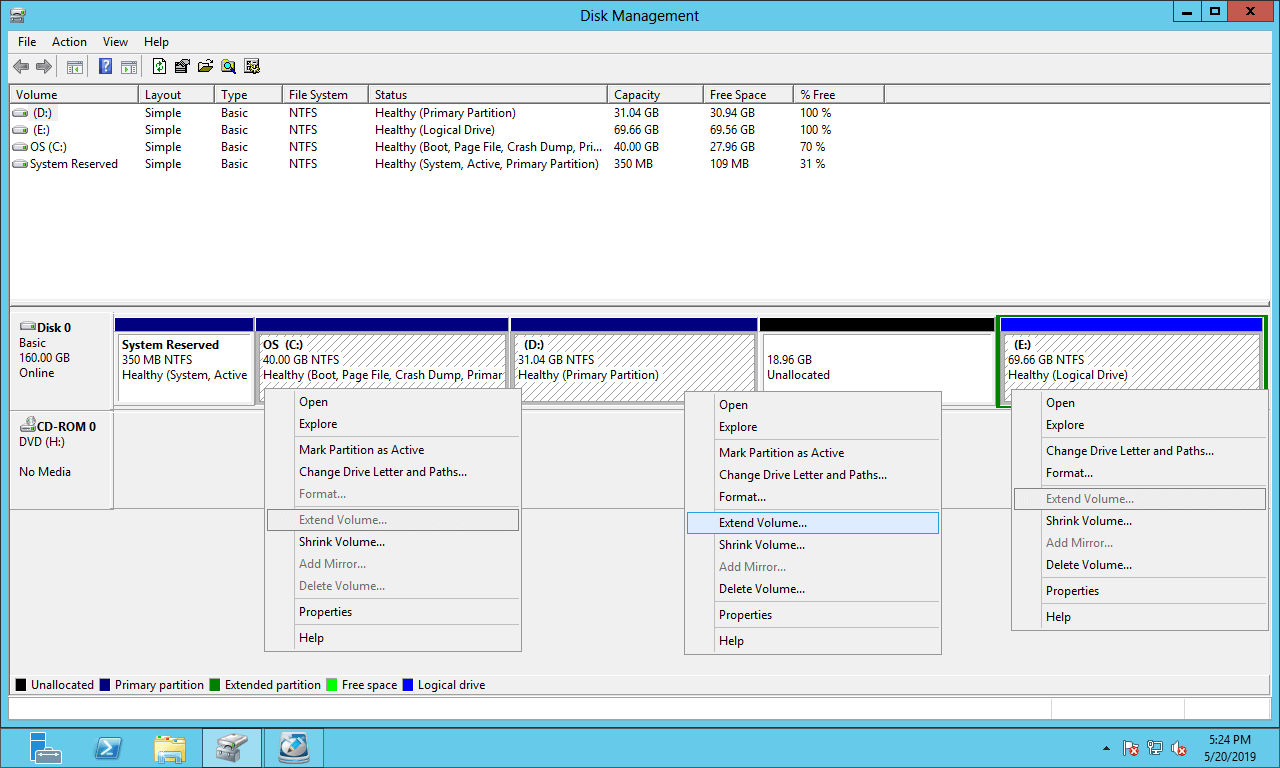
Cannot Shrink D to Expand C with Disk Management
While shrinking a partition with the "Shrink Volume" function in Disk Management, unallocated space can only be generated on the right side. "Extend Volume" can only merge unallocated space into the left contiguous partition.
As shown in the screenshot, Extend Volume is disabled for both the C: and E: drives after shrinking D. This is because the C drive is non-adjacent and the E drive is on the right side of this unallocated space.
If you use the diskpart command tool, you will encounter the same issue. To shrink the D drive and extend the C drive in Windows Server, third-party software is needed.
Shrink D to Extend the C Drive with Safe Partition Software
Compared with Disk Management, NIUBI Partition Editor is much more powerful:
- Both NTFS and FAT32 partitions are supported.
- Unallocated space can be generated on either the left or right side when shrinking a partition.
- Partitions with contiguous unallocated space can be extended in 1 step.
- Unallocated space can be moved and merged into non-adjacent partitions on the same disk.
- It also helps you merge, copy, convert, defrag, wipe, hide, and scan partitions, etc.
Download this program, and you will see all disk partitions with their structure and other information in the main window. The original C: drive is 40GB and D: is 70GB.
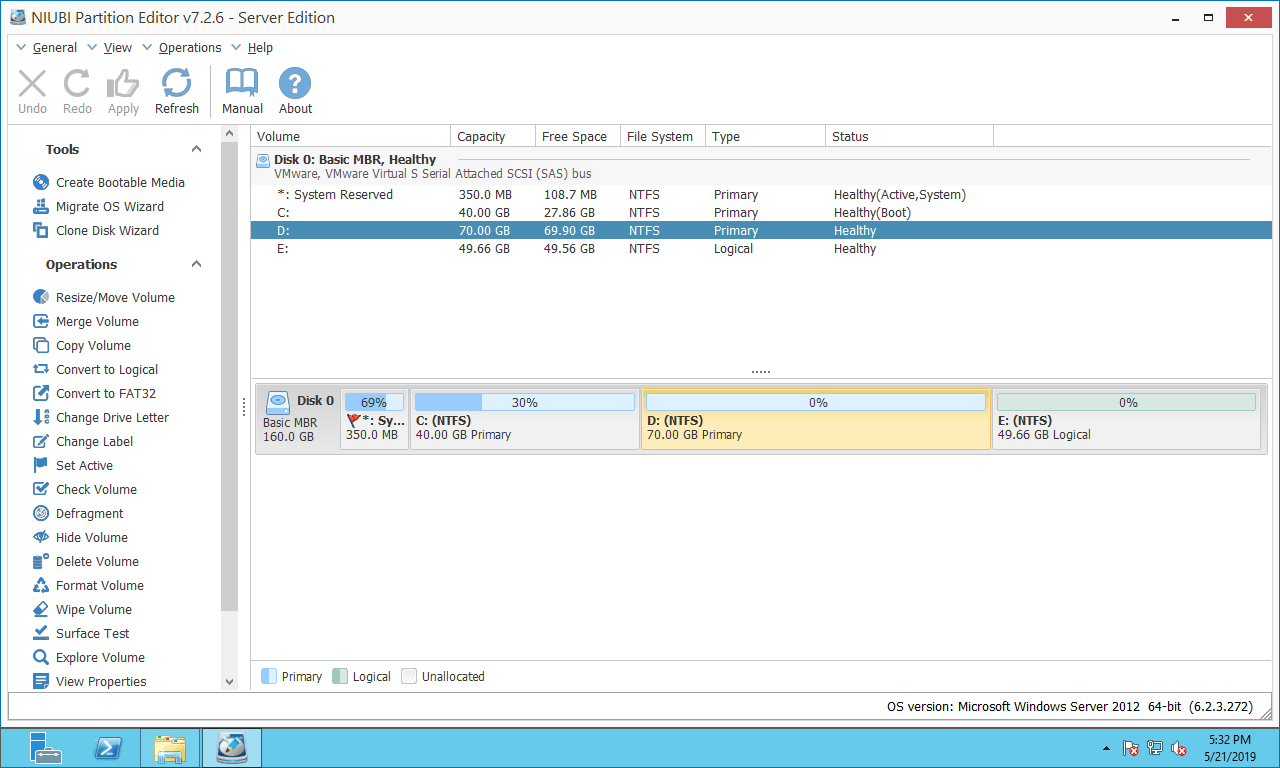
Right-click any partition or the leftmost area of a disk, and you will see the available operations. To shrink and extend partitions, you just need to click, drag, and drop on the disk map.
How to shrink the D drive and extend the C drive in Windows Server 2012/2016/2019/2022:
Step 1: Right-click the D drive and select "Resize/Move Volume", then drag the left border to the right in the pop-up window.
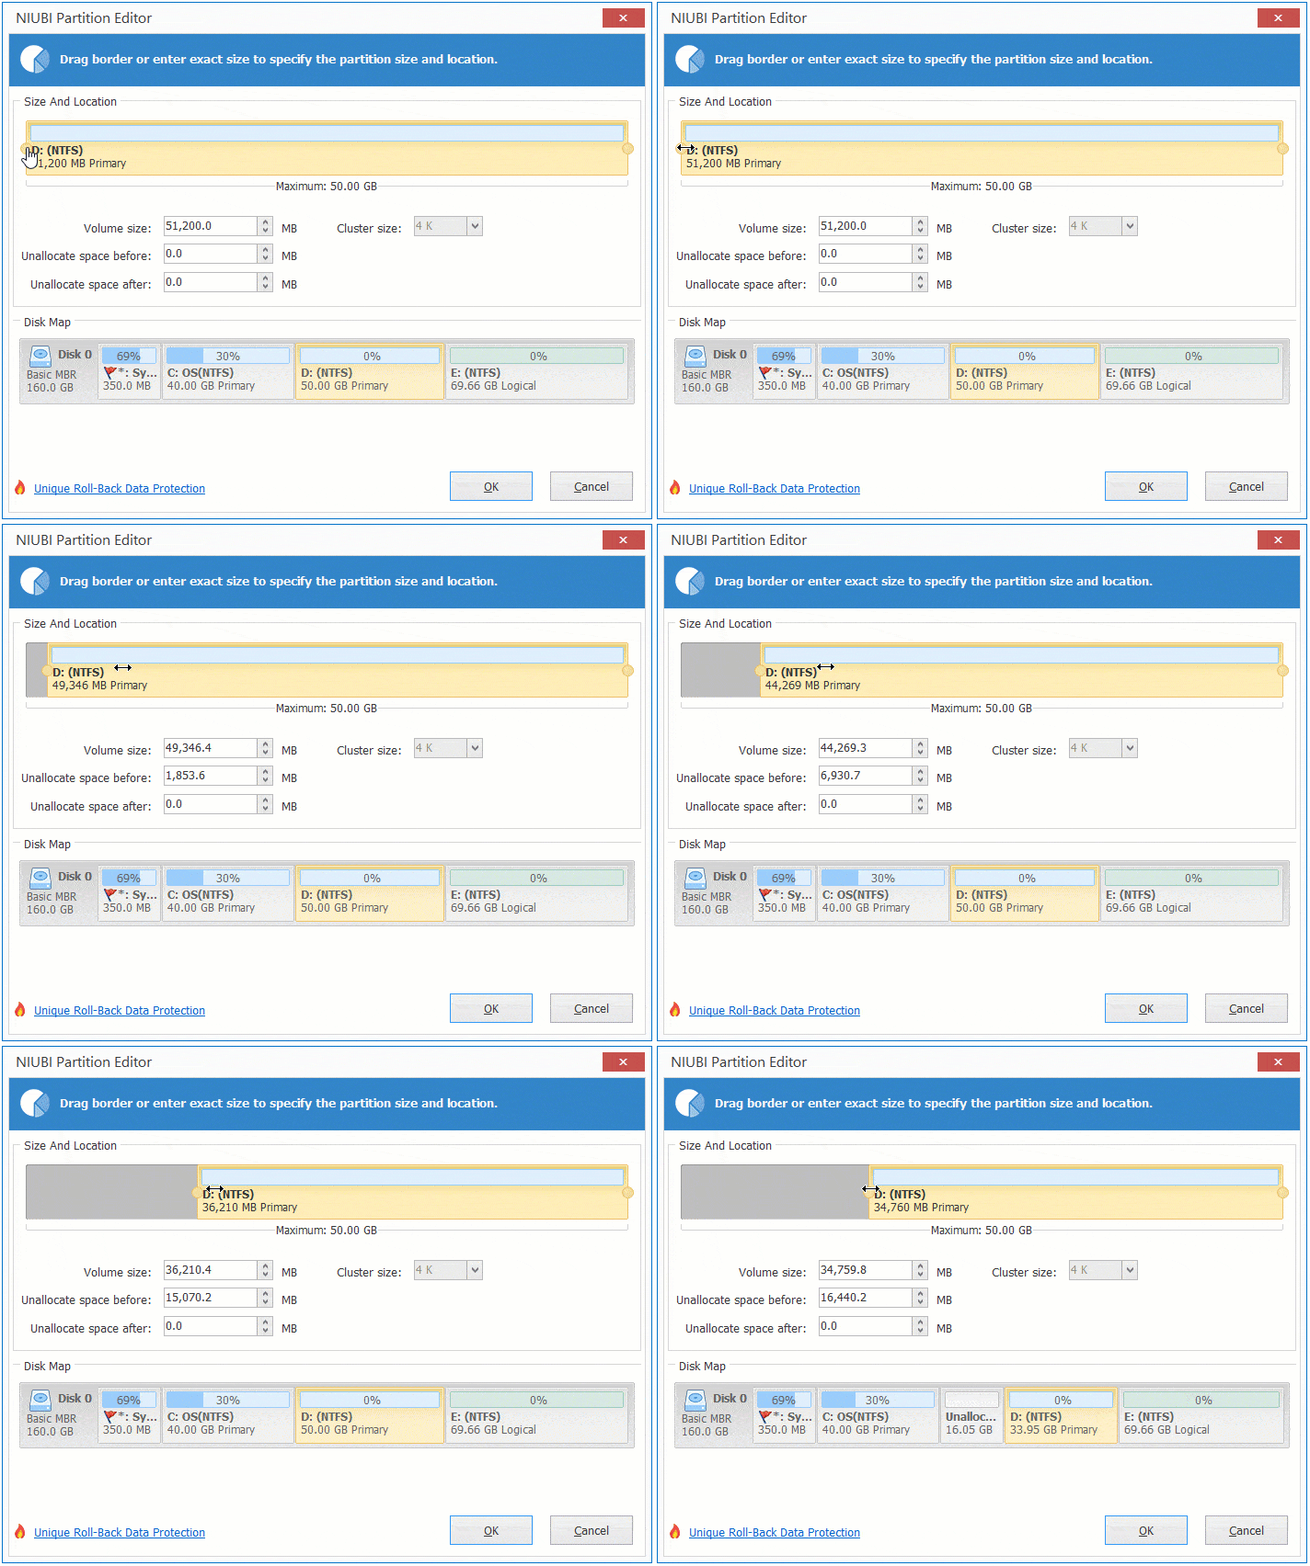
Then, partition D is shrunk and unallocated space is generated on the left side.
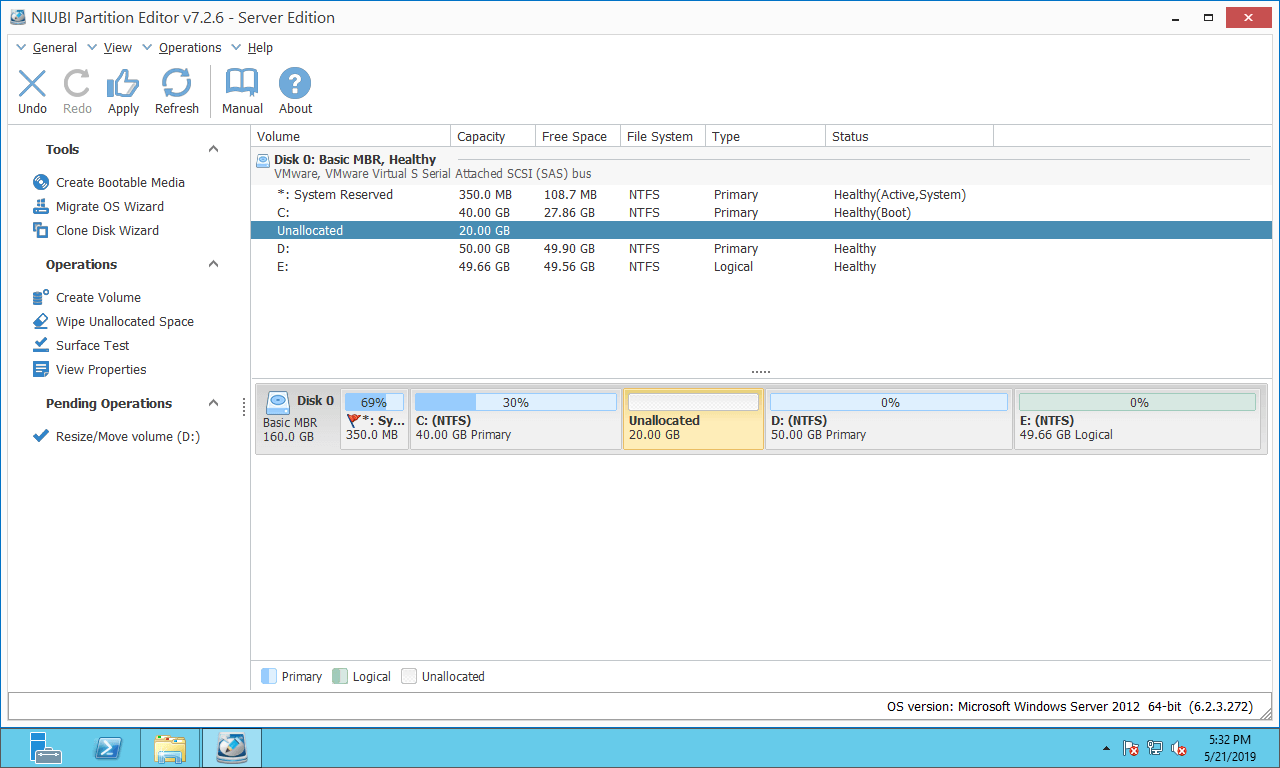
Step 2: Right-click the C drive and select "Resize/Move Volume" again, then drag the right border to the right in the pop-up window.
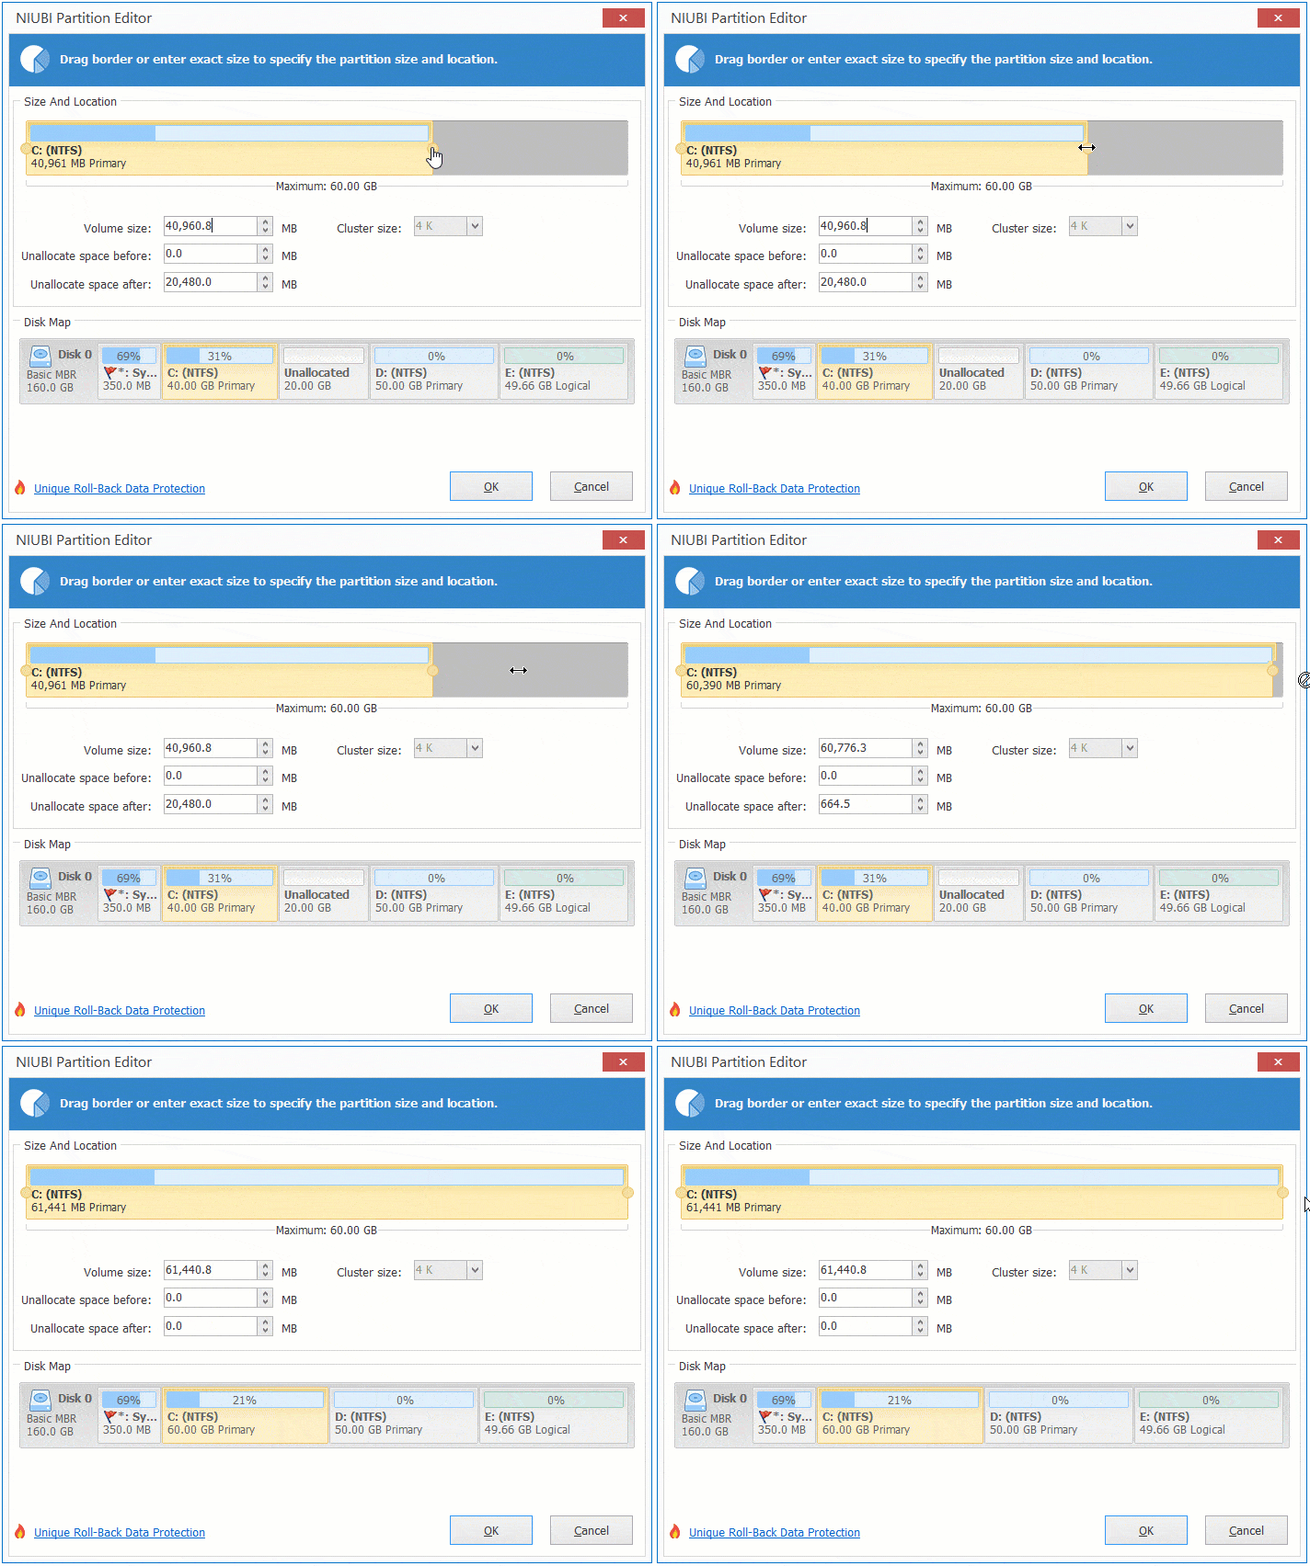
Then, the C drive is extended by merging this adjacent unallocated space.
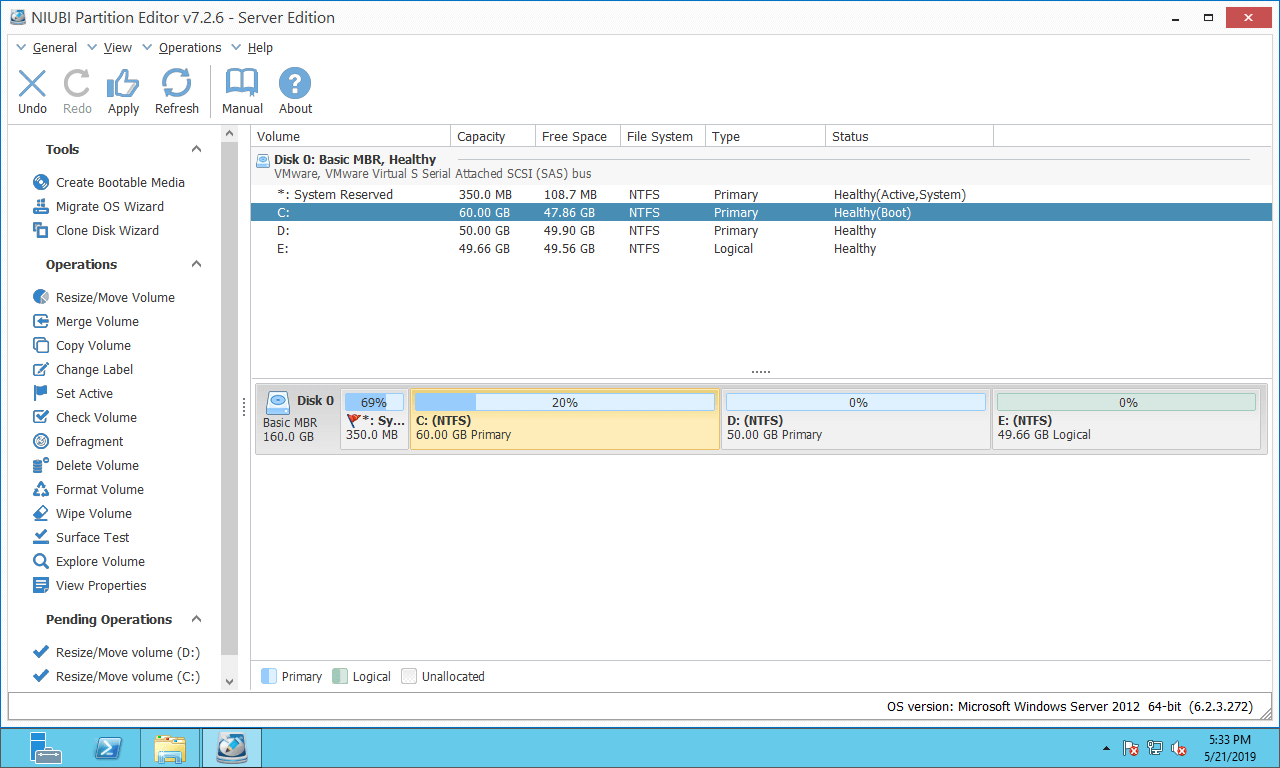
Step 3: Click "Apply" on the top left to execute.
Better than other tools, NIUBI Partition Editor offers powerful technologies to protect your system and data:
- Hot Clone - Clone disk partitions in Windows for backup, migration, and fast disk swapping.
- Virtual Mode - All operations are listed as pending for preview, and real disk partitions won't be modified until you click "Apply" to confirm.
- Cancel-at-Will - If you applied incorrect operations, you can safely cancel the ongoing operations at any stage before completion.
- 1 Second Rollback - If any error is detected while resizing partitions, it can immediately and automatically revert the disk partitions to their previous state.
While shrinking partition D, all files within it will be moved to new locations. This may cost a long time if there is a large number of files. NIUBI Partition Editor is much faster because of its advanced file-moving algorithm.
Method When C and D Are on Different Disks
If the C drive is on Disk 0, but partition D is on Disk 1, or in other words, there are no other partitions on the same disk as the C drive, no partitioning software can extend the C drive with free space from another separate disk. A "separate disk" here refers to Disk 0, 1, 2, etc., as shown by NIUBI, regardless of whether they are physical disks or RAID array virtual disks.
In this case, you can clone the system disk to a larger one with NIUBI Partition Editor and then extend the C drive with the extra disk space.
 © 2009 - NIUBI Technology All Rights Reserved. |